Places to Carbon Fiber Tour

Carbon fiber touring can be very fun and rewarding. As we’ve said before, an ultra-lightweight bicycle frame has many advantages. But before you plan your tour through the mountains of Mongolia with your Carbon Fiber bicycle, you’ll want to think about the following:

  • Types of road surface
  • Amount of services available

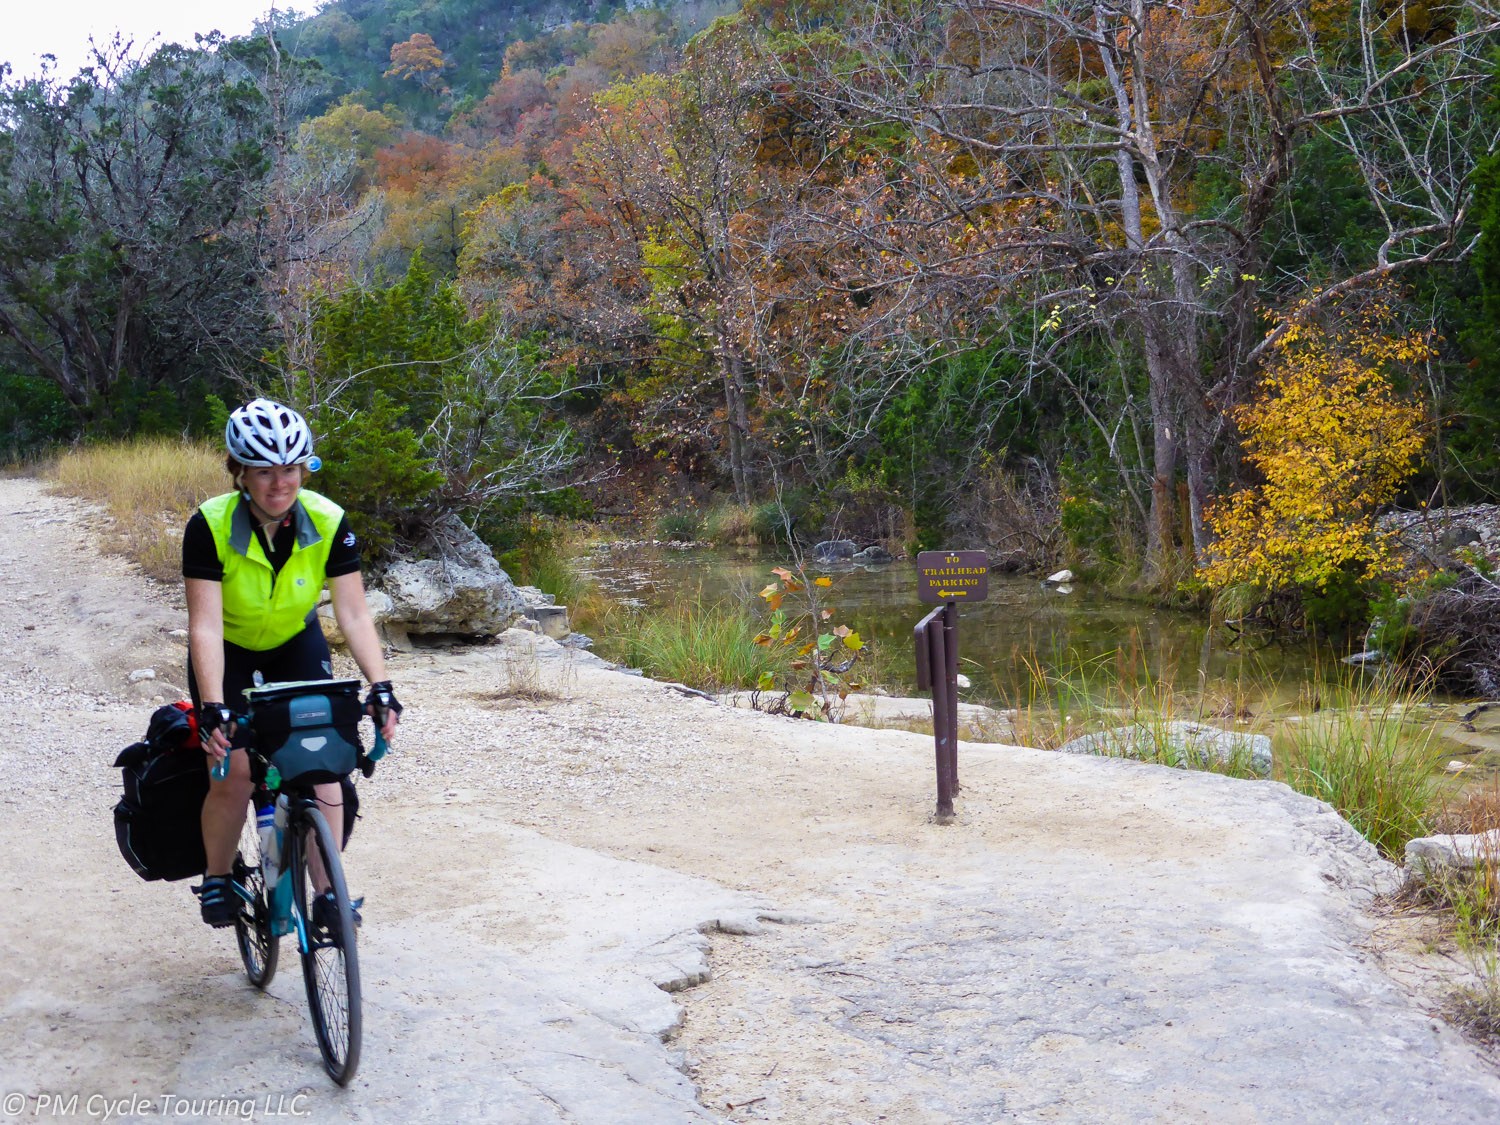
First, don’t think you’ll be doing a lot of off-roading on your carbon fiber bicycle (unless it is a mountain bike). A gravel road for a short distance is fine, but dirt trails in far off remote locations? Forget about it! I found myself riding a rugged 1 mile trail to a campsite on my last tour and it was awful! I pretty much had to walk the bike the whole way. My tires couldn’t handle the mud, leaves, and huge rocks that I came across. While Carbon Fiber frames are super hard, it would be awful to crack your frame on a bump out in the middle of the mountains. So, proceed with caution when encountering non-paved roads with carbon fiber.

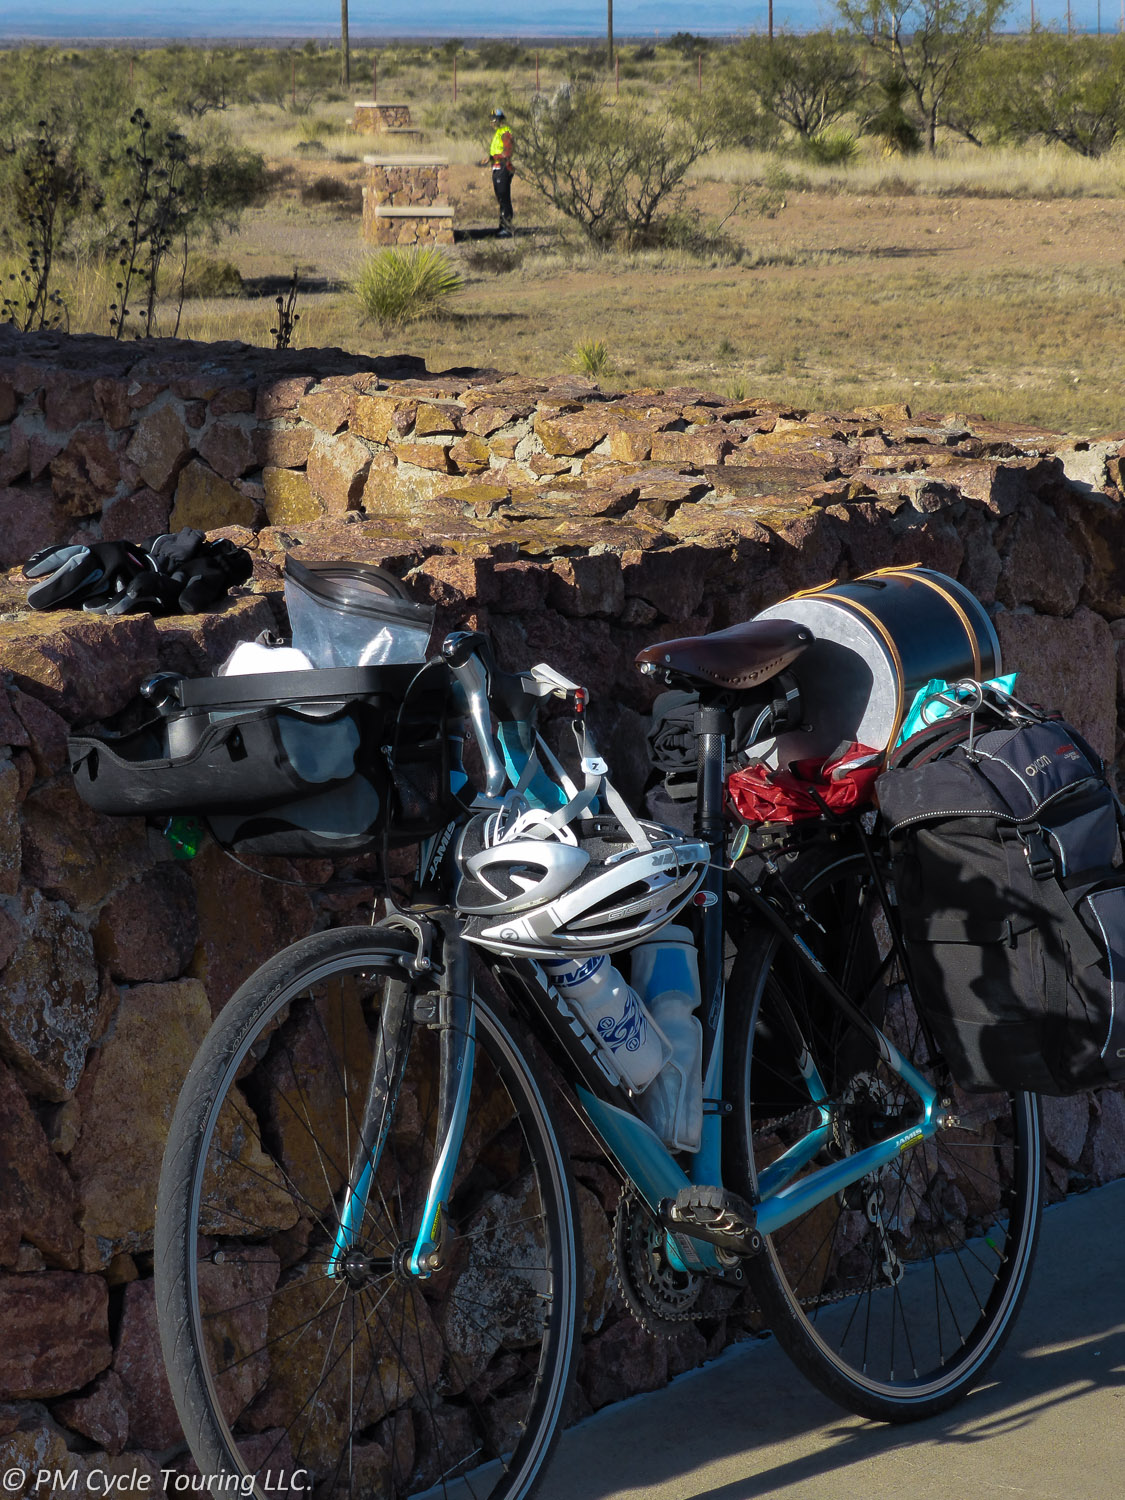
One of the appeals of steel framed bicycles is the ease with which they can be repaired. This is not the case with carbon fiber. If something happens to the frame, you are done, there is nothing to repair. While touring on carbon fiber, in the unlikely event that something happens to you or your bicycle, you’ll want to be traveling through areas that have more services available. Several hundreds of miles between services would not be ideal if you’re on Carbon Fiber, just due to the fact that once the frame is done, it’s done.

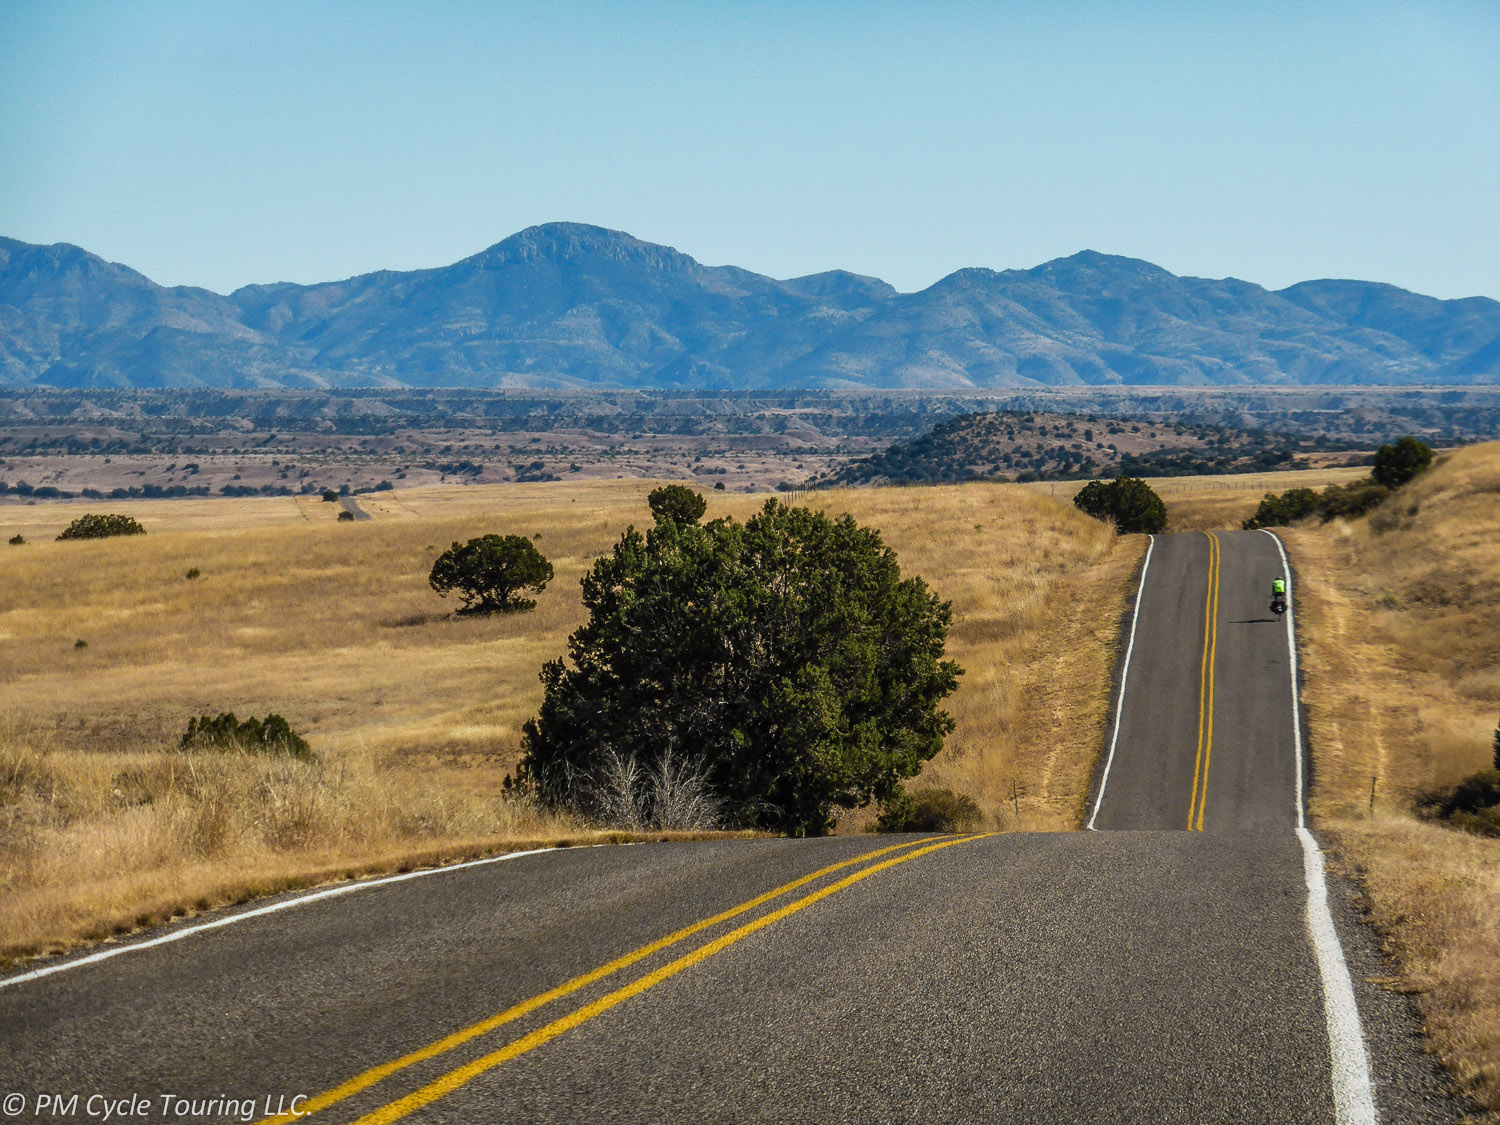
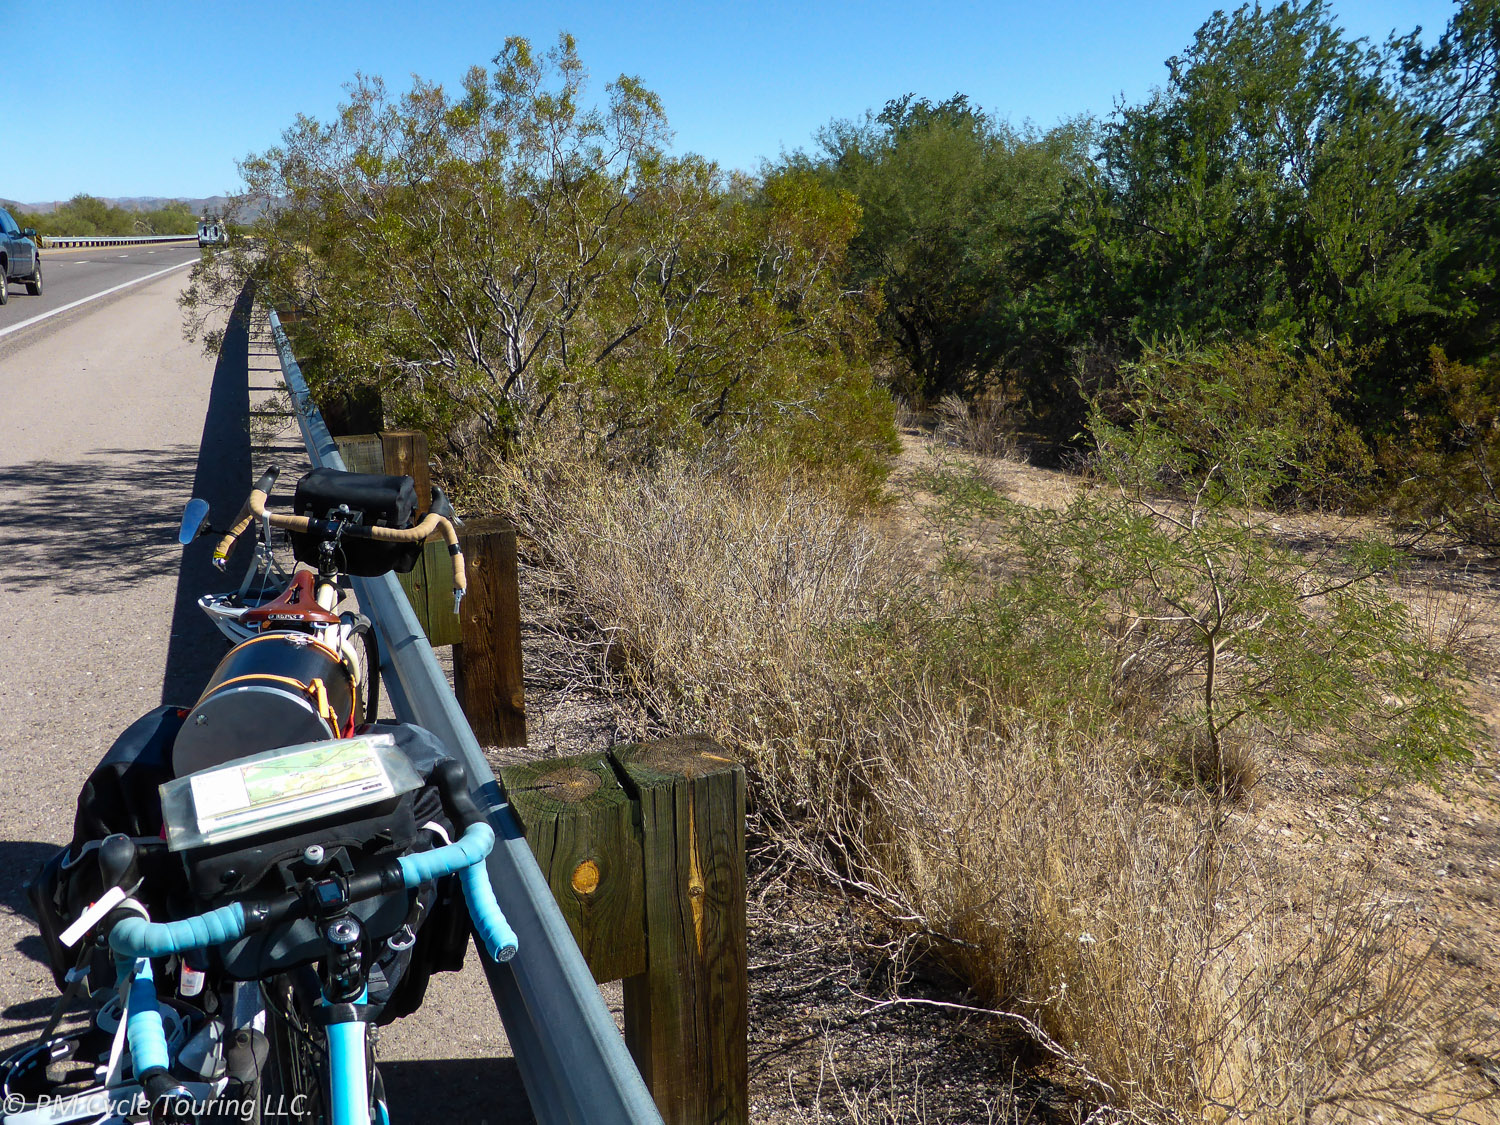
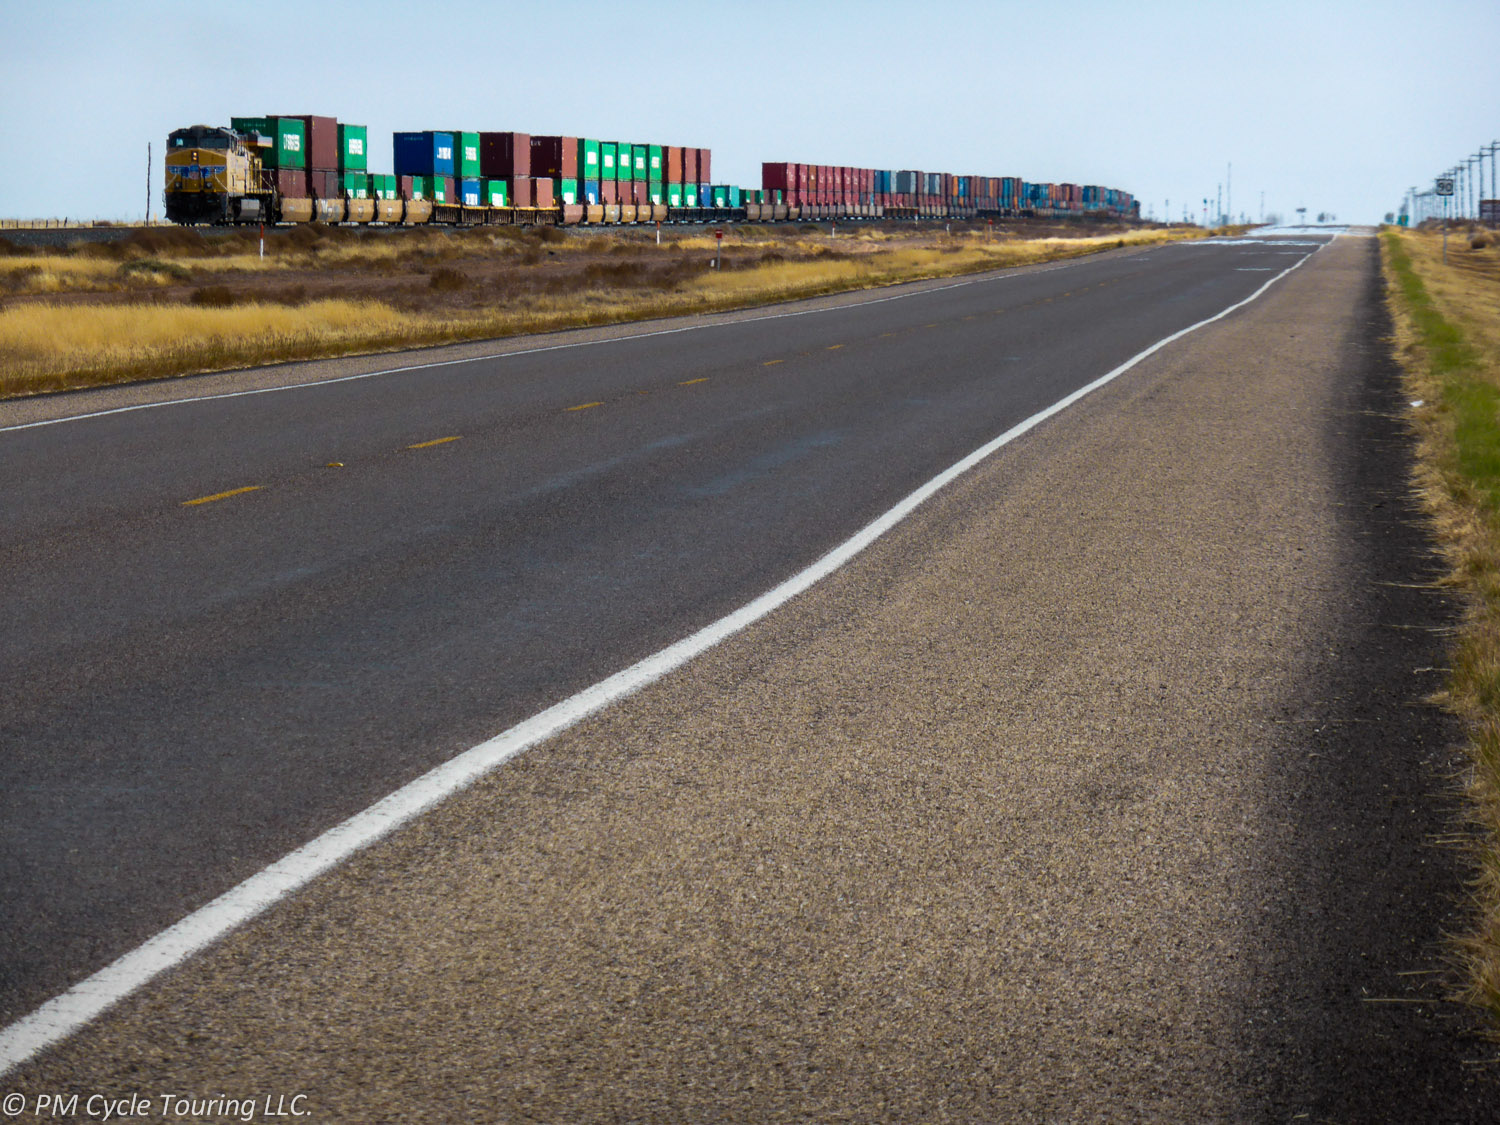
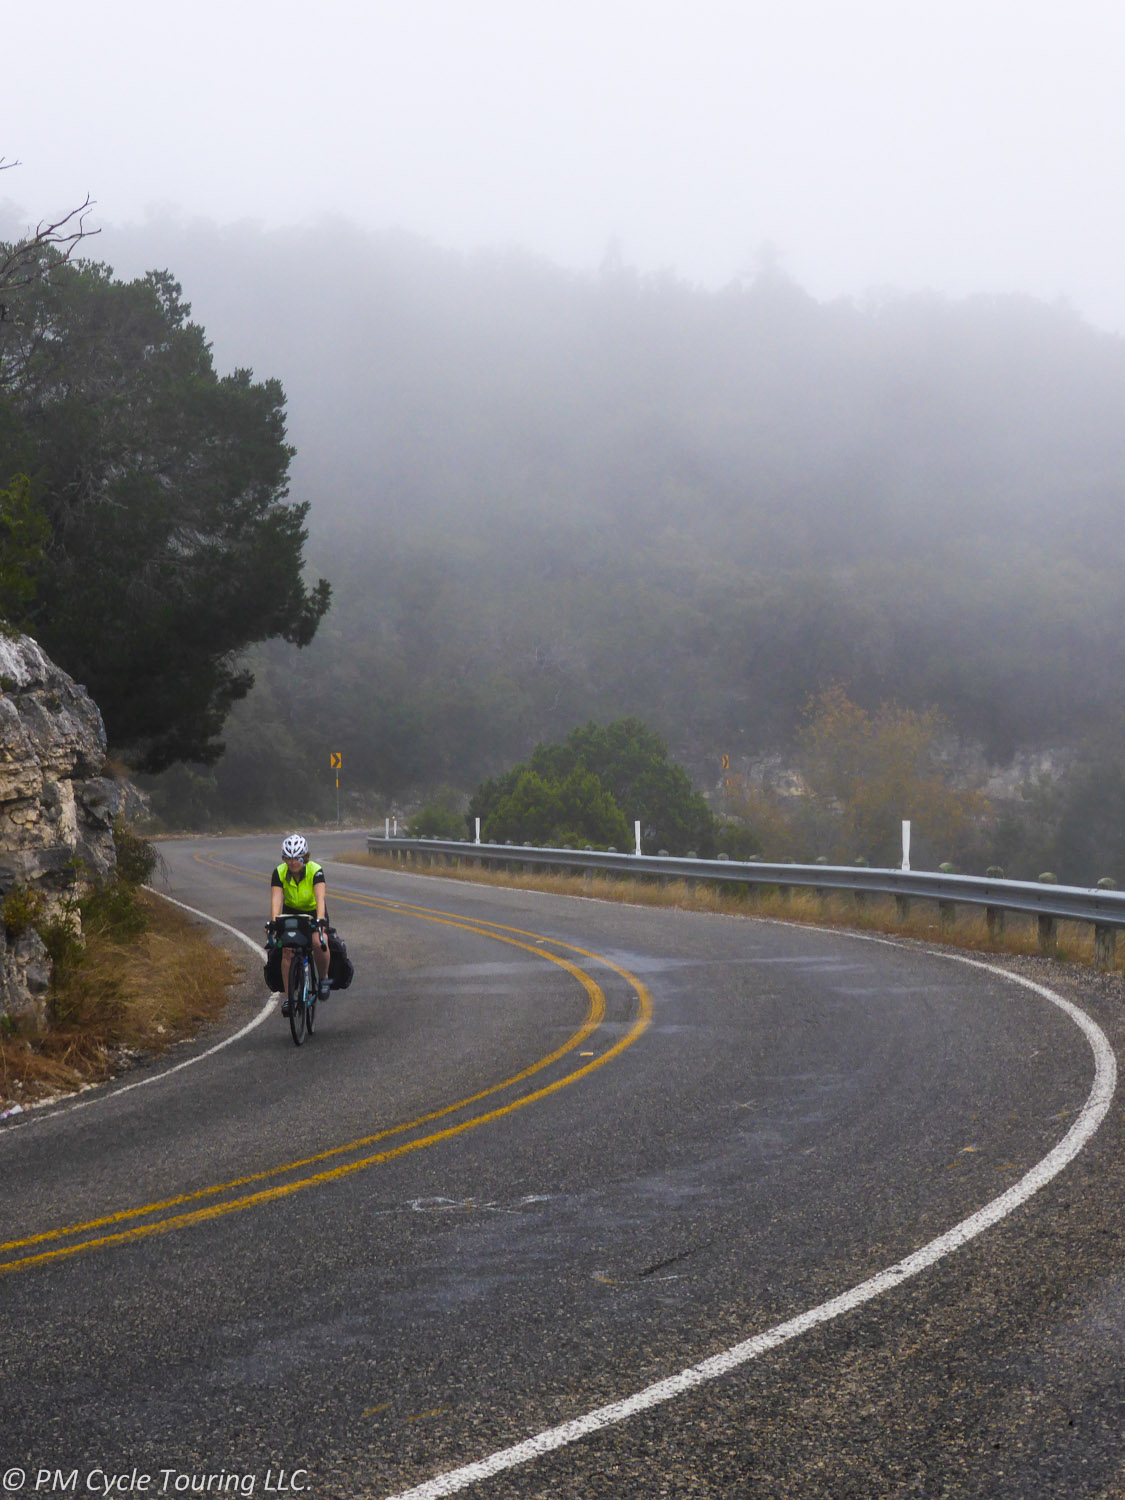
A good place to carbon fiber tour would be a place where the roads are smooth and there is lots of support along the way. People passing by on a nearby road is always a plus because you can flag down a ride if you need it. If you’re going to be mainly riding on US highways and byways, carbon fiber touring can be perfect. In the USA all of the paved Adventure Cycling routes are great choices to enjoy long distance touring while also enjoying the thrill of using a lightweight carbon fiber bike to tour.

Unpacking and putting together a boxed touring bike

For our first tour we flew from Los Angeles to Seattle and had our bicycles boxed up. We had never really thought about how to put the bicycles back together once we got there. I suppose we just assumed it would be super easy. Thankfully our host had a bicycle stand and some tools to help us get them back together, but it was close to being an unpleasant experience. In response to that here is our guide to taking a bicycle from boxed to ready to ride.

Review this before you leave for your tour and reference if needed during your tour:

  1. Get your boxed bike and an open area to begin putting it together.
  2. After removing your bicycle assess how dis-assembled it is. If you had a shop pack it up some equipment may still be attached compared to our walk through, or it may be further dis-assembled.
    Bicycle after removal from box, still contains packing material.
  3. Remove any excess packing material
    Hand with scissors cutting zip tie holding packing material on the bicycle.
  4. Attaching the rear derailleur
    1. Shifting to the highest gear on the rear shifter should give you extra slack in the cable.
    2. The chain does not need to be on the f ront cogs, it may be easier with it off allowing free movement of the derailleur.
    3. There will be one large screw on the rear derailleur which screws into the frame. Additionally there will be a smaller screw which is perpendicular to the large screw (A in the picture). Make sure this screw ends up resting on the notch of the derailleur hanger (B in the picture). If you aren’t paying attention you may tighten the big screw and bend the smaller screw, so make sure you keep an eye on this while tightening the rear derailleur!
      Hand holding rear derailleur near bicycle frame before attaching it.
    4. Once the rear derailleur is attached you can position the chain properly on the front and back cogs.
      Rear triangle of the bicycle with rear derailleur attached and chain on.
  5. Positioning the stem
    1. Prior to packing your bike you should use a metallic sharpie to mark the angle / position of your stem/handlebars
    2. Rotate your fork so that it is facing the proper direction.
    3. We find it best to have the fork or front wheel on the ground while working with the stem/fork, if you loosen the wrong part the entire fork may fall out if the bike is on a rack or has the fork unsupported.
    4. If needed loosen the stem and position it so it is pointing in the proper direction, straight away from the bike. Tighten if needed so the stem is firmly attached to fork.
    5. Loosen the handlebar mount portion of the stem.
      Hands unscrewing the front part of the stem prior to attaching the handlebars.
    6. Insert the handlebars and align the marks you made before you left to get the handlebars centered and at the proper angle.
      Rear triangle of the bicycle with rear derailleur attached and chain on.
    7. Tighten all screws firmly.
  6. Attaching the front wheel
    1. If packed with a plastic spacer, simply remove the spacer. This may require applying gentle pressure to pull the fork a little apart.
      Front fork with plastic spacer to prevent bending during transit.
    2. Attach the front wheel as you normally would. You should be familiar with this because you will be needing to change flat tires while on the road.
      Installing the front wheel on to the fork.
  7. Attaching the front caliper brakes
    1. Locate the front brakes and the mounting hole in the front fork.
      Positioning the front brake calipers before attaching to the fork.
    2. Slide the bolt through the mounting hole and thread the tightening piece from the other side. Use an Allen wrench to tighten, snug but not over tight.
      Tightening the front brake calipers to the fork.
  8. Finishing Assembly
    1. Check all cables to ensure they are in the proper mounting holes. As needed re-guide or re-position cables to their appropriate positions.
    2. For the rear derailleur
      1. Ensure the cable routed properly along or through the frame from the handle bars to the derailleur.
      2. Thread the cable through the derailleur, but don’t tighten it just yet.
        Hand threading cable through rear derailleur on a bicycle
    3. Attach your racks to the appropriate mounting points and ensure all screws are tight, including screws that remained installed during transit. You are about to embark on a tour and you don’t want your bike falling apart because you failed to check a screw tight.
      Girl hold bicycle with rear rack attached to back.
    4. Using a pedal wrench attach the pedals. One pedal is threaded “normal” (tighten by turning clockwise) the other pedal is threaded “backwards” (turn counterclockwise to tighten).
      Pedal wrench attaching pedal to crank.


  9. Adjust the rear derailleur
    1. While this is a necessary part of putting your bike together we have included a separate guide. Look for a future post explaining how to do this!
  10.  Stand back and admire your completed bike. Now get out there and ride!
    2014-03-07 2038 PMCT-6

If you have any questions feel free to leave them in the comments, or if you noticed that I missed something tell me. I hope this helps people get a feel for taking a bicycle from boxed to ready to ride.

How to make your Carbon Fiber bicycle ready for touring

Bicycle manufacturers are coming out with “light” touring bicycles. The Jamis Xenith Endura Sport Femme I purchased came with 25mm tires, three chain rings on front, and rack mounts on the rear. It was almost, but not quite, ready to tour right out of the box. Here are a few adjustments that I made to my bike to make it tour worthy. It’s not an all-inclusive list; you may have to do more or less before your carbon fiber is ready to tour.

Gearing. A good touring bike will have 3 chainrings on the front. Especially if you’re planning on hauling gear, you will appreciate the ability to drop down into lower gears as you cross continental divides and summit several thousand foot mountain passes. There are very few places in the world that are perfectly flat; you WILL have to climb hills on your tour. That small chainring on the front will make a huge difference. If the bike you’re considering doesn’t have a triple front chainring, see if you can order it with one from the manufacturer, or if the bike shop can order just the frame and install proper gearing. For my bike I have a 30 tooth ring on the front and a 34 tooth ring on the rear.

Mounts. How are you going to carry your gear? Some carbon fibers are coming with eyelets for mounting racks and fenders. Check to see if yours has them. If there are no mounts, look into attaching clip on racks or pulling a trailer. But, be aware that attaching anything to the carbon fiber posts which involves tightening a clamp could damage the carbon fiber if tightened too hard. The 2012 Jamis Endura Sport Femme came with mounting eyelets on the rear, newer Jamis Endura models now come with a removable rack mounting system. In addition I considered getting a front rack that clipped on (similar to the Thule Tour Rack)  but ultimately decided against it. I wanted to keep my weight as low as possible, and I was able to fit everything I needed into the rear panniers I carried.

Fenders. Most Carbon Fiber road bikes don’t come with fenders, as this adds weight to the bicycle. I decided against fenders on my first tour, and ended up regretting it. While on wet roads the water splashed up on me and the frame, and dirt roads were much the same by splattering mud everywhere including my drivetrain. For my next tour, I plan on installing fenders. This will help keep my gear cleaner, as well as my clothing, when riding on wet, dirty roads.

Tires. Most Carbon Fiber bikes will come with skinny tires, more suited for road cycling. See what the widest tire it is rated for and consider putting it on. Generally 28-35mm tires are used for pavement touring to allow for variable conditions and give a more comfortable ride than narrower higher pressure tires.

Brakes. My Carbon Fiber came with standard rim brakes. Before I left, I upgraded the brakes to a higher quality. This eased my mind about being able to stop with the added weight I was planning to put on the bike. I had no problems throughout my tour however I did miss the disc brakes from my previous touring bike.

I was very satisfied with my Carbon Fiber bike on tour. The decrease in weight from my Raleigh Sojourn steel-framed touring bike meant that I had much more energy at the end of the day. I felt like I could ride many more miles each day, which made the ride more enjoyable. It only took a few minor adjustments to turn it into the ideal cycle for my tour. I look forward to many more carbon fiber bicycle tours!


Pros and Cons of Carbon Fiber Touring

For long distance touring you might think that heavy, steel framed bikes are the only way to go. Not so! I recently completed a 2500 mile bicycle tour on a carbon fiber “light touring” bicycle. I want to share why I chose a carbon fiber bike and my experience riding 2500 miles of the Southern Tier. Let’s take a look at some of the pros and cons:

Pros.

  • Speed. I could go so much faster!
  • Exertion. I was not as tired at the end of the day.
  • Weight. I was forced to choose lighter gear

Cons.

  • Limited on how much I could carry.
  • Worried about durability
  • Repairabliliy

Weight Limit. Let’s address the cons first. My Jamis Xenith Endura Sport Femme was rated to carry ~40 pounds of gear. Most of the gear I had from previous tours was heavy so I was concerned about putting too much weight on the bike. To address this concern, I purchased new, lighter, more compact gear.

Durability. Additionally I was worried about the durability of carbon fiber. I rode 2500 miles over various road surfaces. This including about 1,000 miles of rough Texas chipseal! If any surface was going to vibrate my bike to pieces it would have been the rough Texas roads, which are some of the roughest surfaces in the United States! I even did a little bit of off-roading, riding on dirt, mud, and gravel.

Repairablility. I was pretty nervous that something would happen to my bicycle along the way. If any damage were to happen to the frame, it would involve a new bike instead of a simple weld like with steel-framed bikes. However, I had no issues in over 2500 miles of loaded touring and the bike is still going strong.

Speed. Now for the pros. My bike weighed in around 17 pounds and my gear weighed 25, my total weight came in just over the unloaded weight of my steel-framed Raleigh Sojourn. By reducing my overall weight, I was able to travel much faster and my average speed went through the roof!

Enjoyable. At the end of the day I wasn’t nearly as tired because I wasn’t pushing as much weight. While I had less space to pack gear, this is also a benefit, because you can’t over pack if you don’t have room. If you sum all of this up I found that with my carbon fiber touring bike, self-supported touring was much more enjoyable. My days felt lighter and easier allowing me to enjoy the views and travel much more.

Some bike manufacturers are experimenting with creating carbon bicycles which are definitely suitable for touring: the rims can take wider tires, the gearing is better suited for climbing hills, the rack mounts are already there. When you’re planning your next tour, don’t discount the carbon. You could find your next favorite touring bike, just watch out for the price tag!


How I fell in love with my touring bike and what to look for in yours

Halfway through my last tour, I realized something: I love my touring bike. I thought this was something I would never achieve. In fact, I had resigned myself to the fact that I would enjoy touring, but not necessarily my bicycle. But, it happened. I found a bicycle that I enjoy riding for days on end. I don’t get tired of riding this bicycle!

How can you make sure that you will love your touring bicycle? Here’s a few things that I considered when purchasing my latest bike.

Fit: My first touring bicycle was not designed for me. A quick look at me and the bike shop ordered what they thought was the right size. It was ok for short rides but 500 miles down the road I was experiencing real pain, on and off the bike. I was able to make some adjustments to it, which helped, but it never did fit me well. A professional can measure you to give you a starting point for a bicycle; this will typically give you a better starting point than someone glancing at you.

One big problem I faced was not riding the bike for several long days in a row to know if it fit well for touring. I should have practiced with a short multiple-day tour to ensure I had proper fit. Additionally riding a loaded bike is different than unloaded, and puts different stress on your body. You should practice with weight, and make the necessary adjustments before you even begin your tour. Even millimeters of adjustments can make big differences in your comfort. Try to get it right before you leave and mark the proper heights/angles on the bike.

Function: I was lucky enough to find a carbon fiber, lightweight, touring bicycle. This was everything that I wanted in a bicycle, both for touring and for riding around. Un-weighted, I can keep up with much faster riders. Weighted, I can go for long distances. Being both lightweight and able to carry gear was important to me. If you are looking to go to remote and distant places on the world you will be looking at 26” wheels with wide tires, steel-tubed, rugged bike. If you are looking to riding around on well paved roads you may find more enjoyment from a lighter weight touring bike. Get an idea for where you want to go.

Form: My bike is beautiful. To me, it looks pretty. This makes me happy. I like to look good while I’m riding, and my touring bike definitely helps me feel that way. So while this may be of less importance to some I feel that is important to me.

Bicycle manufacturers are producing more and more off the shelf touring bikes all the time. If possible, take a bunch out for a test ride. Find a shop that has a sample, and try it out for yourself. If they don’t carry the right size for you try to find a bike with similar geometry/dimensions. Take it for test ride before you order and get it set up the way you want it.

Here’s a few models that we’ve tried (or wish to try). There’s many many more out there:

  • Raleigh Sojourn
  • Surly Long Haul Trucker
  • Kona Sutra
  • Jamis Endura Sport Femme
  • Co-motion Pangaea

Your perfect bike is out there, waiting for you. For now, just get out there and ride!


Cycle Touring Expenses

When you’re thinking of starting a bicycle tour, one of the things to consider is how much money you want to spend. A bicycle tourist can end up spending as much or as little as he or she wants.  You don’t have to be rich to tour; here are some tips to keep your costs down.

Bicycles. Bicycles come in many shapes and sizes, as well as material type. A great touring bicycle doesn’t have to be brand new or expensive. Check the classifieds or Craigslist to find a new-to-you bicycle. Also, your local bike shop might have the perfect second-hand bicycle. Ask your friends: maybe someone has a bike you can borrow. The bottom line is you need a bicycle to get you down the road, you don’t need anything fancy to get started. A simple bike with rack mounts and plenty of gearing will get you from point A to B as well as a custom built Co-Motion.

Lodging. Camping equipment costs, such as for tents and sleeping bags, can add up. You might think it would be cheaper to forgo camping for staying cheap motels, but going that route (also known as credit-card touring) can get quite expensive. Typical campsites (in the US) range from $5 a night to $25 a night for bicyclists. Hotels in popular tourist destinations can be more costly than you might expect, and can be in the $100s/night during peak tourist season. Be ready to spend some money on a quality tent, since it will shelter you from Mother Nature, and can actually help save you money in the long run.

Gear. In addition to camping gear, there’s clothing, bicycle repair equipment, and technology. Stay tuned for more posts on these!

Food. Before you leave, think about how you plan to eat out there on the road. You’ll be eating. A lot. You’ll need to think of meals as well as snacks. When I’m out there, I like to snack at least once an hour, or every 15 miles or so. I also make sure to have a nourishing breakfast, a hearty lunch, and a filling dinner. Cereal grains for breakfast keep me full until that first morning snack. Snacks tend to be much more expensive at convenience stores. Try to buy them at grocery store if you can and always be on the lookout for sales to stretch every tour dollar further.

My go-to lunch is PB&J (peanut butter and jelly sandwiches). It’s difficult to find a more filling, inexpensive meal. Neither jelly nor breads needs to be refrigerated if eaten within a couple days. If you save money on lunch, you may be able to afford to try out that local eatery for dinner without breaking the bank. You should definitely sample the local cuisine, after all, bicycle touring is about experiencing the flavor of an area.

To sum up: The four main things you need to tour are a bicycle, lodging, gear, and food. Touring can be done on any budget. Remember that you don’t have to spend a lot of money to have a great time on your tour. Shop around and find what works for you.


The Perks of Ultralight Touring

Before our latest bicycle tour, I attended a class at a local sporting goods store. The class was all about the ultralight movement as it related to hiking and backpacking. While they didn’t address bicycle touring, the principles taught easily converted to touring. We applied some of those principles on our tour, and here’s what we found to be the best benefits of going ultralight.

Energy. As a bicycle becomes more and more loaded with gear, it becomes more and more challenging to ride. It simply takes more energy to pedal. As you reduce the weight of the bicycle and gear, you reduce the energy required for pushing the bike and increase the amount of energy you have left over at the end of the day. This means you can enjoy your time off the bike even more. For me, it meant I had the energy to explore the campground or the town after the day’s ride. I found my bicycle tour was much more enjoyable because of this.

Pace. Another advantage of ultralight touring is a faster average pace. This might seem like a small thing, but it meant less time overall riding. Which meant I had more time for other things (like sleeping or exploring). Plus, with a higher average speed, I felt like I could take more detours and pause more often without adding a lot of time to the day’s ride. This was key since we were riding while the days were at their shortest and we needed to maximize the daylight we had.

Less Stuff. When you completely convert to the ultralight mindset, this means your gear, all of your gear, becomes lighter and more compact. You reduce the number or size of your panniers. This in turn limits the amount of stuff you can bring, which brings your weight down even more. It self-perpetuates in a very cool way!

Hill climbs. My favorite thing about ultralight touring is how much easier it is to climb the tough hills with less weight. Sure, over time your legs become stronger and hills become less challenging. But starting off with less and lighter gear means those first hills of the trip aren’t your downfall.

Yes, there are some cons to going ultralight. Converting your gear can be costly, since “ultralight” is usually synonymous with “expensive.” But, changing out a few key pieces can get you going in the ultralight direction. Later, we’ll be discussing various ways to go ultralight.


Ultralight touring: how to reduce your gear weight

Bicycle touring historically has involved big heavy bikes with big, heavy gear. But carrying all that weight day after day can really wear you down. An alternative is joining the ultralight touring movement. This is gaining in popularity in many sports such as hiking and backpacking, and now cycle touring. The key to ultralight touring is to minimize the weight or your gear as well as have each item serve multiple purposes. Here’s some ideas to get you headed in the ultralight direction.

Panniers. One of the major areas you can save weight is by reducing the number of panniers and racks. Each pannier and weight of the rack adds up. Removing the front rack and front two panniers from Matt’s touring bike removed over 6 pounds! Plus, the fewer panniers you take means less space to carry stuff which forces you to carry less. Considering that most people over pack this will force you to discard unnecessary items. When we tour as a couple we only require two large panniers on each bike.

Camping Gear. Camping gear is also usually easy to target for weight reduction. Modern sleeping bags and tents come in a wide range of weight classes. The only concern is to strike a balance between lightweight and your warmth requirements. For sleeping bags check out some small manufactures like ZPacks. Matt’s 20F down sleeping bag weighs in at just a hair over 1 pound. When selecting a tent going lightweight can easily shed several pounds. Finally that nice memory foam sleeping pad which weighs 10 pounds can easily be replaced by a new inflatable pad measured in grams. Shave ounces, and sometimes pounds, by choosing the right equipment. The weight of the bike is another key place to reduce weight. Steel is the heaviest. Aluminum is intermediate, and carbon fiber is the lightest. While a lot of emphasis is put on the material of the frame, typically the components of the bike and wheels end up adding more to the total weight of the bike than the just the frame. Trimming down the weight of the bike can start off relatively simple, but can get expensive quickly so make sure there aren’t other areas your money can be better spent.

Cooking equipment. As you get into the ultralight mindset, you are going to have to start looking further into your gear list and instead of shedding pounds at a time you will be working on grams. Cooking equipment is a prime place to look at fine tuning your weight. Titanium pots, pans, and stoves are lightweight and durable components which should last for years. There are a lot of backpacking stoves that are measured in grams, with fuel bottles that are much lighter than the heavy Coleman varieties. For eating utensils plastic can be just as light as titanium and much cheaper.

Multiple uses. Another thing to think about is having multiple uses for each piece of equipment you have. For example, instead of bringing a windbreaker, we just brought our rain jackets and used them as windbreakers on and off the bike. Our rain pants added an extra layer for warmth.  Our down vests were used mainly for off-the-bike comfort, but also as an extra layer for on-the-bike warmth. We only brought one extra bowl for meals, using our cooking pot as another bowl.  The Schnozzel Bag acted as a storage sack for the air pads and pillows. Our emergency space blanket had many functions. We used it as a ground cover for our tent as well as a picnic blanket. On our coldest night it covered our tent, keeping us even warmer.

Hopefully this gives you a place to get started with pursuing ultra-lightweight touring. We went from an estimated 75lbs of gear to just 40lb on our most recent tour (Check out our packing list). Remember that every pound of weight that you reduce is a pound you don’t have to carry for the duration of the tour.

To get started don’t feel like you have to change out everything you have. By swapping out a few key pieces of gear you can get started in the ultralight direction. Who knows? You might soon be cutting off tags and weighing each item down to the gram (like Matt did before our last tour). Be careful, it can be addicting and expensive!

Disclaimer:
All opinions about any products mentioned in this article are my own. I have not been compensated in any way by anyone. I will, however, receive a small commission if you choose to purchase the item from Amazon after clicking the link I provide. Use your own discretion.

The Nature of Bicycle Touring

Bicycle touring can be many things. It can be a cross-country ride, or a cross-county ride.  It can involve packed-to-the-brim panniers stuffed with every possible convenience, or a support vehicle carrying your gear. It can be a slow easy ride, or a fast-paced adventure with long mileage days.

Distance. When you think of a bicycle tour, you may be picturing that one guy you heard about that has bicycled 45,000 miles around the world and you think “I could never do that!” Bicycle tours don’t have to cover such a great distance. A bicycle tour could be as straightforward as riding from your house to the next town, or as involved as riding from one side of the country to the other. The sky is literally the limit when it comes to distance covered on a tour.

Lodging. Many people camp while on tour. They carry a tent and all the necessary gear on their bike or in a trailer. Some people skip the gear and ride from hotel to hotel. This type of tour is nicknamed “credit-card touring” and typically costs a bit more than camping. Most tours end up being a hybrid of the two, with some nights camping, and others spent in hotels. Even some nights spent in a welcoming stranger’s house or yard.

Time. Bicycle tours last one day or many. Tours can be a sort of race, with the rider trying to see how far they can go in as little time as possible. Or you can leisurely enjoy the ride with no time constraints and stopping to explore everything along the way. I prefer the latter.

It doesn’t matter if you decide on a quick, long distance tour, or a slow, easy ride to the next town. What is important is to get out there. Decide where you want to go make it happen. You won’t be sorry!

Bicycle Touring: Where do you start?

My very first bicycle tour was a one night tour. My husband and I loaded up our bicycles and rode from our house to a campground 9 miles away, and then back the next day. I wasn’t sure I would like it; however, this wound up being a perfect test. We got to try out our tent and cooking gear, and we got to practice packing everything in our panniers. I had a ton of fun, and this little excursion whetted my appetite for much longer tours. If you’re thinking of going on a tour, but are hesitating, here’s my advice to get you over those hurdles.

Start small. The idea of bicycle touring might seem overwhelming at first. Let me just say that it’s not. It is so simple. That first overnight trip for me was an excellent example. We got to test out our gear in a non-threatening way. So, find a place to camp (or even a hotel) a short distance from your house (25 to 40 miles is great beginning distance). Or, drive yourself and your gear to a reasonable distance from a campground, ride to it, and then ride back. You want to challenge yourself, but don’t overdo it. It’s that easy!

Prepare yourself. Once you’ve tried it out touring, start preparing for a longer tour. You want to get started riding longer distances. If you don’t practice riding long distances don’t assume you will be able to do them on your tour! Make sure you get all your gear together before you go and that you try it out; you don’t want to be setting up the tent for the first time on your tour only to find it is missing pieces. Also ride your bicycle loaded, since it feels so much different than unloaded. Ride for multiple days in a row. If you start noticing pain or numbness on your longer ride consider getting a professional fit on your bike. Plan your route. Adventure Cycling Association maps are a great place to start, and they’re adding new routes all the time!

Get out there and do it. Prove to yourself that you are capable of touring. Long distance bicycle touring is simply a series of small day tours. Put them together, and you will find yourself a long ways from home enjoying the freedom of bicycle touring.