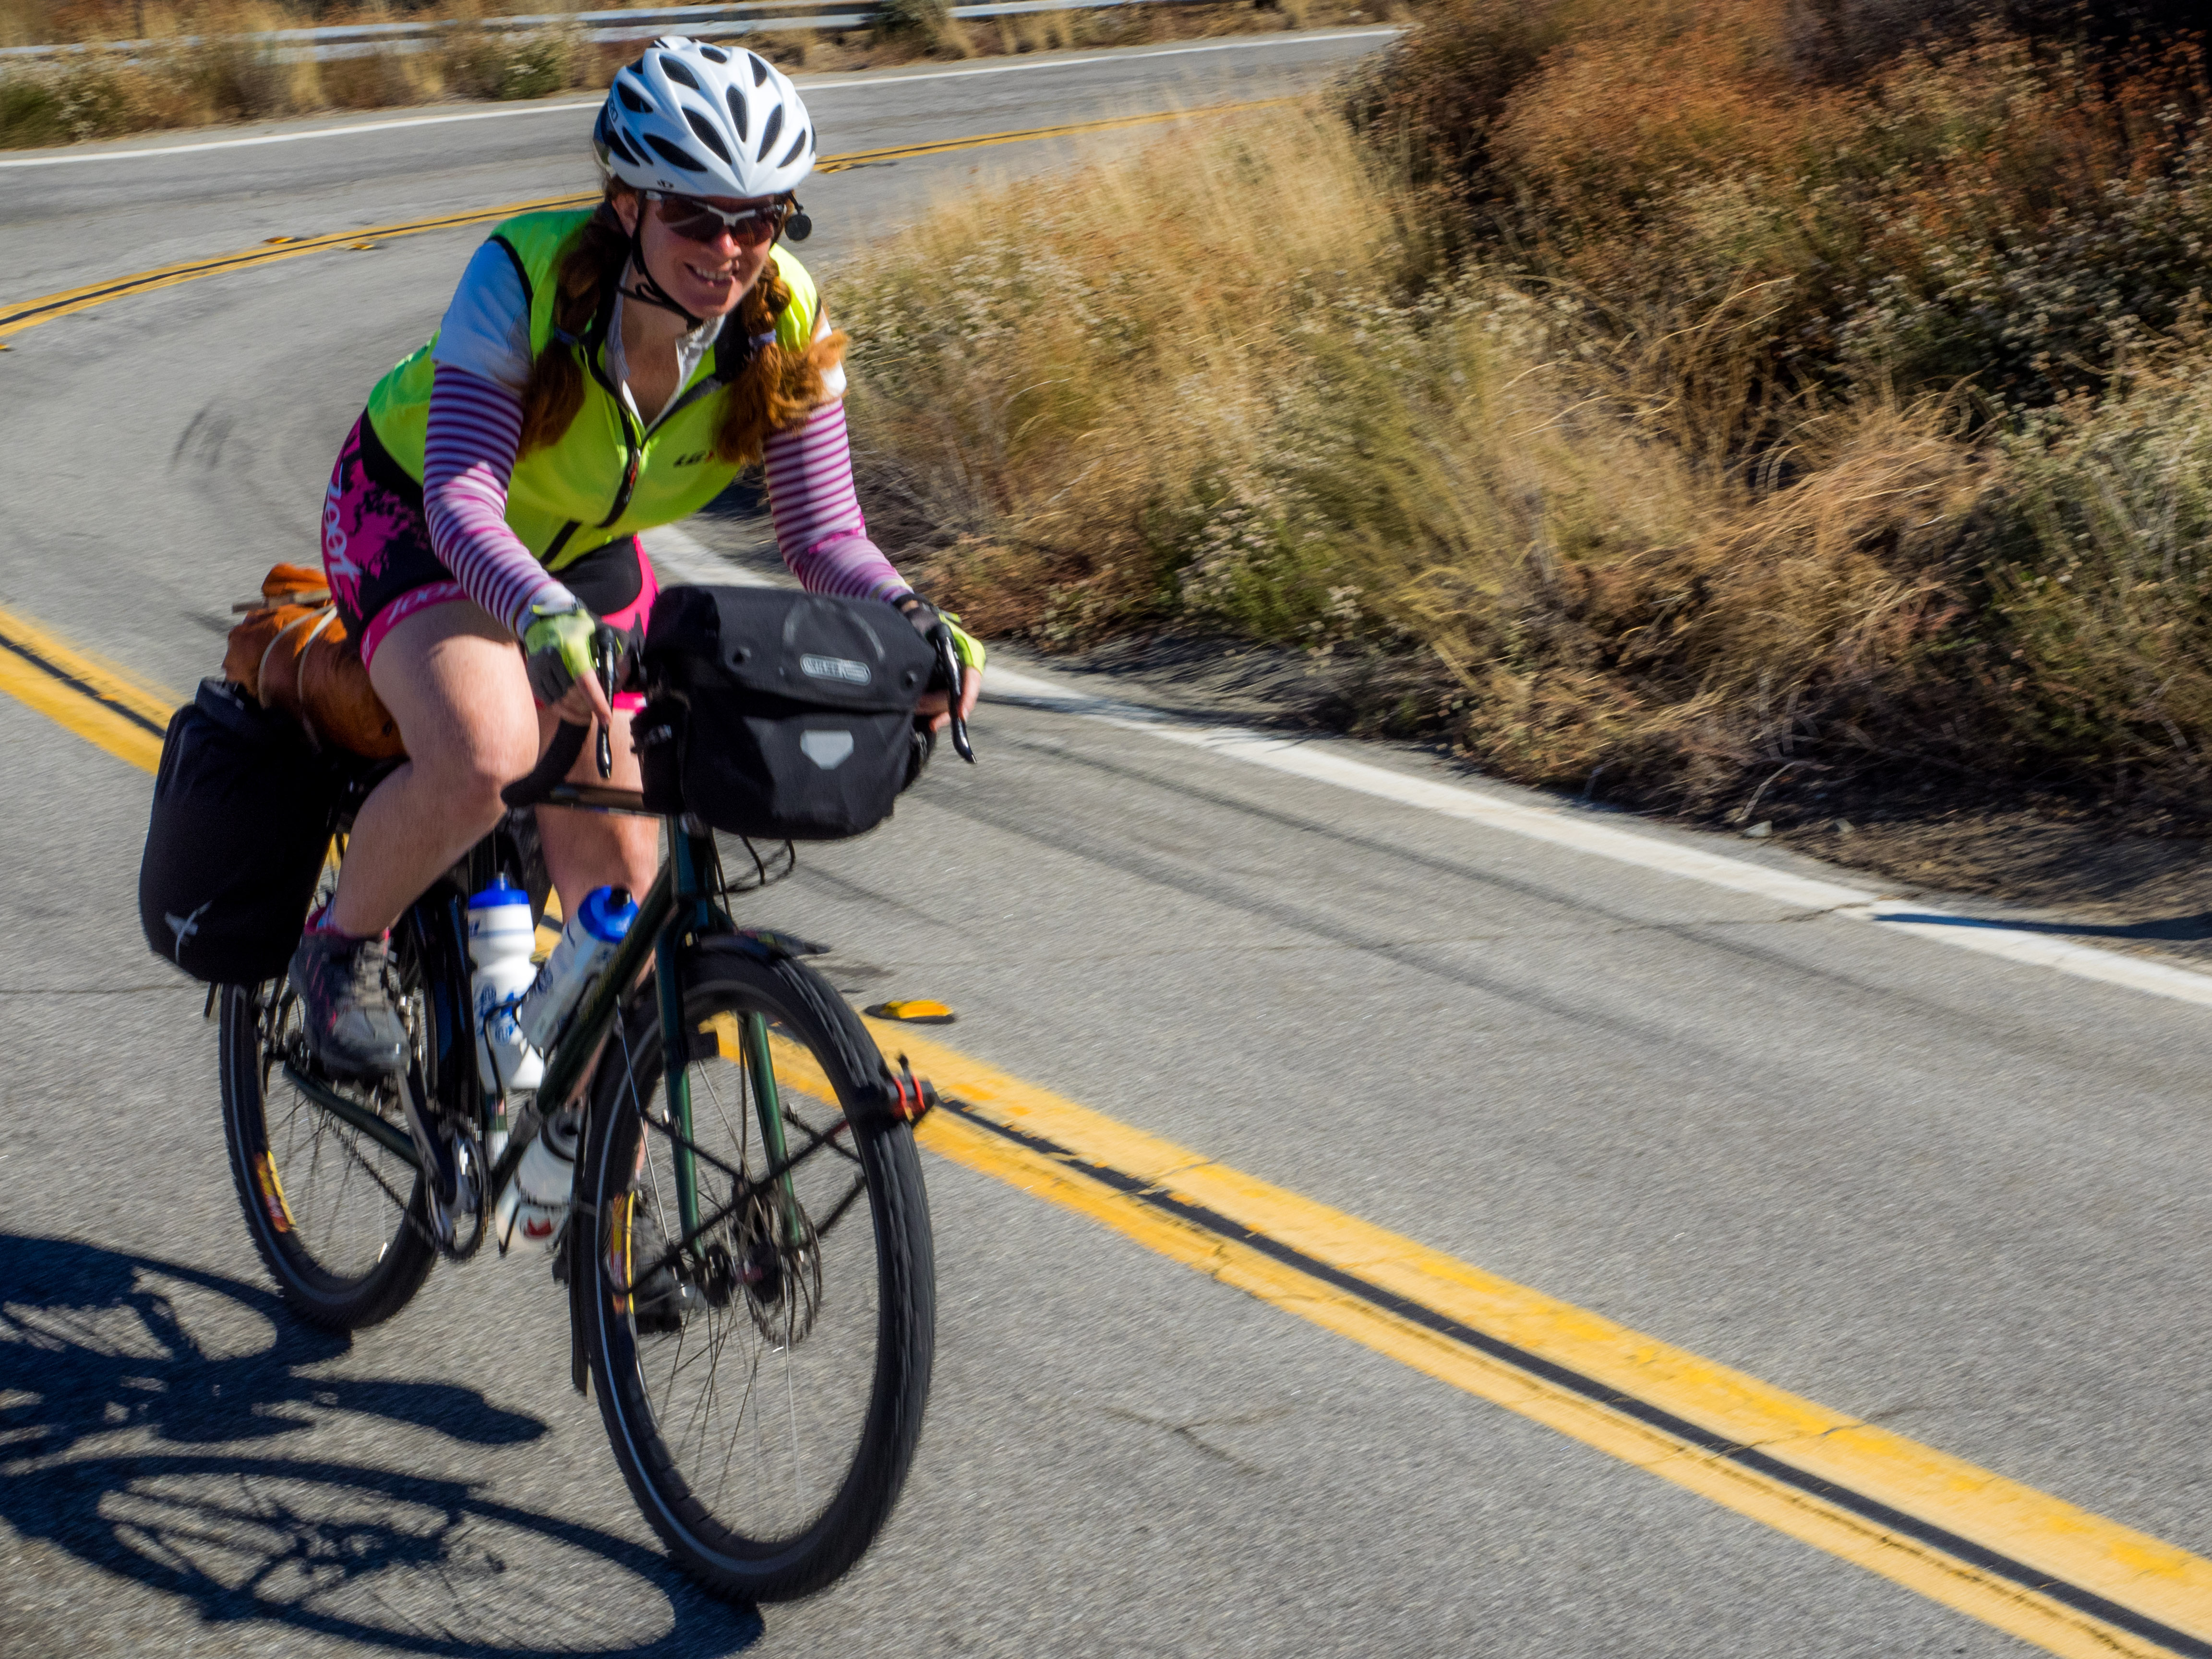
So starting September 12th we are going to be hitting the road and touring the Adventure Cycling Sierra Cascades Route! If you want to follow along with us visit our website at http://pm.ona.bike!
-Matt
So starting September 12th we are going to be hitting the road and touring the Adventure Cycling Sierra Cascades Route! If you want to follow along with us visit our website at http://pm.ona.bike!
-Matt
Now that we have a few tours under our belt, and our last tour was in a place where the temperatures were a bit cooler (New Zealand), our packing list needed to be updated. Here’s what we’re taking with us for our upcoming ACA Sierra Cascades tour. Total weight is everything but the bikes and racks.
| Category | Name | Pieces | Discussion | Grams | Pounds |
| Total | 27 kg | 59.5 | |||
| Camping | 4471 | 9.85 | |||
| Tent | Big Anges Copper Spur UL2 tent | Tent | Nice tent, fits two normal sized people snuggly, two doors, two vestibules. | 450 | |
| Rain fly | Rain fly | Could have went with UL3 for another 500 grams, but don’t see need? | 510 | ||
| Overall Bag | Overall Bag | Left behind stake bag 11g | 25 | ||
| Ground Cover | Ground Cover | 175 | |||
| GC Bag | GC Bag | 11 | |||
| 8 Stakes | 8 Stakes | 89 | |||
| Emg Splint | Emg Splint | 10 | |||
| Poles | Poles | 440 | |||
| Pole Bag | Pole Bag | 13 | |||
| Sleeping Bag | ZPacks 20F 900 Fill Down w/ Draft Tube | Sleeping Bag | Evaluating durability, so light it is unbelievable. Regular girth is snug on me and I am skinny. | 600 | |
| ZPacks 0F | Sleeping Bag | Smaller bag, but lower temperature rating. | 595 | ||
| w/Draft Tube | |||||
| Stuff Sacks for Bags | Sea to Summit UL Dry Sack 8L | Roll up dry sack | 56 | ||
| Sea to Summit UL Dry Sack 8L | Roll up dry sack | Found that the version of these bags with compression straps weren’t really needed because we had plenty of space and the straps added 100 grams. | 30 | ||
| Sleeping Bag Liner | Cocoon Silk Mummy Liner | Liner | Keeps sleeping bags cleaner, works as lightweight cover on hot nights, adds warmth if needed on cold nights | 115 | |
| Cocoon Silk Mummy Liner | Liner | 115 | |||
| Sleeping Pad | Exped SynMat Duo | Pad for two | Lightweight & insulated; schnozzle bag makes inflating a breeze. Two independent inflation points so you can both sleep comfortably. | 797 | |
| Pump | Exped | Schnozzle Pump Bag | Store the sleeping pad and pillows inside the bag. The bag can inflate both sides of the sleeping pad in about 3 bags of air. | 58 | |
| Pillows | Exped M Air Pillow | M Air Pillow | 72 | ||
| M Air Pillow | M Air Pillow | 72 | |||
| Headlamp | Black Diamond | Headlamp | weight includes 4 Lithium AAA batteries. Much brighter than previous headlamps. | 100 | |
| Headlamp | 100 | ||||
| Bug Netting | Ben’s Invisinet | mosquito protection | 19 | ||
| Bug Netting | Ben’s Invisinet | mosquito protection | 19 | ||
| Eating | 3074 | 6.77 | |||
| Stove | Soto Windmaster | stove + bag | 73 | ||
| Stove | Trangia Alcohol burner | 110 | |||
| Stove | Trangia Gas burner | + bag | 194 | ||
| Pots & Pans | Trangia | Pots, pans, and handle | 858 | ||
| Orange Bag | Trangia | 27 | |||
| Bowls | Sea to Summit Delta Bowl | Bowl | 87 | ||
| 2 Spoons & Forks | REI Plastic | 37 | |||
| Measuring Spoon | MSR Fold-able | Useful for measuring/scooping | 30 | ||
| Stirring Spoon | GSR | Long handle. | 17 | ||
| Can Opener | John Wayne Style | +carabiner for storage | 129 | ||
| Dish washing Towel | Small Camp Towel | 22 | |||
| Dish Drying Towel | REI travel towel | Fluffy drying towel | 57 | ||
| Kitchen Sink | Sea to Summit 5L | Sink | Makes dishwashing/peoplewashing easier when facilities are lacking | 135 | |
| Bag | 35 | ||||
| Dish washing Sponge | Scotch-Brite Stay Clean Scrubbers | Sponge | Great easy to clean sponge | 7 | |
| Fuel | Primus 230g | Gas Can | 375 | ||
| Bear Can | Bearikade Weekender | store all of our food in here don’t have to worry about critters, nor bears on future rides. | 881 | ||
| Hygiene | 1109 | 2.4 | |||
| Shovel | Montbell Scoop | if nature calls, while in nature | 39 | ||
| Toilet Paper | Tiny Travel Roll | 30 | |||
| Towel | Travel Towel | Grey | 113 | ||
| Travel Towel | Green | 142 | |||
| Turban | Green | Helps dry long hair. | 73 | ||
| Wilderness Wash | Citronella | Body Wash | 110 | ||
| No Smell | Other Wash | 110 | |||
| Shower Shoes | Airwalk (Pam) | Flip Flops | 138 | ||
| Cushe (Matt) | Flip Flops | 192 | |||
| Toothbrush | Crest Spin Brush | Toothbrush | Luxury choice to have battery operated toothbrush. Weight includes batteries. | 100 | |
| Extra Head | 0 | ||||
| Toiletry Bag | Eagle Creek | Lightweight | 42 | ||
| Fingernail Clippers | Generic | 20 | |||
| Survival | 1086 | 2.4 | |||
| Space Blanket / Tarp / Picinic Blanket | Space | Tarp/EMG Blanket | terrific all around tarp, used on side of roads, picnic benchs. Can act as emergency blanket if needed. Very versitale | 345 | |
| Water Storage | Nalgene | 96oz Cantene | going through arid areas, up to 90 miles between services, empty they weigh almost nothing | 80 | |
| Nalgene | 96oz Cantene | 80 | |||
| Bug Lotion | 3M | Ultrathon Lotion | Excellent bug repellent, does contain DEET | 70 | |
| Pepper Spray | Fox Labs 2oz Spray | Bottle | Best pepper spray on the market. | 145 | |
| 2oz | Bottle | 145 | |||
| Filter | Hydrapak Filter Bottle | Collapsable filter bottle. | 56 | ||
| Purification Tablets | Iodine tablets for emergencies. | 0 | |||
| First aid kit | Assorted | 135 | |||
| Emergency Tape | Tenacious Tape | Terrific repair tape, have used on rain pants and toiletry bag holds very well | 30 | ||
| Bike Stuff | 5515 | 12.2 | |||
| Panniers | Axiom LaSalle 45 | Rear Pannier | Have lasted two tours, work well | 855 | |
| Rain Cover | 75 | ||||
| Axiom LaSalle 45 | Rear Pannier | 855 | |||
| Rain Cover | 75 | ||||
| Randonnee Aero 60 | Rear Pannier | New/waterproof | 885 | ||
| Randonnee Aero 60 | Rear Pannier | 885 | |||
| Axiom Cartier | Front Pannier | 775 | |||
| Axiom Cartier | Front Pannier | 775 | |||
| Repair Stuff | Fiber Fix Spoke | Kevlar Spoke | Just in case can replace a spoke | 16 | |
| Fiber Fix Spoke | Kevlar Spoke | 16 | |||
| Bike Care | Tri Flow | Lubricant | 68 | ||
| RavX Retractable Cable | Lock | Extremely lightweight deterrent | 50 | ||
| ACA Maps | 185 | ||||
| Luxury | 575 | 1.27 | |||
| USB Cord | 17 | ||||
| Battery Backup | Anker | Bar | 242 | ||
| USB Cords | Startech | 6″ USB A to Mini B | These weigh in a few grams less then other cables | 12 | |
| 1′ USB A to Micro B | Yes I am obsessing over every gram | 17 | |||
| 1′ USB A to Micro B | Yes I am obsessing over every gram | 17 | |||
| Misc Micro B | 17 | ||||
| Misc Micro B | 13 | ||||
| Headlight for Bike | Diablo Exposure | Light | 1000 lumen’s 🙂 | 109 | |
| Helmet Mount | 10 | ||||
| USB Cord | proprietary 🙁 | 25 | |||
| Reusable Shopping Bag | Chico Bag | Bag | included carabiner to clip to pannier, folds in to small pouch on its self to store small | 41 | |
| Clothes Line | REI | Easier than string | 55 | ||
| Matt’s Clothing | 5132 | 11.3 | |||
| Rain Jacket | Showers Pass Event | Event Jacket | w/hood | 472 | |
| Rain Pants | Sierra Designs | Pants | Cheap rain pants also used in cold weather to keep wind off legs | 377 | |
| Bike Shorts | AeroDesign | 210 | |||
| Bike Shorts | AeroDesign | 210 | |||
| Cycling Base Layer | Showers Pass | Top | 176 | ||
| Bike Shirt | Ibex | Neo Long Sleeve Wool | 260 | ||
| Ibex | Indie Short Sleeve Wool | 190 | |||
| Giro | 179 | ||||
| Cycling Base Layer | Assos | Long Sleeve | 215 | ||
| Cycling Tights | Castelli | Windproof pants | 198 | ||
| Down Jacket | Patagonia | 361 | |||
| Leg Warmers | D | 117 | |||
| Leg Warmers | Pearl Izumi | 130 | |||
| Arm Warmers | Cutter | 65 | |||
| Sun Sleeves | Novara | great for keeping sun off the arms | 45 | ||
| Cycling Vest | Garneau | High Visibility | 126 | ||
| Cycling Shoes | Pearl Izumi | MTB shoes | 805 | ||
| Shoe Covers | GoreTex | 176 | |||
| Cycling Gloves | Pearl Izumi | Full Finger | for most days | 68 | |
| Showers Pass | Insulated Full Finger | for cold days | 142 | ||
| Camp Pants | REI | 360 | |||
| Camp Shirt | Smartwool | Long sleeve | wool is great for not smelling, breathes well | 161 | |
| Camp Underwear | Exofficio | 2 pairs | 172 | ||
| Stuff Sack | Sea to Summit Event Bags | Roll up dry sack | not compression type bags with straps, they are 100+ grams heavier | 50 | |
| Down Vest | Marmot | Zeus | 268 | ||
| thermal underwear | Icebreaker | wool | 147 | ||
| Balaclava | Pearl Izumi | Full Face protection | 51 | ||
| Beanie | Zpacks | 30 | |||
| Bathing Suit | 190 | ||||
| Socks | Castelli | 2 Pairs | 54 | ||
| Showers Pass | 1 Pair | 67 | |||
| Swiftwick | 1 Pair | 49 | |||
| Pam Clothing | 6067 | 13.4 | |||
| Underwear | Exofficio | Travel underwear. Durable, washes and dries easily. To be worn off the bike. 3 pairs. | 78 | ||
| Camp Bra | Victoria’s Secret | 94 | |||
| Camp Shirt | Ibex wool | Long Sleeve | 143 | ||
| Camp Pants | REI | Long pants, convertible to shorts | 352 | ||
| Boy Shorts | Stoic | Wool Underwear | 83 | ||
| Base Layer | Under Armor | Bottom | 187 | ||
| Camp Socks | Wigwam | Wool | 75 | ||
| Down Jacket | Big Agnes | 324 | |||
| Down Vest | Isis | 309 | |||
| Bathing Suit | generic | 129 | |||
| Cycling base layer | Showers Pass | Top | 154 | ||
| Heavy cycling shirt | Assos Cycling | Cycling heavy layer-top | 206 | ||
| Sports Bra | Victoria’s Secret | Front enclosure makes for easy removal at the end of a tiring day | 145 | ||
| Sports Bra | Victoria’s Secret | Different style | 156 | ||
| Jersey | Ibex | Wool S/S jersey | 164 | ||
| Jersey | Garneau | S/S jersey | 116 | ||
| Bike Shorts | AeroDesign | 217 | |||
| Bike Shorts | AeroDesign | 212 | |||
| Bike Shorts | AeroDesign | 200 | |||
| Socks | Smartwool | 30 | |||
| Socks | Smartwool | 33 | |||
| Socks | Ibex | 28 | |||
| Socks | Swiftwick | 38 | |||
| Cycling Wind Pants | Sugoi | Heavy, but necessary for me, I like them better than leg warmers. | 449 | ||
| Bike shoes | Shimano | MTB shoes | 745 | ||
| Balaclava | Pearl Izumi | Full Face coverage | 50 | ||
| Earwarmer | phd | 27 | |||
| Riding Beanie | Showers Pass | Also use as camp beanie | 69 | ||
| Glove Liner | Showers Pass | 30 | |||
| Outer Glove | Showers Pass | 118 | |||
| Arm Warmers | Cutter | 66 | |||
| SunSleeves | Novara | 42 | |||
| Rain Jacket | Showers Pass | Elite 2.0 | 458 | ||
| Rain Pants | Showers Pass | Refuge | 346 | ||
| Shoe Covers | Gore Tex | 194 | |||
We’ve worked really hard to get these numbers as low as we can. I’m sure there’s still some places where we could shave off ounces, but we’re both pretty comfortable that we’re not carrying any extra unnecessary weight this time around.
Floating around the web is a BuzzFeed article about how often you really need to shower: How Often You Really Need to Shower (According to Science).-Rachel Wilkerson Miller January 12, 2015 I read this article and thought, “Yes!” I totally agree! In fact, I’ve already written two articles about this very thing: How to Stay Clean (without a proper shower) While On Bicycle Tour, and Touring Clean vs Home Clean. It’s nice to see that the science backs me up.
On our most recent bicycle tour my tolerance for going to bed without a shower was increased dramatically. When you’re traveling through isolated regions (ok, so New Zealand isn’t really all that isolated, but there were days where we didn’t have access to a shower, so it counts, I swear!) there are sacrifices you make when it comes to cleanliness. Or are there? According to the article, it isn’t really necessary to shower every day, or even every other day. Showers can dry your skin out (especially paired with harsh soaps) and might remove beneficial bacteria from your skin. It’s much more important to change your undergarments daily. And if you’re really grossed out, you can clean your dirty bits (underarms, groin, bottom, and face, hopefully not quite in that order) with a wash cloth.
Speaking of changing undergarments daily, does that mean you should bring a week’s worth of bicycle shorts with you on tour so you can have a fresh pair every day? I think not. During our recent New Zealand tour, I tried a new tactic for undergarments and cycling shorts. Previously, I’ve stayed away from wearing anything under my shorts. I have a tendency to chafe (not fun). But, my husband found these great merino wool boxers for me, and they’ve changed the way I cycle. The wool is soft and comfortable, easily cleaned, and doesn’t develop a smell because it’s a natural fiber. They’re easier to wash out than cycling shorts, don’t irritate my nether regions, and don’t take up much space in my clothing bag. I can get away with two pairs of cycling shorts, and three pairs of underwear.
So, bottom line is: in daily life, and in cycling, showering daily isn’t necessary. You can do it, but it won’t kill you if you don’t.
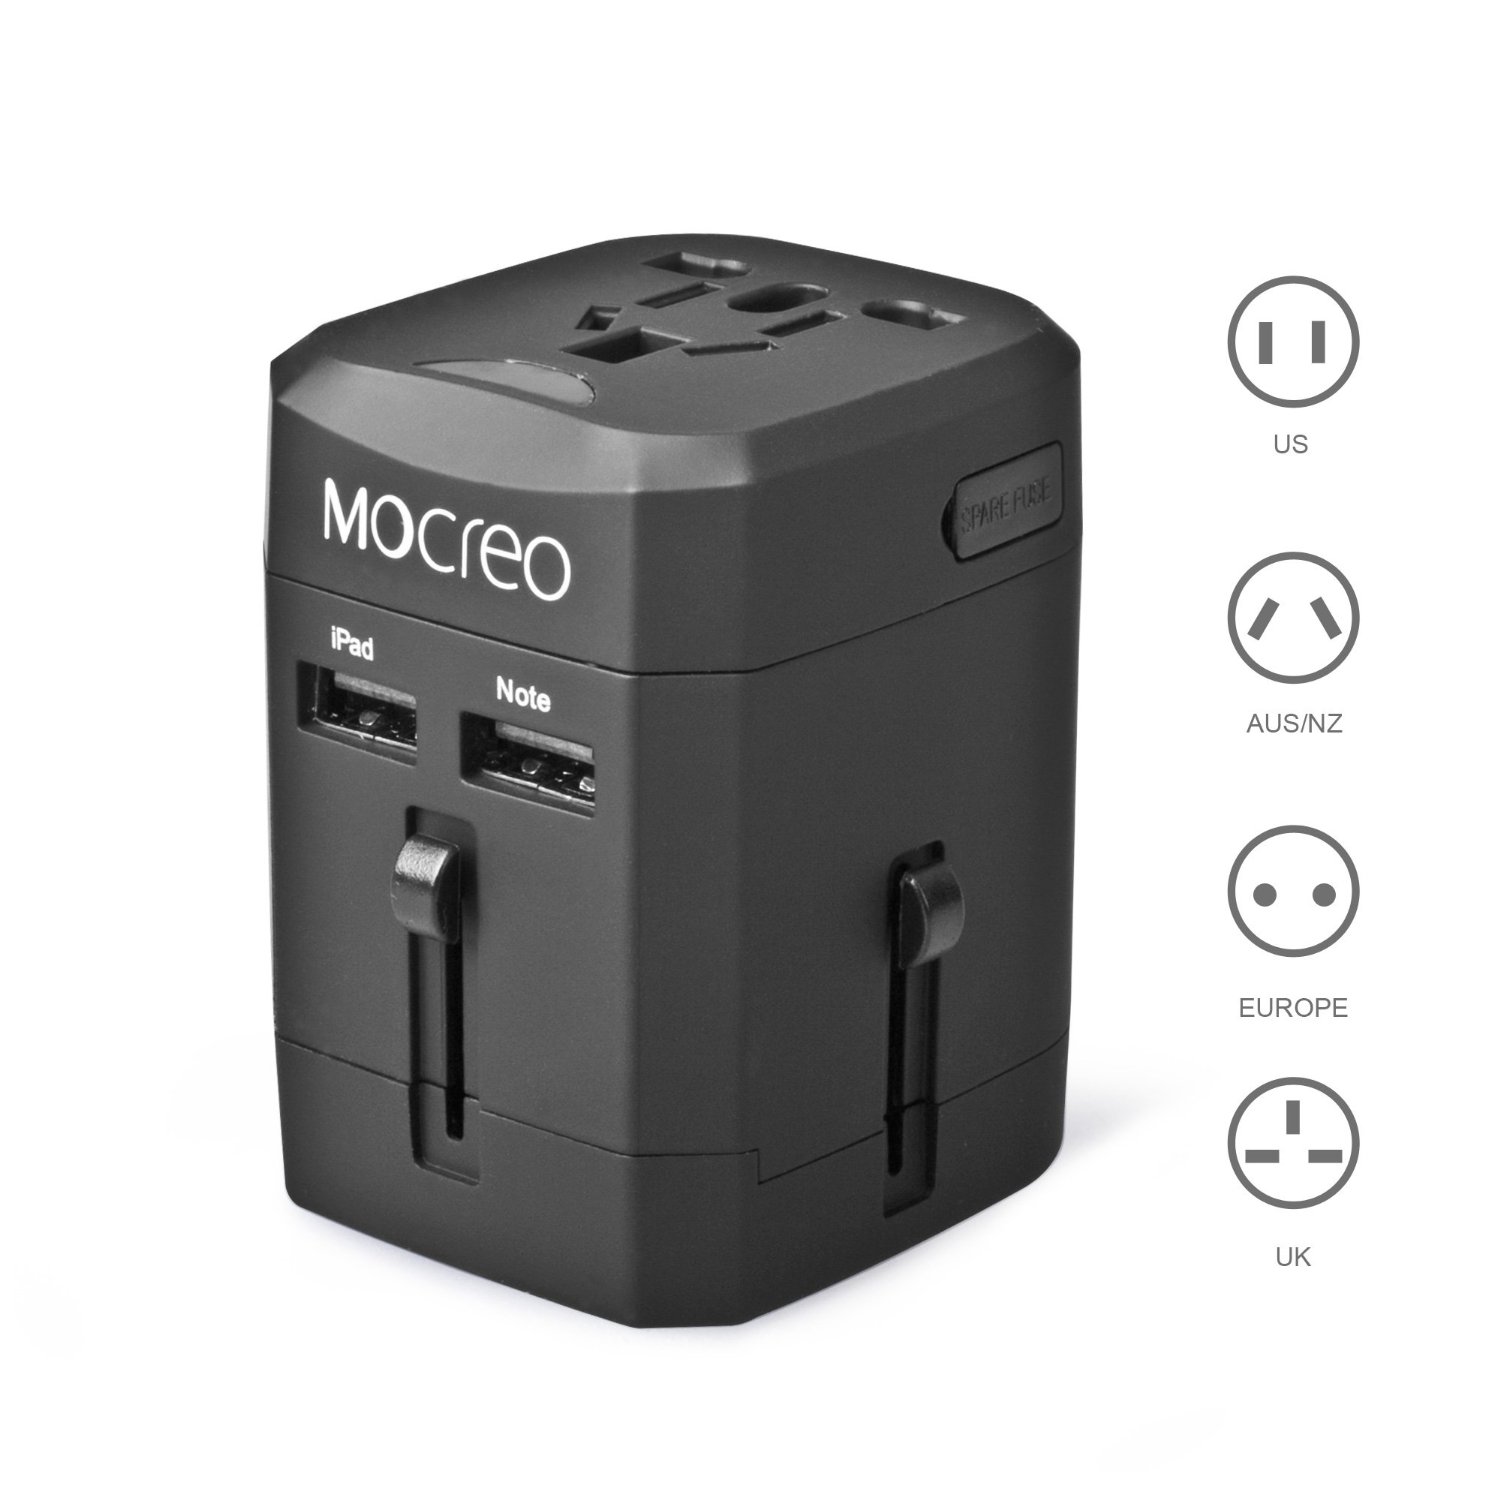
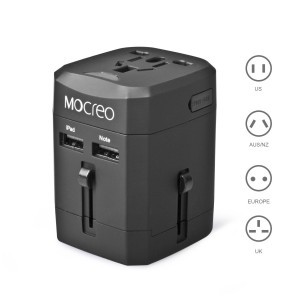
If you’re planning on making a trip overseas, don’t forget that other countries have different power systems. That’s right! Your power plugs won’t fit into the outlets overseas. And don’t try to force the plug in. Not only is the plug shaped differently, the voltage and frequency are probably different. You will risk damage to your electronics, and possibly cause a fire. So, before you go, you’ll need to get a power adapter/converter.
There are many brands of adapter out there. But we found the Mocreo adapter to be a great option.
Pros:
Cons:
Specs:
AC: 6A Max. 100-240Vac 50/60 Hz
USB: 2100 mA Max. +5Vdc
Warning: AC-AC. No voltage conversion. USB is for charge only. Indoor use only. No grounding.
If you’re planning on traveling to many different countries, this adapter will definitely meet your needs.
Disclaimer: All opinions about any products mentioned in this article are my own. I have not been compensated in any way by anyone. I will, however, receive a small commission if you choose to purchase the item from Amazon after clicking the link.
Thinking of going on a bicycle tour? Each time we go, we find new ways to streamline our gear list. Here are three tips for how to multiply the uses of your gear on your next tour.
Turn a water bottle into a lantern. This works with the clear water bottles. Simply fill your water bottle at least halfway with water, turn your flashlight or headlight on, and shine the light into the side of the bottle. This improvised lantern provides a surprising amount of light, without the added weight of an actual lantern.
Use an emergency blanket as your tent footprint. Emergency blankets are really handy. They’re lightweight, and help reflect your body heat back toward your body in an emergency. Save weight by leaving your tent’s footprint at home (or don’t even bother to purchase one, since most tents these days don’t have one included). The blanket might even prove to be more puncture-proof than the footprint, which will save your air pad, as well. Bonus! We love this one.
Use hair elastics to keep your air pad/mattress rolled up. We found an easy way to keep our air pads tidy is to use hair elastics. This gives me the benefit of having a few extras on the trip, as I have a tendency to lose my hair bands at some point on tour. Sure, you could use rubber bands, but I can’t use rubber bands in my hair.
Bonus: Have you heard of Tenacious Tape? Great for fixing everything from tents to rain gear, this is a must-have on tour.
Sometimes if you step a little bit outside the box, you can save weight and energy on your tour. What are some inventive weight-saving ideas you’ve had? Let us know in the comments below! Also, check out our post on reducing your gear weight on tour for some more ideas.
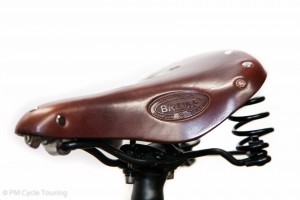
My first touring bicycle came with a Men’s Aged Brooks B17 saddle. Even though not designed for a woman, I quickly (after about 200 miles) became used to the saddle, and continued to ride it for several thousand miles. I even moved it to my second touring bicycle when the time came, as that bicycle came with a foam padded saddle that hurt my butt after about 5 miles of riding, and I never could get used to it. Now, with my third (and probably final) touring bicycle purchased, I had to make a choice. Do I move my B17 to the new bike? Or do I try out a new saddle? Well, I decided to go with a new saddle, and so far I’m not regretting that decision. I continued with Brooks, opting for the Women’s Flyer S. I’ve ridden a couple hundred miles so far (*update-a couple thousand miles, still no regrets), and plan to use the saddle on all tours in the future.
Pros:
Cons:
For women the saddle specifically made for you is simply a shorter version than the men’s. Initially I was concerned about this length difference but find that it fits my smaller bicycle well and doesn’t have any negative impact. In all, I’m very pleased with the quality and look of the saddle, as well as the fit and comfort. If you’re in the market for a new saddle, try a Brooks. Take care of it, and it could be the last saddle you ever buy!
Disclaimer: The above contains my opinions only. I have not received any compensation for this review. This review is for informational purposes only. I have not been in contact with the manufacturer.
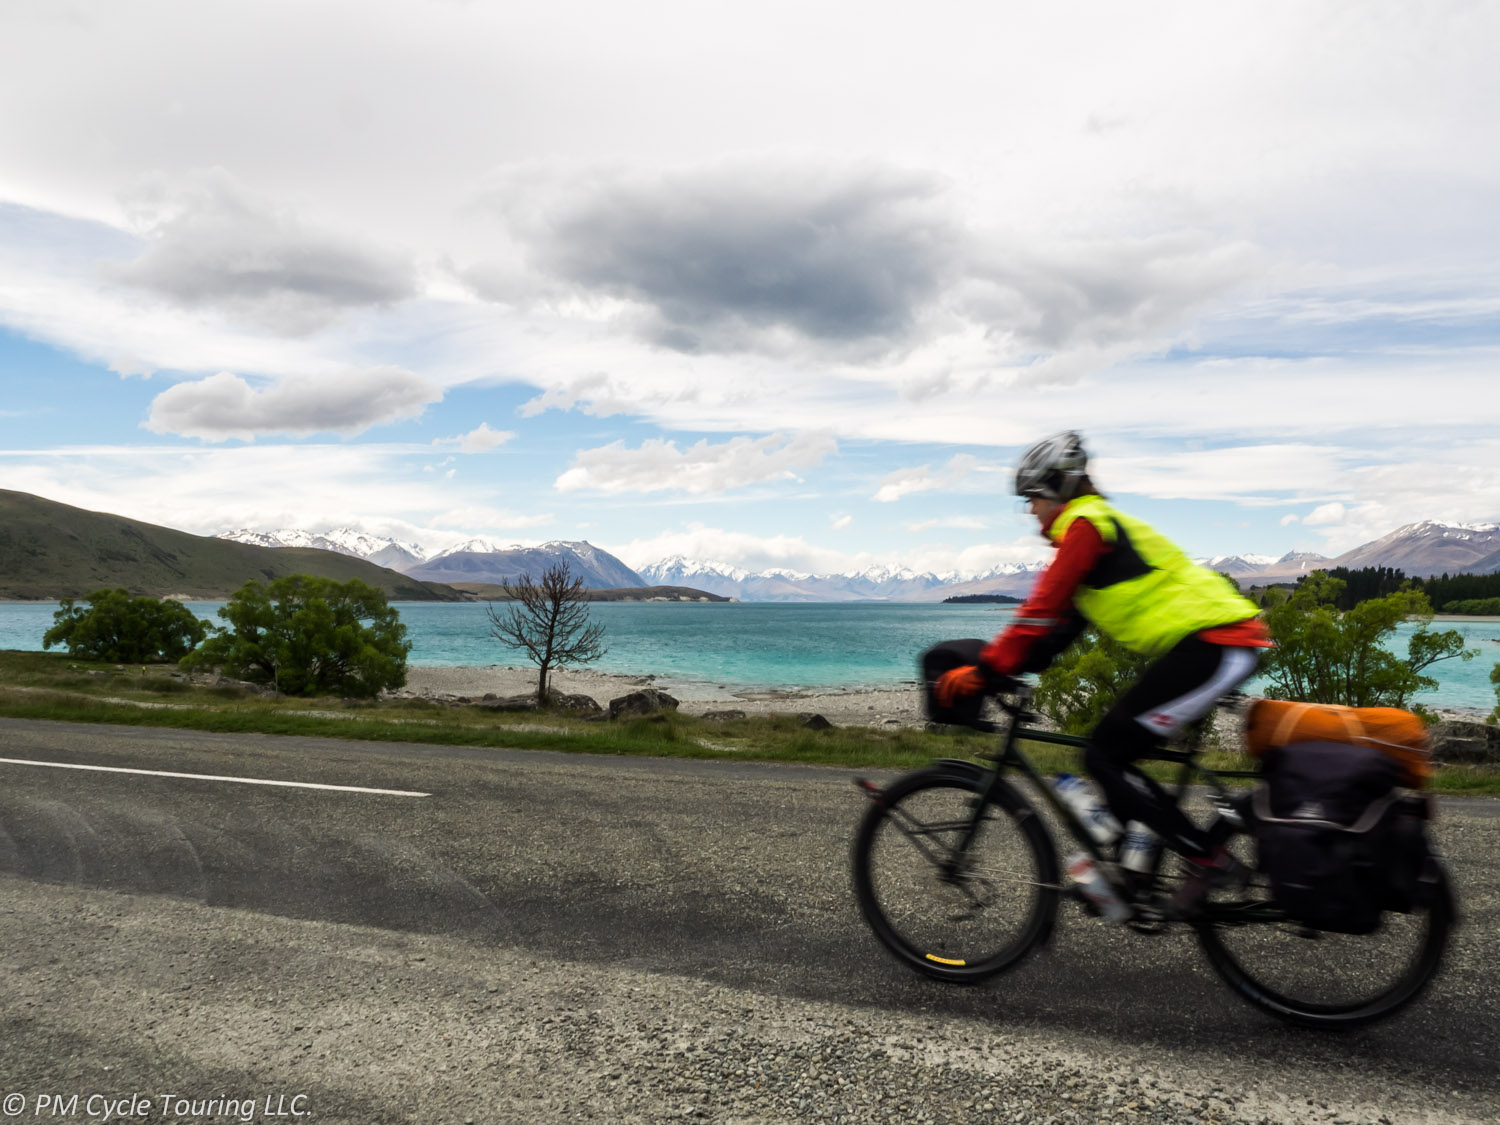
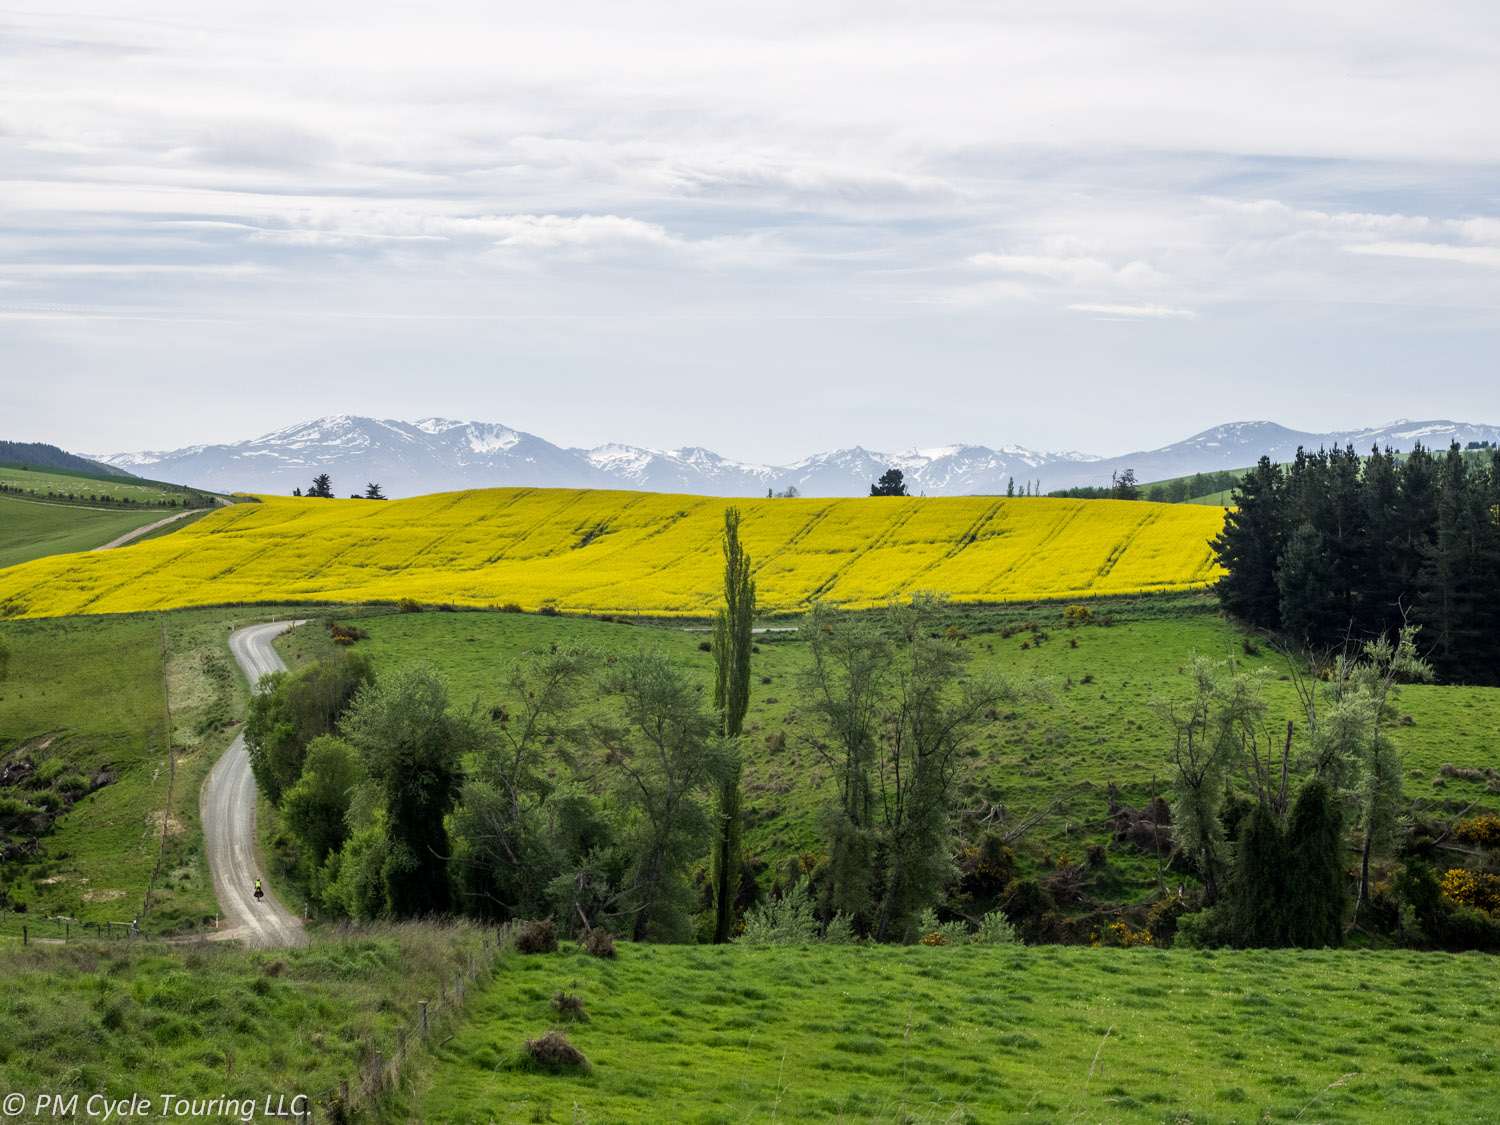
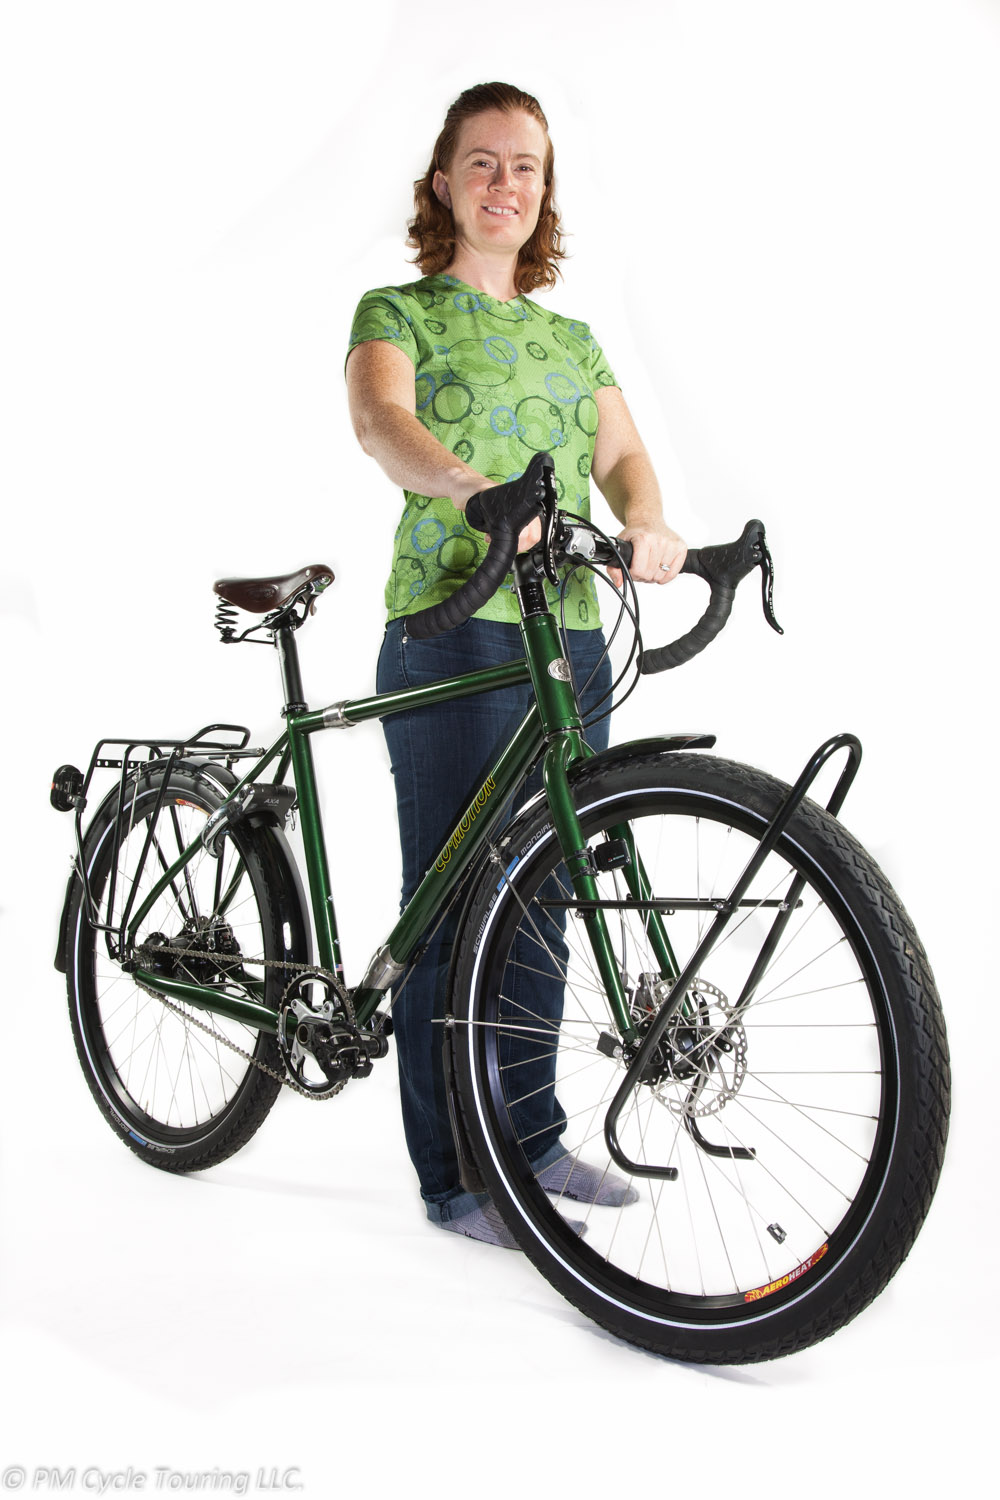
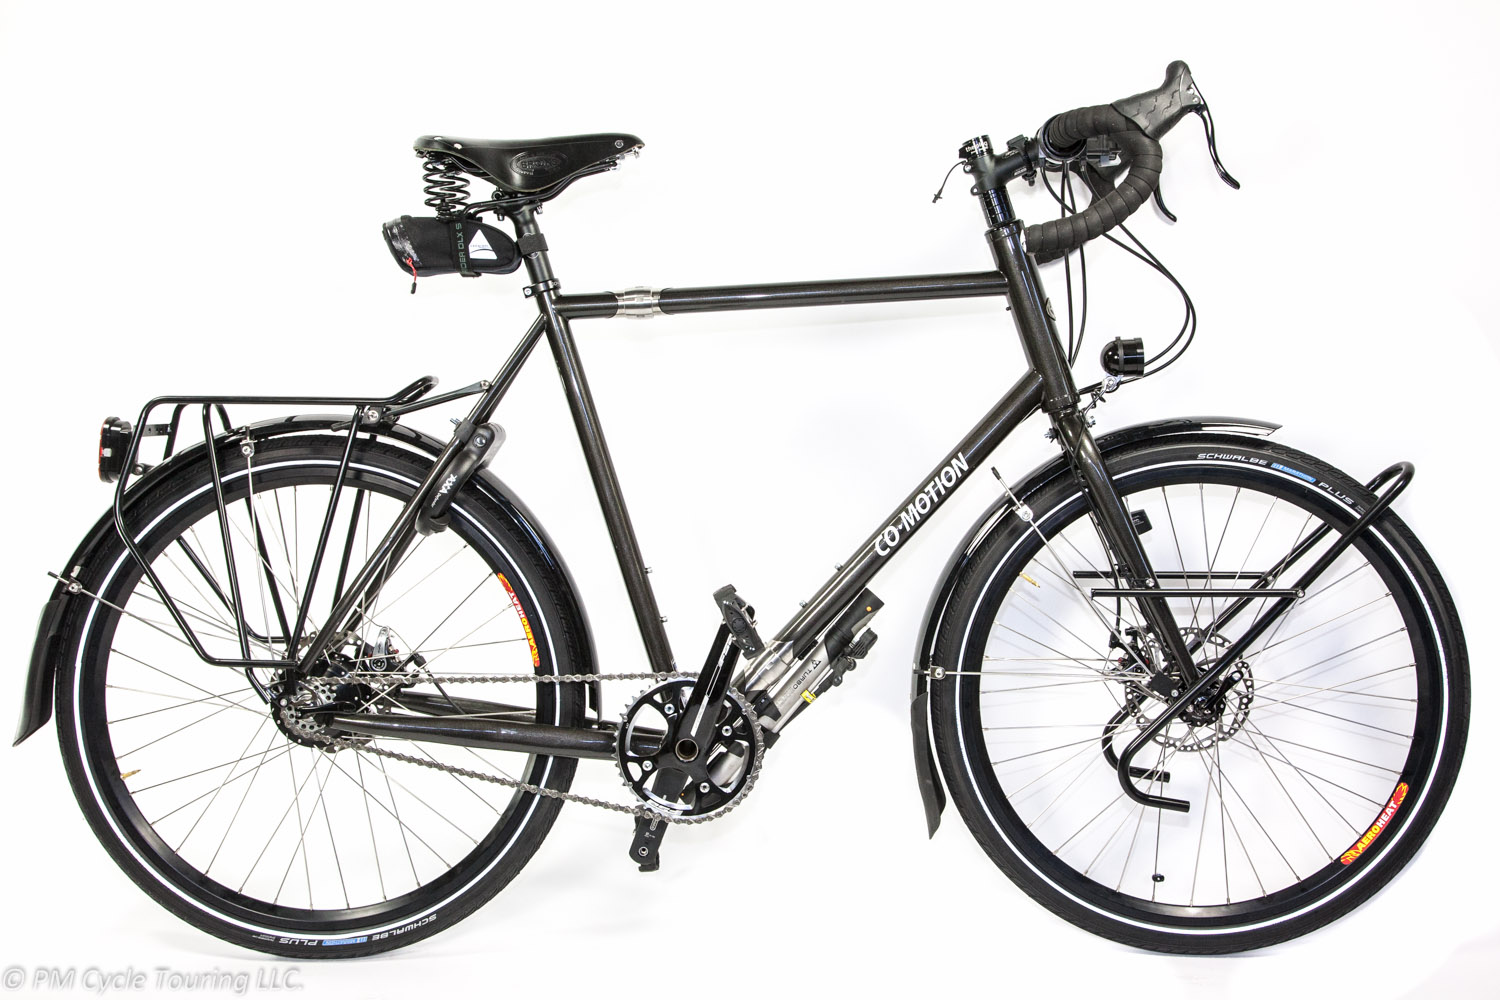
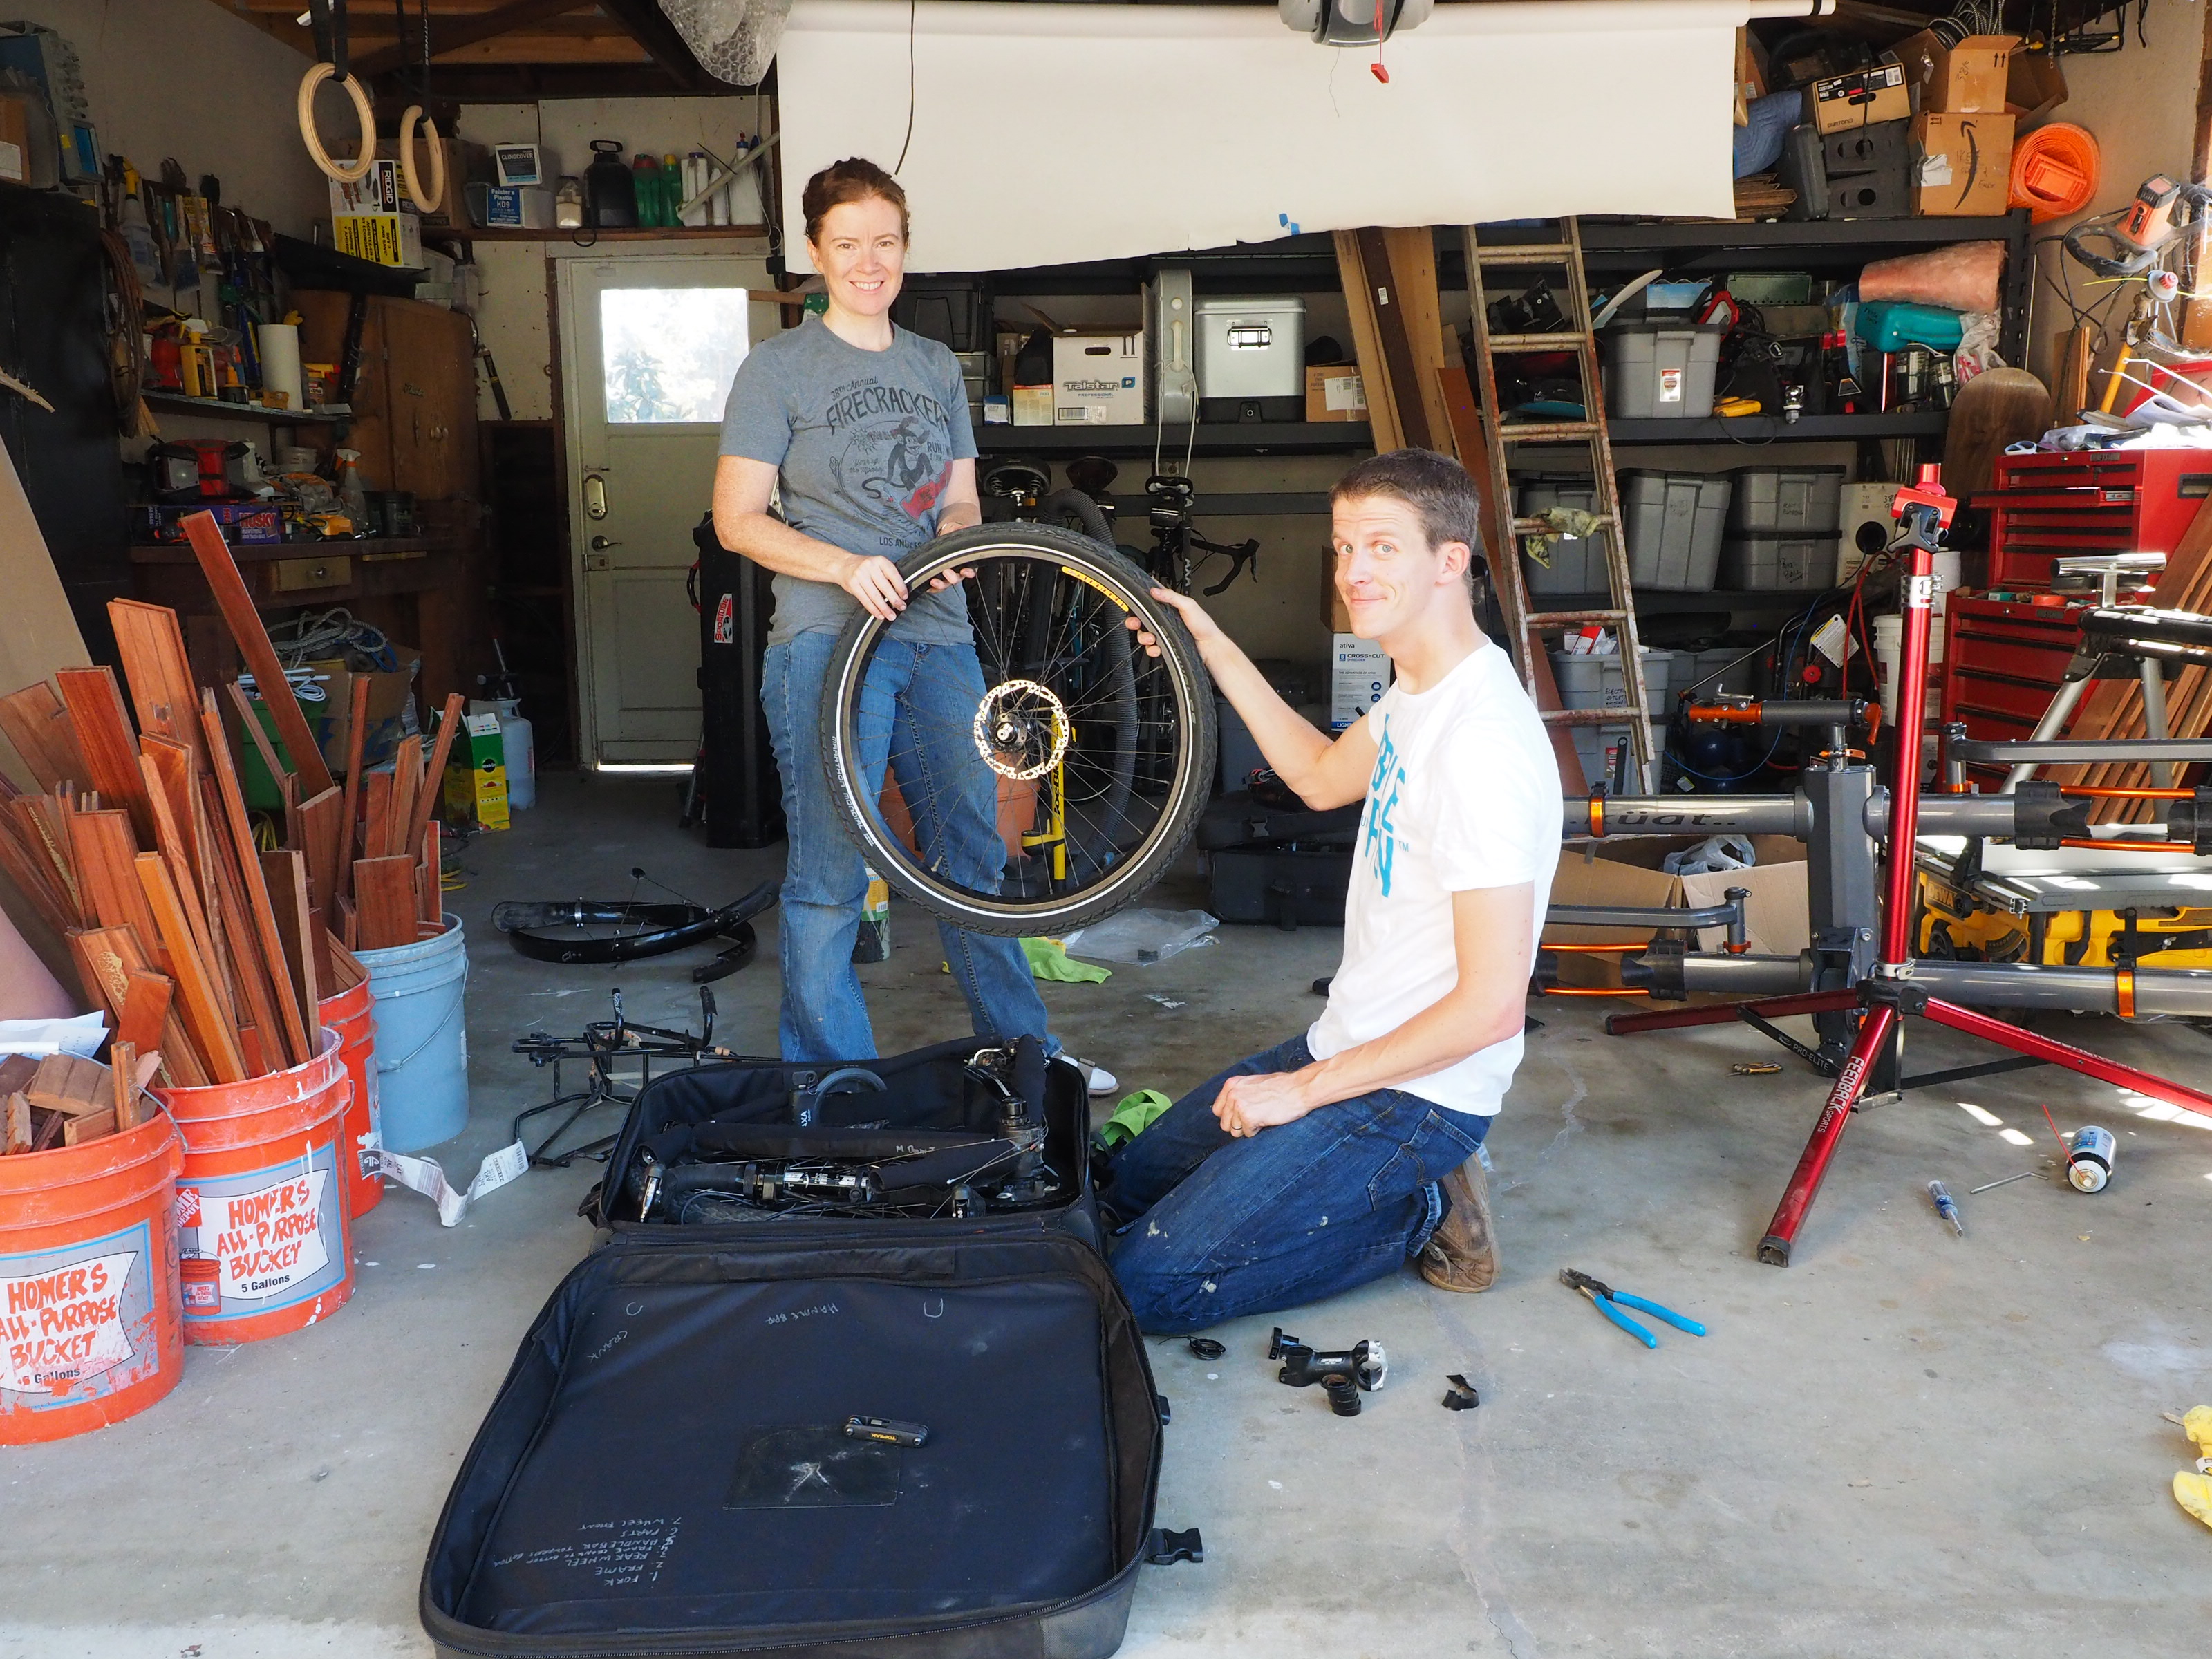
About a year ago I purchased my Co-Motion Pangea after an exhaustive search for the “dream” touring bike. Post-purchase I decided that a break-in tour was needed, to put the bike to the test. We began preparations for a tour of the South Island of New Zealand, which proved to be an amazing test of my Pangea. During our tour we experienced a little bit of everything you can throw at a touring bike: rain, gravel roads, river fording, snow and ice, mud, steep hills, and high winds.
Travel:
To get from sunny Los Angeles to New Zealand involved a 13 hour direct flight. Air New Zealand has a reputation for being very strict on their baggage policy and the Co-Motion suitcases dimensions are pretty much at the limits of allowed baggage sizes.
However the real issue ended up being weight. The suitcases themselves weigh near 14 lbs., and you only get 50 lbs. per bag. We packed the bikes and added the cages, bottles, pedals seats to the suitcase only to find that we were over the limit. After some re-arranging and putting all the extra bits into our other luggage, we managed to get the bikes under the weight limits.
Assembly:
Putting the bikes back together was exactly as we practiced at home; please make sure you practice at home before you tour. No issues to report, everything worked as expected. It was a half-day event getting two of them together and tuned up.
Touring:
So, how is it to tour on a Pangea? I can sum it up in three words: I love it! The ride is very smooth and responsive. We started off on paved roads for the first few days and had no issues with any kind of pavement. The Brook’s saddles with springs, 26×2″ Monodial tires, and thick steel tubes make for a supremely comfortable ride. Even on gravel roads, the Pangea continued to ride very smoothly. My butt has never felt so good and the saddle wasn’t even broken in yet.
Speaking of gravel roads, we found that New Zealand roads aren’t graded like American Roads. It was rather common to find ourselves going up 11-14% grades that are a rarity in the US. We found that the gearing of our Pangea’s may be a little higher than we would like for such steep roads, especially dirt or gravel. However, there may have been another factor. We hardly trained for the tour. So I am uncertain how much of the gearing issues was due to our weak bodies.
As we progressed through New Zealand there were very few bicycle problems. About two weeks in I started noting that my chain was clicking a bit as I pedaled. I found that the tension was very loose and the chain was flopping a bit. I busted out the best multi-tool for a Pangea and adjusted the chain tension using the eccentric bottom bracket. This brought the chain nice and tight eliminating the noise from the drive train. Pam’s right handlebar brake lever started to get loose but that was probably a bike assembly error. Pam was missing one gear of her 14MW on Rohloff, once again likely bike assembly error (seeing a theme here? I am wondering about the shop we used to get the bike). We had to adjust chain tension several times. The Brook’s saddles with springs produce a tiny bit of noise every now and then. The stainless steel drops require a lot of force on the quick removal skewers to keep quiet.
My biggest disappointment was the SON generator and USB outlet. Riding along on flat roads it wouldn’t charge my battery pack or phone reliably. It would turn on, with the green LED lit, then the device would start to charge, then it would shut off, and repeat. If going downhill it would charge for a bit, but as any tourist knows the downhills are always too short. Finally we went through a particularly remote 4×4 track through the mountains that involved fording knee high water 40 times. The SON generator stopped working the next night and never turned on again.
After the generator stopped working I wanted to troubleshoot it, but as a cycle tourist I was carrying nothing I needed. I had no multi-meter or method to test if the hub was producing and the USB outlet failed, or if the hub failed. I unplugged the hub and we made use of our touring techniques for maintaining electric power for devices. New Zealand campsites usually had power available, so we were never more than two days without have an outlet. As any cycle tourist knows, you just make do.
Final Thoughts:
I am very happy with my bicycle, and I was recently asked if it was worth $7,000? For me it is. It feels great to ride, and I spend my time enjoying the ride not worrying about a derailleur tuning, or wondering if my bike could be just a little bit better. If I were to do it again I would skip the generator hub, but I stand by my decision to get a chain instead of the belt drive; the Rohloff itself is amazing.
I know that the Pangea will take me anywhere in the world I want to pedal; it is built like a tank. All that being said, you don’t need a fancy expensive bike to tour, the sites and views look the same, just get out there and ride! If you want the best bike money can buy I would put my money towards a Pangea.
*Note: I was not compensated in anyway for this review, just my two cents on a bicycle I purchased with my own hard earned money.
It’s very important to stay hydrated throughout all aspects of your life. Some people think that lack of adequate hydration is the reason for many health problems. While the scientists are still trying to piece it all together, I do know that I function much better as a bicyclist when I’ve had enough water to drink.
When you’re out there on the bike, exposed to the elements, you’re bound to encounter many different climates, even in a single day. Trust me, you’ll never have a problem where you’re carrying too much water (actually, I take that back. Once, while touring the southern tier, we prepared for a 70 mile ride with limited services by stocking up on water. At the halfway point, a stranger-turned-friend gave us plenty to eat and drink, and we had no need of the extra water we carried. We dumped it out to lighten our load. But that’s rare). More often you’ll wish you had more. You must plan ahead!
So let’s talk about different methods of carrying water. First, water bottles. Most bikes have space for one or two bottle cages. My recommendation is to use both, if possible. Also, get the largest bottle you can that will fit the cage. Don’t mess around with the small bottles. And we find the insulated ones are a waste of money. They tend to hold less water with the promise of keeping your water cool for a minute, but by the time the sun rises there won’t be a noticeable difference.
For rides that will be a bit longer, think of carrying a canteen or platypus. We like to carry two 96 fl. Oz. Nalgene Wide-Mouth Canteens when we ride. They fold flat and take up minimal space, but carry enough water for both of us if we really need it. We have to be careful, though, because if we fill both of them up, it adds about 12 pounds to our weight for the day. That’ll slow you down a bit before you drink it!
Want to go super lightweight? You make use of surface water as you go. If you want to do this, you’ll need either a filter, an ultraviolet pen, or iodine, or a combination of all three. There are a few different filters on the market, but some are pretty bulky. Some water bottles come with charcoal filters, which can help filter out sediment or other impurities, and could be a good first step to clean water. Iodine is very effective at killing all nasties in water, but makes the water taste horrible. I’ve heard there are tablets you can get that make it taste better. But when you’re desperate, you’ll drink anything, regardless of taste. Might be a good idea to carry a bottle of iodine, just in case. Make sure to wait the requisite time before drinking the iodine treated water.
If you’re not into surface water, where else can you fill up? Of course, gas stations and grocery stores carry bottled water, but before you buy a bottle, ask the clerk if you could fill your bottle from the soda machine. Some restaurants will fill your bottle for you. Bathrooms have faucets in the sink. We’ve filled up using an irrigation hose outside a church. As a last resort, you could stop at a house and ask for water. The worst they could say is “no.” Many people will take pity on you if you’re polite, and help you out.
Keep in mind that you’ll need water for things other than drinking, such as cooking and sanitation. That’s why sometimes a bottle just won’t cut it. Think about how you’ll be using water on your tour, and make sure you have a receptacle that will hold as much as you need, without adding more weight than you’re willing to carry.
For our first tour outside the United States, we decided to make things easier by traveling somewhere with a common language. We had read about New Zealand’s beauty, the friendliness of its people, and how pleasant a place it is to stay, as well as its claim to speak English.
Upon arrival, we found that even though we spoke the same language, sometimes it didn’t feel that way. Some things still got lost in translation.
For example, for dessert one night, we decided to try a New Zealand milkshake. And not just any kind of milkshake, a “thick shake.” Here in the US, a thick shake is, well, thick, usually requiring a spoon to enjoy it properly.
When our thick shake arrived at the table, we were a little disappointed to find that not only was there no spoon, but it was liquid! It was mainly milk, with flavoring, and a scoop of ice cream. I guess that’s where the “thick” comes from. Ah, well. It tasted good regardless.
Bacon in NZ is not necessarily what Americans would call bacon. I ordered a “bacon burger,” thinking it would be a hamburger with slices of bacon. Nope. It was basically a ham sandwich, on a hamburger bun, not even including a hamburger patty. Slightly disappointing. If you are looking for proper American style bacon, the Kiwis call it “streaky bacon.”
On our last day in NZ, I needed a late afternoon pick-me-up, and we popped into a coffee shop. They advertised “iced” drinks, so I ordered an iced coffee. I expected to get coffee, with ice. Instead, the waitress served me a coffee milk shake, complete with ice cream, milk, and chocolate syrup. It was delicious, and even better than the aforementioned thick shake, just not what I had expected.
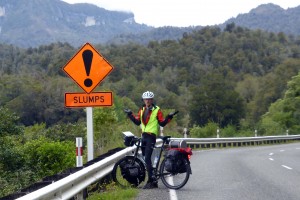
As we rode our bicycles around New Zealand, we were constantly amused at the differences in road sign wording that our two countries use. Over time, we became used to the differences, but every once in a while one would stand out. We actually came across a sign that we still have no idea what it could have meant: A hazard sign (orange with a black exclamation point), and underneath the word “Slumps.” We’re still puzzling over the meaning of that sign. And, sometimes the road signs were polite to the point of ridiculousness. For example, a sign in Christchurch read: Buses and heavy vehicles to use High St one way system as Manchester/Taum intersection not suitable. Seems like a much more polite way to state: Large Vehicles Prohibited.
The longer we were in New Zealand, the more we found ourselves adopting the local words for various activities and things. In a small way, we were able to pick up a little bit of the culture of New Zealand, even in the short time we were there. We had a fantastic time, and look forward to traveling to many more exciting places in the future.
An essential item for any lover of riding bicycles is a tire pump. We’ve already talked about our favorite hand pump. However, it’s a good idea to have a floor pump handy as well. With a floor pump, you can pump your tires more quickly, with less effort. Obviously, you won’t be taking this one with you on your rides (although I once saw a kid with one strapped to his back as he rode along a bike path. I’m sure there was a story to go along with that). We’ve tried a few different floor pumps over the years. Our favorite by far is the Topeak Joe Blow Sport II, which we like so much that we even purchased a second one when we misplaced the first. This pump has it all: it’s easy to use, it’s durable, and its color stands out even in the messiest of garages (I’m speaking from experience, trust me). Here’s what makes this pump special.
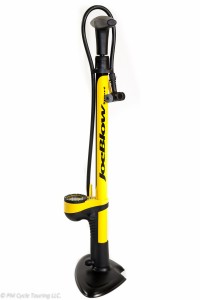
No need for an adapter. Presta valve and Schrader valve on each side of the pump head, so you don’t need an adapter. It’s right there, on the head.
Pressure gauge. Large analogue pressure gauge, easy to read. This makes getting the right pressure in your tires a breeze.
Hose. 28 inch / 71.5 cm flexible hose, makes reaching tire valves easy, even when on a bike stand.
Color. Yellow color helps it stand out and makes it easy to find in a messy garage.
Handle. Large, padded handles add comfort to your pump.
Base. Large steel base makes for a stable foundation.
Extras. Need to pump up a basketball? A ball needle is included. Also included is a bladder head, which you can use to pump up anything from air mattresses to exercise balls.
Price. You can get this one for a little over $40, which is a great value.
Specs.
Weight: 1.4 kg / 3.09 lbs
Height: 67.5 cm / 26.6 in
Capacity: 160 psi / 11 bar
Bottom line. We love this pump. It does everything we need it to do, and then some. Highly Recommended.
Disclaimer: This review is for informational purposes only. All opinions about any products mentioned in this article are my own.