Ah, Valentine’s Day. One of those holidays where you either love it or absolutely hate it. There’s really no in between. We don’t celebrate many holidays, but we usually try to make Valentine’s Day special. We’re not big on chocolate or roses, so we usually just make sure to spend some quality time together. This year, I thought I’d put together some special bicycle themed Valentine’s for my Valentine.
What do you think? What are you going to do with you Valentine this holiday?
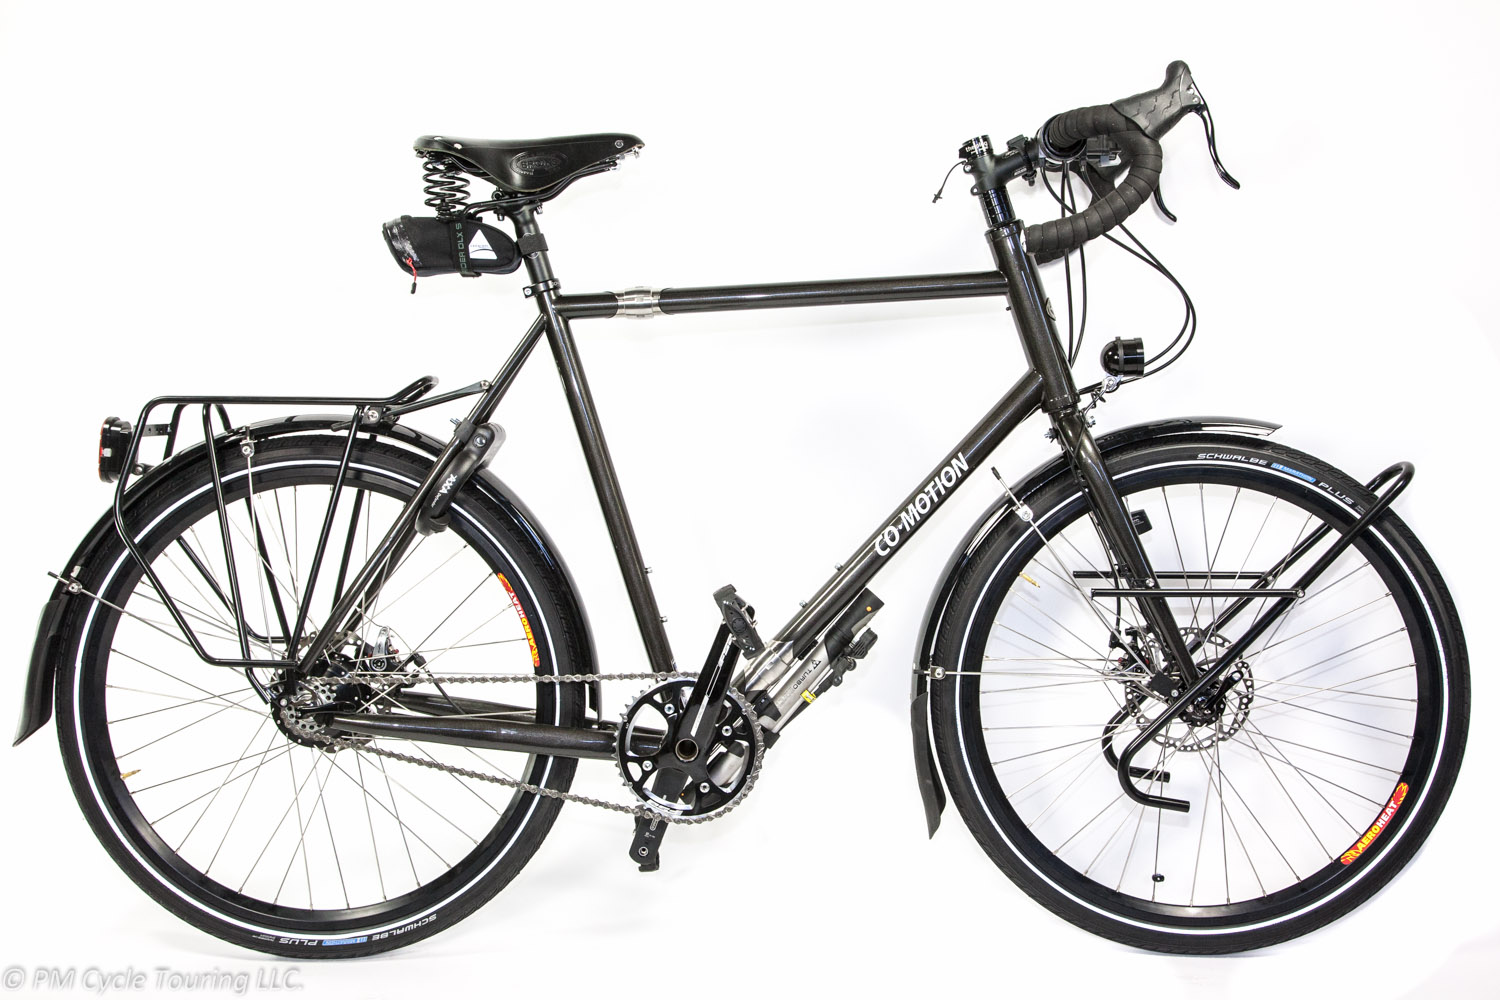
As big of a fan as I am of the Co-motion bicycle, (see this post, here) the company website could use some refinement. When I started researching my dream touring bike I found that there were several options available that had little to no description. I spent a little bit of time trying to educate myself about the varying options and I wanted to share what I learned.
Stainless Steel Dropouts: The dropouts are the points that the wheel axles attach to the frame. Typically these are made of steel similar to the rest of the frame, so if you select this option they use stainless steel at these points. There are two distinct benefits of this option.
First, the stainless steel dropouts are not painted, leaving beautiful shining stainless steel which looks very sharp.
Second normal steel dropouts get all of the stress of you riding the bike put on them, and are prone to becoming slightly worn over time making it harder to get the wheel perfectly aligned. Additionally as you remove and re-install the wheel on a steel dropout you will likely chip the paint from clamping the wheel to the frame and will see rust building up. Since stainless steel is stronger than normal steel the stainless dropouts will not rust and will be less likely to get worn.
Co-motion Pangea Stainless Steel Dropouts
If you are looking at having the bike for a long time or just love the look, my recommendation is to get this option.
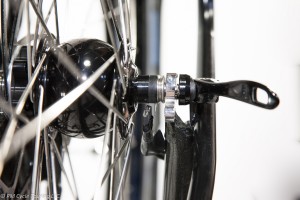
Pathfinder Package: This replaces the front hub with a Schmidt SON 28 generator, includes a Schmidt Edelux LED headlight, and a “the plug” stem cap with a built in USB charger. For a serious tourist getting off the beaten path this is a great way of giving you the ability to charge your electronics on the road. The headlight is top-notch, plenty bright for night time riding, and is a nice convenience to have.
The two downsides are that adding a generator to your bike does increase the amount of power required to pedal the bike. However this drag is relatively small being about 1 Watt at 5mph, and 6.5 Watts at 20mph. Considering that an unloading bicycle going up a 5% hill at 13mph takes ~320Watts, and pedaling on a flat surface with no wind at 13 mph takes about ~80Watts this generating hub and light are a small load. This package does add some complexity to the bike. However given our modern electronics this option is increasingly becoming more and more necessary, and I sprung for it on my bike.
If you look at the above picture, you can see the hub inside the wheel.
Co-pilot: Do you need your bicycle frame to be able to broken into two pieces to allow for packing of the bicycle? Yes? Then you need S&S couplers. These mechanical stainless steel joints have teeth between the joints and screw together to couple the two pieces of the frame together.
These couplers actually stiffen the frame a little bit and have been proven to be very reliable in service. To separate/tighten the couplers you do need a special spanner wrench (included with purchase). The only maintenance required is a dab of Teflon lubricant every now and then.
Matt’s Co-Motion Pangea Rolhoff in Metallic Black.
You can clearly see the two sets of S&S couplers on the frame, one on the crossbar and one on the downtube.
Co-pilot Padding Kit: When packing your bicycle you need to wrap padding around the frame to keep the paint nice and prevent any metal parts from rubbing against each other (bare metal rusts and can be a potential weak spot). If you are trying to save money you could just use some generic foam padding or rubber insulation material. However, the Co-pilot provides sewn padding kits with a nice fabric and Velcro closure to keep the padding attached to the frame. The time you save using this kit may be worth it if you plan on packing the bike a lot versus trying to wrap it yourself every time, or making your own padding.
Co-pilot Case: At $400 this is a significant amount of money. What you get is a very well built bicycle-packing specific suitcase. There are 4 exterior pockets, 3 interior pockets, reinforcements where the wheel axels will poke the bag, heavy duty zippers, and compression straps to ensure you can meet the airline size requirements. Additionally it is built with telescoping handling and wheels to make transport a breeze. The case appears and feels very well made, and I think you would be hard-pressed to find a better alternative, but let me know in the comments if you have heard of or found a suitable alternative.
Hopefully this sheds some light on to a few of the options that I found little information on, if you have any more information or questions let me know in the comments!
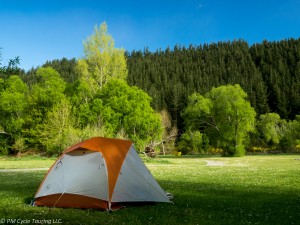
Restful sleep is essential to putting on the miles day after day. Ever noticed how it takes a while to get used to falling asleep in a new place? That definitely happens to me. But one thing I have observed during my bicycle tours is that even though the tent I’m sleeping in is in a new place each night, the tent itself doesn’t change. Having that consistent environment makes up for new locations each night. So, for me, this makes the tent is one of the most important purchases for a bicycle tour.
I did a lot of research before deciding on the Copper Spur UL 2 tent for our touring tent.
Big Agnes Copper Spur UL 2
First off, the pros:
Two “rainbow” doors, one on each side. This means that we each had a side to enter and exit the tent, and weren’t crawling over each other to get in and out. This turned out to be even better than I thought it would.
The one person tent only has one door and vestibule.
The tent, rainfly, and poles weigh in at 1400 g. and the 2014 version coming in 125 g. lighter. This tent is truly lightweight.
Easy to set up and take down (even with just one person). At the end of the day, this tent went up quickly with either one or two of us setting it up.
Head space.
Matt is 6’2” and I’m 5’6” and there was plenty of headroom for both of us to sit up in the tent. Previous lightweight tents that we’ve had skimped on headspace to save weight, but the Copper Spur left more than enough room for comfort.
Adequate ventilation.
Nothing is worse than waking up to bedding that is saturated with condensation. We found no problems with this tent throughout our entire tour.
Durable.
Stood up to 60+mph winds on our most recent tour.
Cons:
Footprint
Does not provide protection against thorns
Not included with the tent/needs to be purchased separately
Color
The bright orange doesn’t lend very well to stealth camping.
What’s changed on the 2014 model: The 2014 model is very similar to last year’s model, only slightly lighter. We have not had a chance to try the new version out.
We highly recommend this tent for bicycle touring. The Big Agnes Copper Spur comes in a single person as well as three-man and four -man versions. The single might be a bit small for a larger (taller) person, so keep that in mind. What are some things you look for in a tent? Let us know in the comments below!
Disclaimer: This review contains my personal opinions. I have not received any compensation by the manufacturer for this review. This review is for informational purposes only. If you click the Amazon link and make a purchase, we will receive a small commission.
I was reading through our most recent touring journal (haven’t read it yet? Check it out here!) and came across this situation:
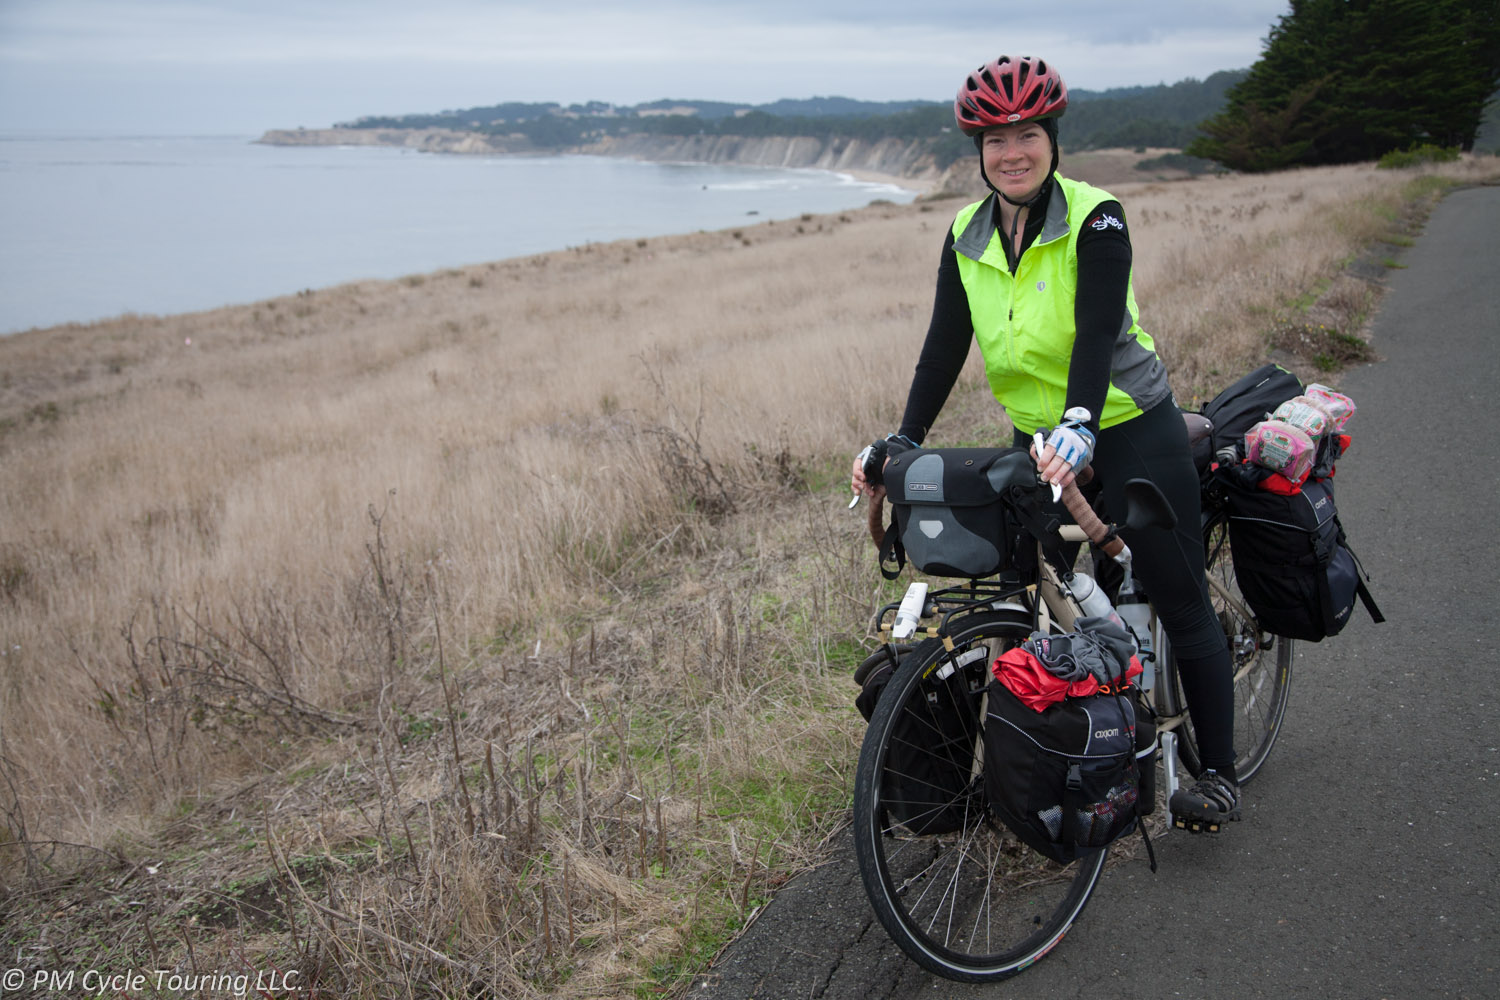
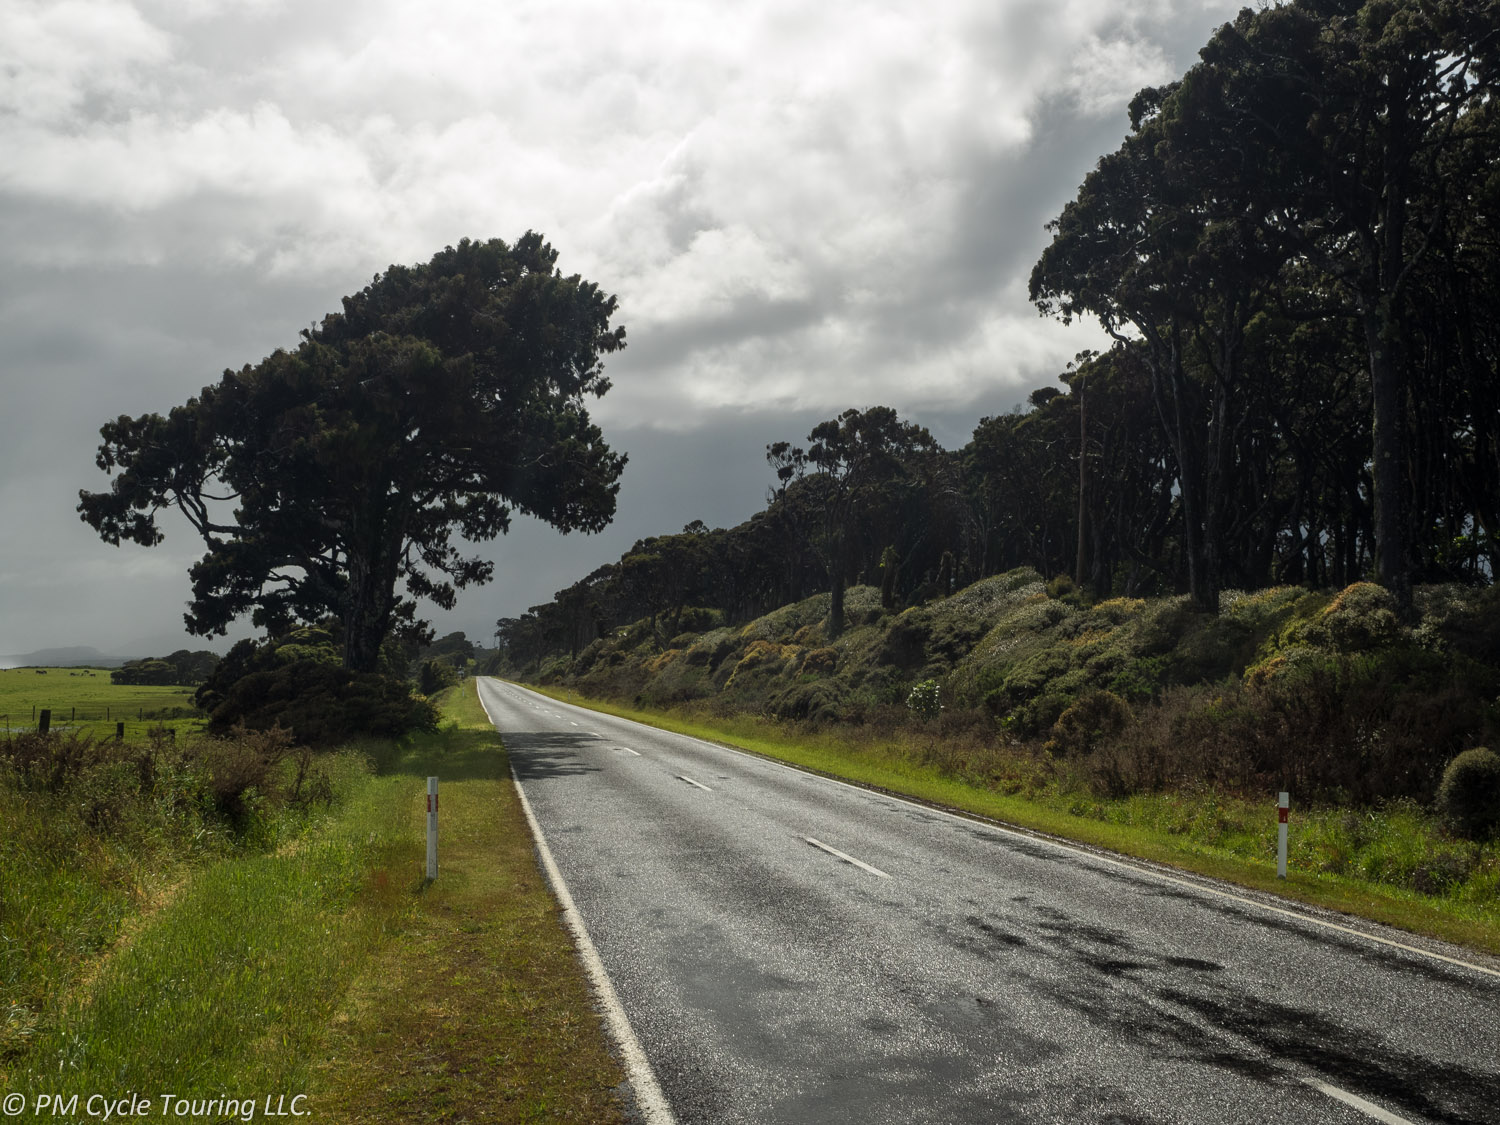
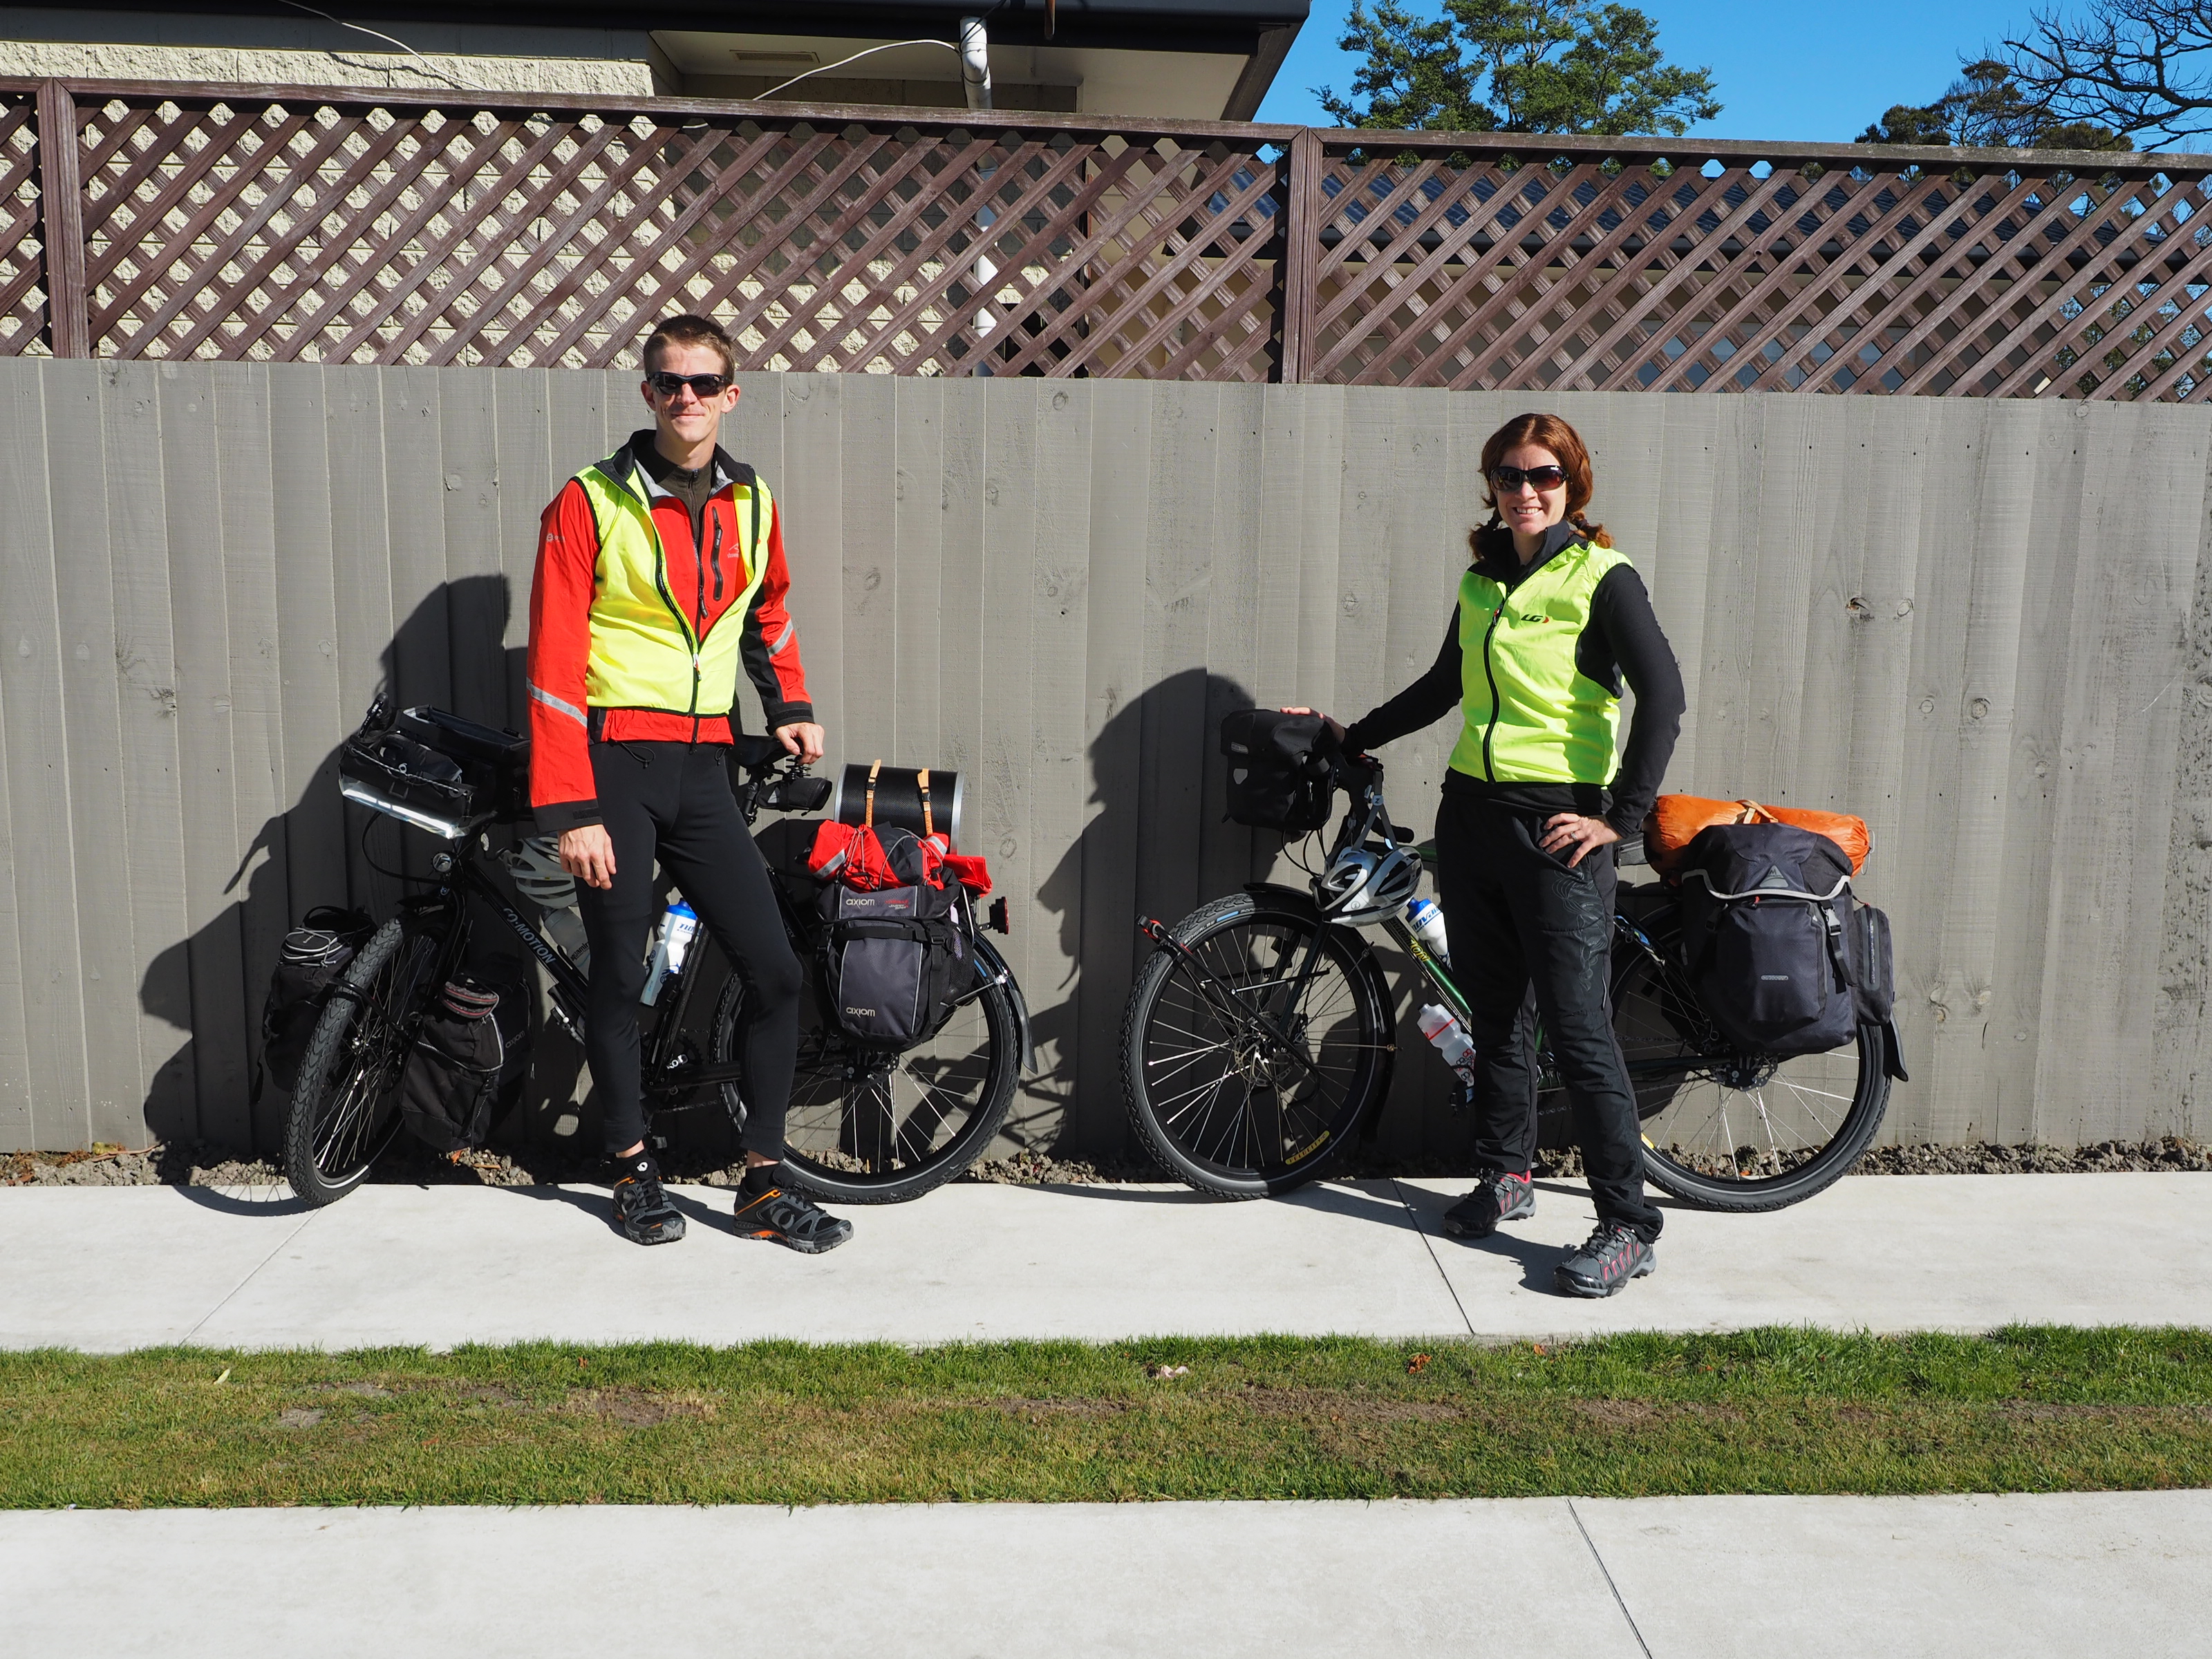
Day 33: Fox Glacier to Hari Hari…Along the way we passed another touring couple who was clad in dark blue jackets, black pants, dark panniers, and had no lights. We were decked out in bright red jackets, neon yellow vests, and taillights that are extremely bright. Since it was raining we didn’t get to stop and chat, but afterwards Pam and I stopped and both shared how invisible they were riding up the hill. It just doesn’t make sense to us, why take the risk of not being seen? Drivers aren’t going to hit us because they didn’t see us…
Unfortunately, we see many riders, whether at home or abroad, who subscribe to this same attitude about visibility. We’ve already posted about this, but I thought I’d repost, as a reminder of where we stand on the issue.
High visibility: To wear or not to wear?
High visibility clothing, commonly referred to as “high-vis,” is a matter of contention among bicyclists worldwide. You can be pretty much be assured that every bicyclist has an opinion about whether or not to wear high-vis. Even government is getting involved. At the beginning of this year (2014), officials in New Zealand considered making it mandatory for all bicyclists to wear high-vis. Take some time to consider your visibility before you embark on that cycle tour.
So what is the big deal? Many bicyclists feel that high visibility clothing is uncomfortable, un-fashionable, and doesn’t actually help the bicyclist be seen. There also is the feeling that it is not their responsibility to stand out. Unfortunately none of the above matter when someone does not see you and you are hit/injured.
Modern high-vis comes in many shapes and sizes. Matt and I like to wear high-vis vests over our normal cycling clothing that we are wearing at the time. The vests don’t hinder our movement, have vents & mesh to keep us from overheating, and give us peace of mind that we are going to be seen. We even get compliments from drivers about how visible we are.
As far as fashion goes, we feel that this is a nonissue. We cycle not to look good, but for enjoyment and fitness and the ability to enjoy the outdoors. Most importantly we cycle to enjoy being alive. Wearing high-vis helps keep us visible to cars and distracted drivers, thus letting us live longer. These days there are many more fashionable versions of high-vis clothing and jerseys available to keep you visible while still fitting your fashion sense. However if you are looking for something cheap, not much will beat the construction vest.
Many studies have been done on this subject of visibility, mostly on the related subject of motorcyclists, and they come to varying conclusions. The consensus seems to be that contrast is the major factor in being able to see an object. Most cycle/auto interactions occur during rush hours and dawn/dusk/night, times when the number of cars is high and visibility is low. High-visibility clothing can help with that contrast. Lights also increase your visibility.
Of course, just being visible doesn’t mean you can’t be hyper vigilant and aware of the cars around you. After all, they are protected by a metal box, and you have nothing. Don’t take anything for granted, and pay attention to what’s going on around you at all times.
Think about it. Why not do everything in your power to make sure you are as safe as you can be? If this means wearing a high visibility vest, it is such small thing to do, and it may save your life. We’d rather be out there enjoying our bicycles than be injured or worse.
Your sleeping pad can make or break your camping experience. When touring the primary concerns for a sleeping pad are comfort, weight, durability, size, and ease of use. The Exped Synmat UL 7 exceeds expectations in all of those categories.
Pam holds the Exped Synmat UL 7
Comfort is the whole reason for bringing a sleeping pad, and can be difficult to quantify. Pads typically can be broken down in to two categories: Solid foam or Air Inflated. The Exped is air inflated and has a maximum inflated depth of 2.8 inches; the amount of air in the mattress can adjust pad firmness. The Exped also has insulation inside the pad to keep you warm on cool nights. Not much is worse than sleeping on a cold pocket of air. There is some concern that this insulation may work to keep you warmer on hot nights, however neither Pam nor I noticed that the pad was uncomfortable even in the hot humid nights in the South Eastern United States.
Weight is where the Exped shines, at only around 400 grams (depending on the size of pad you choose) it is one of the lightest pads available. Lighter weight pads tend to be made of crinkly plastic; this pad is constructed of a material that feels like very tightly woven nylon. It does not stick to the skin and can be laid on directly with reasonable comfort. Noise-wise this pad does create a bit of sound when laid on and if you toss or turn during the night, however we have yet to find a magical silent pad and you quickly get used to this sound.
Durability of any inflatable pad is directly proportional to how you treat the pad. If you throw it on the ground and aren’t careful about where you put it (like Matt) it will probably get a hole or two (read here about how to patch holes). However if you are careful and make sure you only place the pad on surfaces free of debris (like Pam) then you can go an entire tour with no problems. We did not find any appreciable difference in the durability of these pads compared to other pads we have used.
The size of the pad you choose can be very personal and also depend on weight. If at all possible try out the pad in the store, make sure you can inflate it to a firmness you like, and lay on it to verify comfort. Matt and Pam both prefer pads that go from head to toe. Matt is 6’1” and chose to go with the M size (72 in long) and Pam is 5’6”, so she went with the S size (64 in long). An option for those looking to go ultralight is to get the smallest pad possible, just covering the shoulder, torso, and hip area, letting the legs hang off the edge. This reduces overall pack weight, but might also reduce comfort.
Pam lays on the Exped Synmat UL 7 Sleeping Pad
The pad has two valves similar to all other Exped products, one for inflation which has a flap to prevent air leaking out between breaths until you close the cap, and the other to allow for deflation. Both of these have a hole approximately the size of a quarter to allow for rapid inflation and deflation. Compared to twist valves used by other companies these valves operate much easier.
To inflate the pad we use our Schnozzle Bag which takes about 4 full bags to completely fill it. If you elect to fill it manually it takes quite some time. In fact we have never even tried; just get yourself the Schnozzle bag! Inflation pressure can be tweaked by keeping the inflate valve cover open and pressing on the flap to release small amounts of air. Deflation is quick due to the large opening deflation cap, it takes about 30 seconds to deflate to where you are touching the ground and no more air is exiting.
Pam prepares to inflate the Exped Synmat UL 7 with a Schnozzle Bag
Overall we have been very pleased with the Exped Synmat UL 7 and highly recommend them. In our opinion these pads are the best all-around pads available. They are a good compromise between weight and comfort. We used them on our Southern Tier Tour and our New Zealand Tour and they continue to be our go to choice. When combined with the Schnozzle Bag we find it difficult to imagine we will be looking for other pads in the future.
Detailed Specs:
Name
Exped Synmat UL 7 S / UL 7 M
Weight
399 g / 463 g
Packed Dimensions* L x Diameter (cm)
24 x 9.5 / 24 x 10.5
Inflated Dimensions L x W x Thickness (cm)
162.5 x 53 x 7 / 183 x 53 x 7
Temperature
25 F (-3.8 C)
*Dimensions will vary based on how tightly you roll the pad. This is just an example of what you could expect when you pack the pad.
Disclaimer: All opinions about any products mentioned in this article are my own. I have not received any compensation for this review. This review is for informational purposes only.
There are many things I enjoy about bicycle touring. I love the fresh air, the beautiful scenery, and the grand vistas. There is definitely one thing I DO NOT like: bugs. A perk of living in southern California is the lack of bugs (sure, there are bugs here. But not like in other places. Trust me.) On our tours, we’ve had to deal with mosquitos, ticks, chiggers, mites. I’m like a bug magnet, if there is a bare patch of skin the bugs seem to find it. So how do we handle all the bugs in the world?
One thing we did on the Southern Tier was to treat our clothing and tent with a product called Permethrin. We picked up a few bottles from the sporting goods store, and treat all our camp clothing, plus our socks and tent. The active ingredient is Permethrin, a synthetic insecticide that was developed by the US Army to prevent its soldiers from being bitten while on duty, because of this it has been tested for safety and currently seems to pose no issues. Maybe you’re hesitant about using a “non-natural” product? Well, I have misgivings, too, but if this stuff can keep me from getting bit (or sick) then I’m all for it. This stuff should be sprayed directly onto clothing or gear, but never onto skin. It’s highly toxic to fish and cats, so if you have a cat, keep it away, and it smells very strongly upon initial application, however that fades as it dries.
In addition to treating our clothing, we also like to bring along a few repellent products. Two sprays, one cream. One spray is Repel Natural, a more natural product, with the active ingredient citronella (the stuff in those candles people burn to keep mosquitos away). If that’s not working, we break out the Ben’s 30% Deet spray. And if we’re still having an issue, Ultrathon Insect Repellent cream by 3M has 34% Deet. Now, I hesitate to use Deet, so we try to be sparing with it and only use it as a last resort. But, honestly, if the bugs are bad, it’s totally worth it.
We have yet to tour in the rain forest or jungle, so our experiences with bugs has been mild so far. But I’ve heard the sand flies (or no see ums) are pretty bad sometimes in New Zealand, so we’re going prepared. And as we plan grander tours in the future, bug-infested places might be on our list. It’s a good idea to think about it before you’re attacked by a swarm of mosquitos with no place to hide. What are your tricks to avoiding bug bites? Let us know in the comments below!
Update: Now that we’re back from our New Zealand tour (didn’t read the journal? Catch it here!), here are my thoughts about the repellents we used there. We went at a great time of year, just cold enough that the bugs weren’t too terrible. But the sand flies were very annoying at times. We found that using the Repel Natural worked as a quick fix. If we weren’t going to be stopped for very long at a time, like for lunch, we’d spray it on the exposed areas and it worked well enough (especially combined with movement, which seemed to also work well. If you keep moving, the sand flies don’t have a chance to annoy you.). I felt good using it when we didn’t have access to water for washing, as its non-toxic. A few times we were in a sand fly infested area for longer periods of time, and the Deet cream or spray worked very well at keeping the bugs away. We just made sure to keep it away from our faces and wash our hands well if we could.
Disclaimer: I am not an expert and these are only my opinions. Consult a health care provider if you are concerned about any ingredient. I have not been compensated in any way by any of these manufacturers.
I am not a shoe girl. I don’t like going shoe shopping and I don’t have a closet full of shoes. I’m more into having a few pairs of practical shoes that I wear all the time. But, I recently became the proud owner of a third pair of cycling shoes. When I was a kid, all my shoes were cycling shoes. They were simply the shoes I wore when I rode my bike. Now, it’s more complicated.
I have Time ATAC clipless pedals, which are really the pedals with the clips on them, and my shoes need to be clip compatible. My first pair of cycling shoes were Keen Commuter Sandals. I loved them, and I still do. They’re really versatile, easy to clean, and keep my feet from smelling too funky.
When I got a new, fancy bicycle, I wanted a new pair of shoes, and got a pair of mountain bike cycling shoes, Velcro and all. I choose the Black Shimano SH-WM51 Mountain Cycling Shoes because they have a recessed cleat to allow walking around and they are fully enclosed shoes for foot climate control. These shoes ended up being super comfortable, and kept my feet warm on the frigid mornings in the mountains of the Southern Tier. I could add an extra layer of socks, and adjust the shoes to fit snugly. My biggest complaint was the lack of breathability. After a good rainstorm, my socks would be as wet on the inside, from sweat, as the shoes were on the outside.
As we made plans for a New Zealand bicycle tour, I decided to purchase a brand new pair (New bike, new shoes? Maybe there’s a theme). This new pair, Shimano SH-WM34, could be easily mistaken for a pair of hiking shoes. Which is perfect, since we plan to spend a lot of time off the bike on this trip. The shoes lace up, and are pretty comfortable to walk around in. The traction is similar to a hiking shoe, and makes hiking up the hills a breeze. The hiking shoe look helps me blend in with all the other outdoor adventurers for those days off the bike.
Update: And now that we’re back from New Zealand, I’m happy to report on how the SH-WM34 performed. On the bike, the shoe performed exactly as needed, providing a solid platform for pedaling. In addition to cycling, we did plenty of “tramping” off the bike, that is, hiking, and the shoe was very comfortable. There was just enough traction to make me feel secure on the moderate hills we hiked. I wouldn’t do very much advanced hiking, however, as this is a cycling shoe, not a hiking shoe. The inflexibility of the sole takes some getting used to, though, as I’m used to a little bit more flex in my hiking shoes. But overall, I was comfortable on our hikes. In the cool weather, I was able to wear thicker socks, which helped keep my feet warm. When it warmed up, I didn’t like how sweaty my feet got, however, so I wouldn’t recommend these shoes on a tour through hot, humid areas.
What kind of shoes do you wear when you ride? Do you go for comfort or style?
So, what are you going to do while your husband is on his bike ride? Are you going to drive the car for him and carry his gear?
This question was recently asked of me, by a stranger, who had just learned that we are planning a long distance bicycle tour. Even though we said “we,” the guy didn’t seem to understand that we were doing it together. When I explained that I would be riding my bicycle alongside my husband, carrying gear and camping out with him, he was stunned. Apparently his wife would never agree to even try something like that.
My wife would never do something like this with me.
Part of a conversation I had with a man while in the middle of a particularly tough obstacle course race. My response to him: You didn’t marry the right woman. Some of my favorite memories have happened while my husband and I work as a team to complete the obstacles in the races.
When my husband and I got married, I had no idea where our marriage would take us. Did I think we would become long distance bicycle tourists? Not really. And I had never even heard of obstacle course races. But I did know that we were both adventurous, and willing to try new things. And I knew we liked to do things together. And once we tried this whole bicycle touring thing, we loved it. Yes, we have separate hobbies. But there are many activities that we enjoy doing together.
I think the key is finding something that you both like to do, that requires cooperation. Whether we are riding our bikes, setting up camp, or finishing a race, my husband and I are a team. We rely on each other to meet our goals. We have become closer as a couple, and learned to appreciate each other.
What kinds of activities do you enjoy with your significant other? Give us some ideas in the comments below!
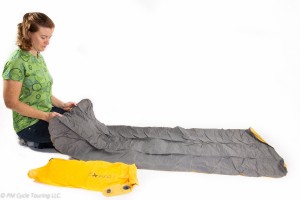
Pam and I love cycle touring, and if you check out our gear list you know that we hate lugging extra weight. Our previous sleeping bags collectively were weighing in at around 4 lbs (1.8kg) each. Considering that our total gear weight was about 50 lbs, the bags accounted for almost 10% of the weight we were carrying. After some research I decided to try to reduce that weight and try out the Zpacks ultralight sleeping bags.
Z-packs sleeping bag
About the company: Zpacks is the brain child of an avid ultralightweight hiker, and they manufacture most of their products in Florida and are currently some of the leaders in the ultralight hiking market. Since Pam and I try to support people who provide good products and pay their employees well so it is easy to support Zpacks.
Spec: Zpacks sleeping bags are available in four temperature varieties: 40F, 30F, 20F, 10F. They come in 5 different sizes based on your height, and 2 widths based on your girth. Either 900 fill or 850 fill water resistant down is available. The outer and inner fabrics are Pertex GL, a durable, lightweight material.
Z-pack sleeping bag and xped sleeping pad
About the bag: The fabric feels similar to other tech materials: smooth, slippery, and thin. This doesn’t bother me at all. Most of the time I do use a silk liner, but that is mainly to keep the bag clean or to sleep on top of the bag during warm nights. The bags are designed to be slept in with the zipper on the ground underneath your back to reduce drafts. While the zipper is small and doesn’t bother me laying on it, I tend to toss and turn all night so I added an optional draft tube to prevent drafts as I do my nightly roll overs.
The bag is shaped so that it is larger at the top of the bag and tapers down to a small foot area. The whole idea is to minimize the space inside the bag which you have to heat up; this will keep you warmer with less extra material and therefore less extra weight. The zipper extends to about ¾ down the length of the bag which is plenty for climbing in and out.
One of the most amazing things about this sleeping bag is how much you can compress it down. Fully compressed it is downright tiny and as soon as you pull it out of the bag it starts inflating back up to full size. With a little fluffing it is perfect every night. The second amazing thing is Matt’s bag only weighs ONE pound. A one pound, 20F rated bag has kept Matt plenty warm even on a 15F night.
Durability: Initially I was very concerned about how the bag would hold up to continuous use on a bicycle tour. In hindsight this is probably a silly worry as a bicycle tour is not any more taxing on equipment than 3 months of hiking which is what this bag was designed for. Through 45 days of bicycle touring on the southern tier, this bag performed like a champ, and continues to perform as expected.
Overview: The Zpacks sleeping bag comes highly recommended by me. The weight and comfort are amazing. This is a great place to spend a little extra money to ensure that you get a warm comfortable night’s sleep and slash a few pounds that you have to carry around on a tour.
Disclaimer: This review contains my personal opinions. I have not received any compensation for this review. This review is for informational purposes only.
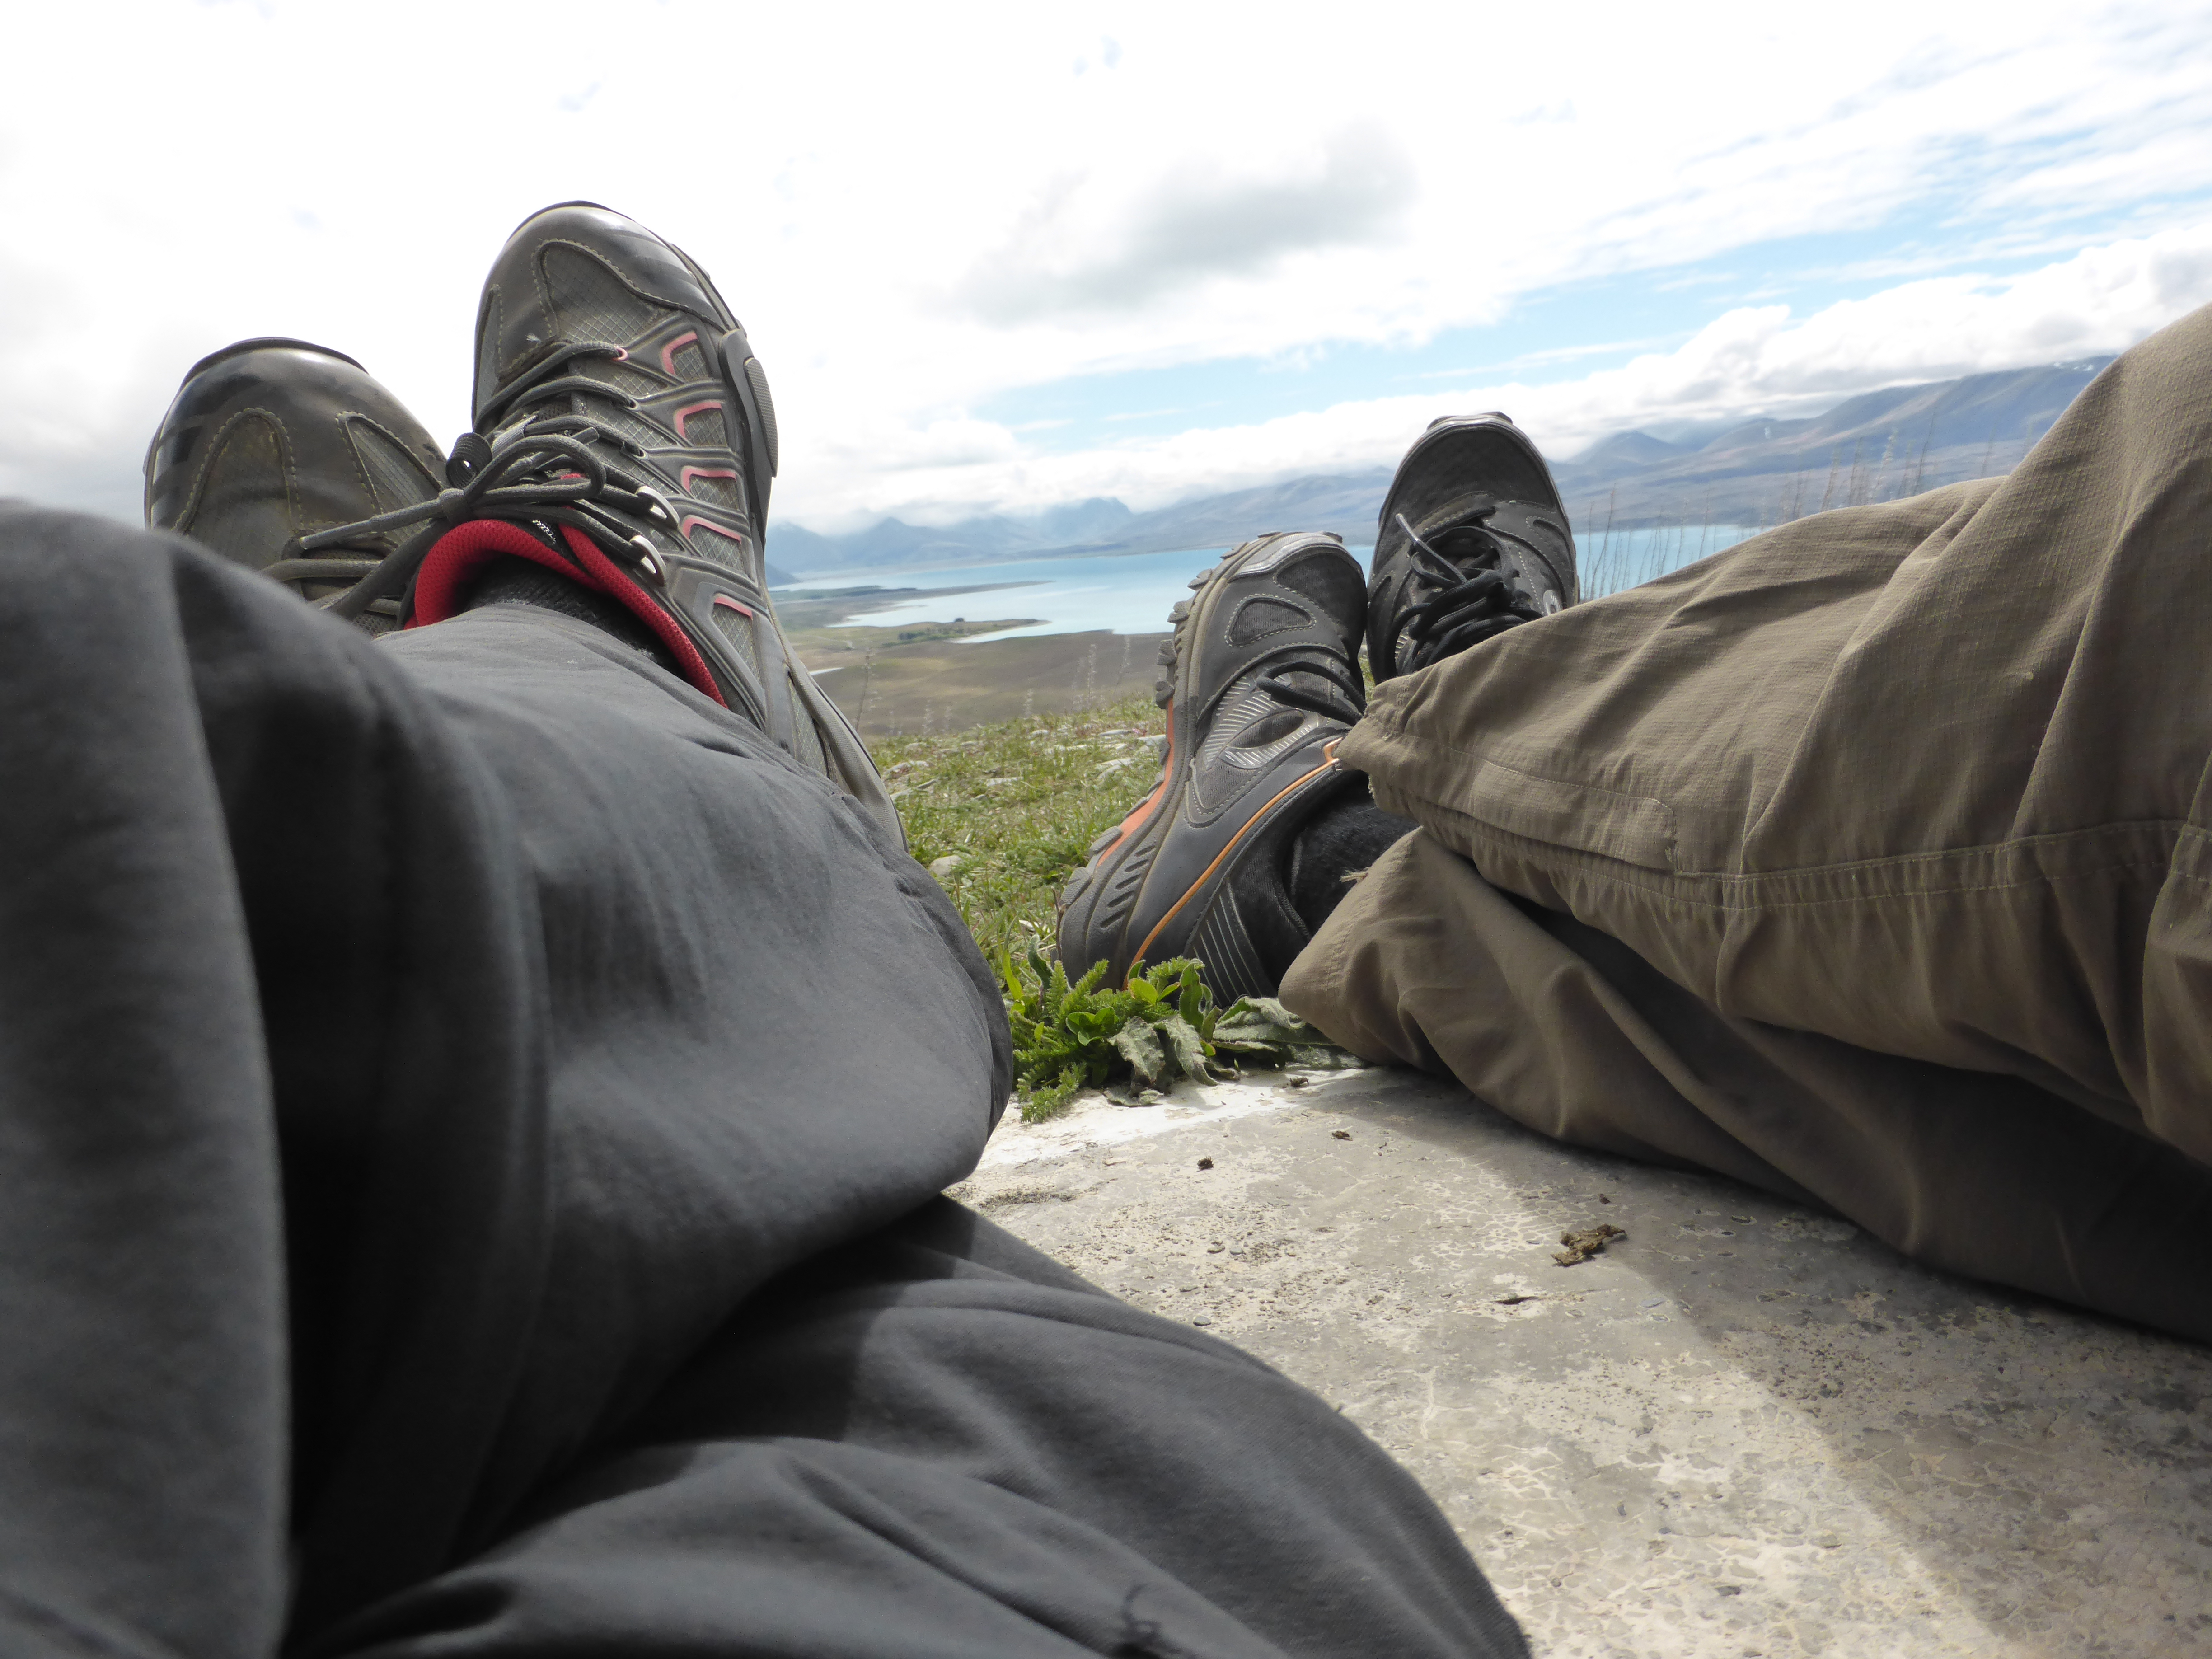
I’m a huge Lord of the Rings fan. I’ve read the series at least once a year for the last 15 years. Of course I was thrilled when the movies were releases, and I was very impressed with the cinematography. When my husband first mentioned New Zealand as a possible bicycle tour, my first thought was: I’m going to get to see Middle Earth.
We’re focusing our tour on the south island, which means we will miss out on Hobbiton and Mt. Doom, which are on the north island. However, there are many iconic vistas and scenes from the movies that we will have the pleasure of witnessing. This list is not all inclusive; I’m sure there are more places to see. But here’re the places I’m most excited to see on our tour of New Zealand.
South Island:
Canterbury:
Twizel-Fields of Pelennor, where the epic battle took place between orcs and Rohan/Gondor
Potts Station-Edoras and Meduseld (Mount Sunday)
Nelson/Marlborough:
Mount Owen – The Fellowship escape Moria, sans Gandalf
Otago:
Cardrona Valley/ Mount Cardrona- Panorama View of Middle Earth
Arrowtown (Arrow River) Skipper’s Canyon- Ford of Bruinen, where Frodo crosses the river with the elf, the wraiths in hot pursuit, and the water rises up to drown the wraiths.
Glenorchy-Misty Mountains
Kawaru River, Otago- The Argonath on the Anduin River (computer generated statues)
Cadrona Hotel – Prancing Pony (Between Queenstown and Wanaka)
Poolburn Dam – Rohan (one of Jackson’s favorite filming location)
Sutton Salt Lake near Middlemarch- ambush scenes in Rohan
Southland:
Kepler Mire, Te Anau – the Dead Marshes
North Mavora Lake – The lake at the end of the Anduin River
South Mavora Lake- The Fellowship leaves Lothlorien
West Coast:
Mount Gunn, near Franz Josef Glacier- Warning beacons from Gondor to Rohan


 What do you think? What are you going to do with you Valentine this holiday?