Life and Hills-Metaphors for biking and life

Why are there so many references to hills in our language?

  • An uphill battle
  • It’s all downhill from here.
  • Over the hill.
  • King of the hill.
  • Making a mountain out of a mole hill.

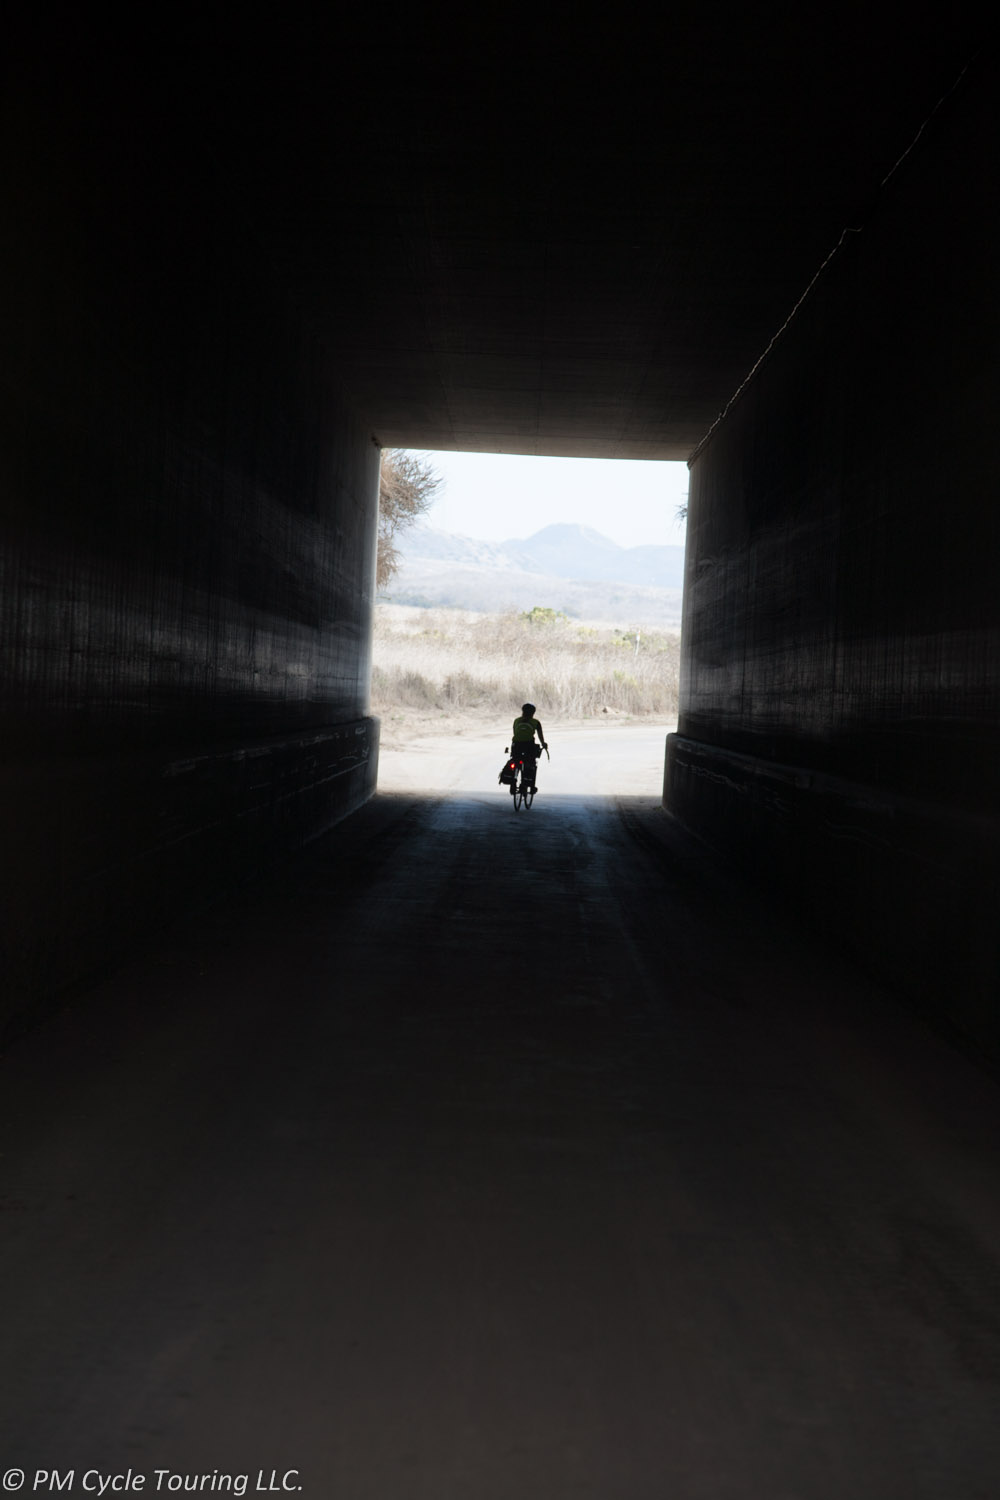
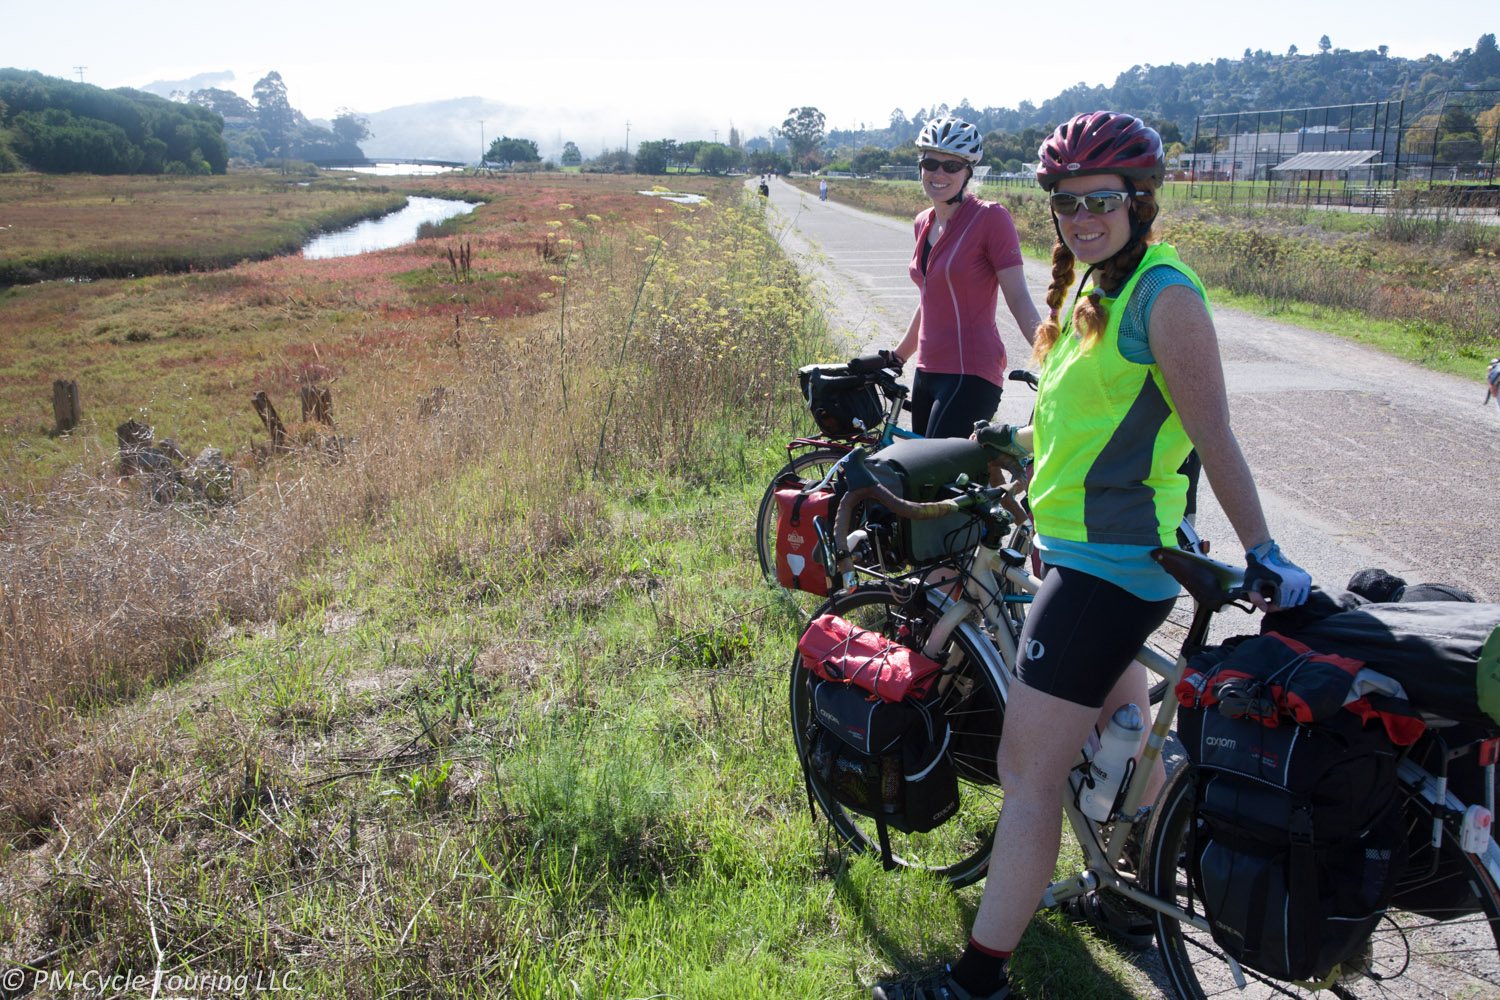
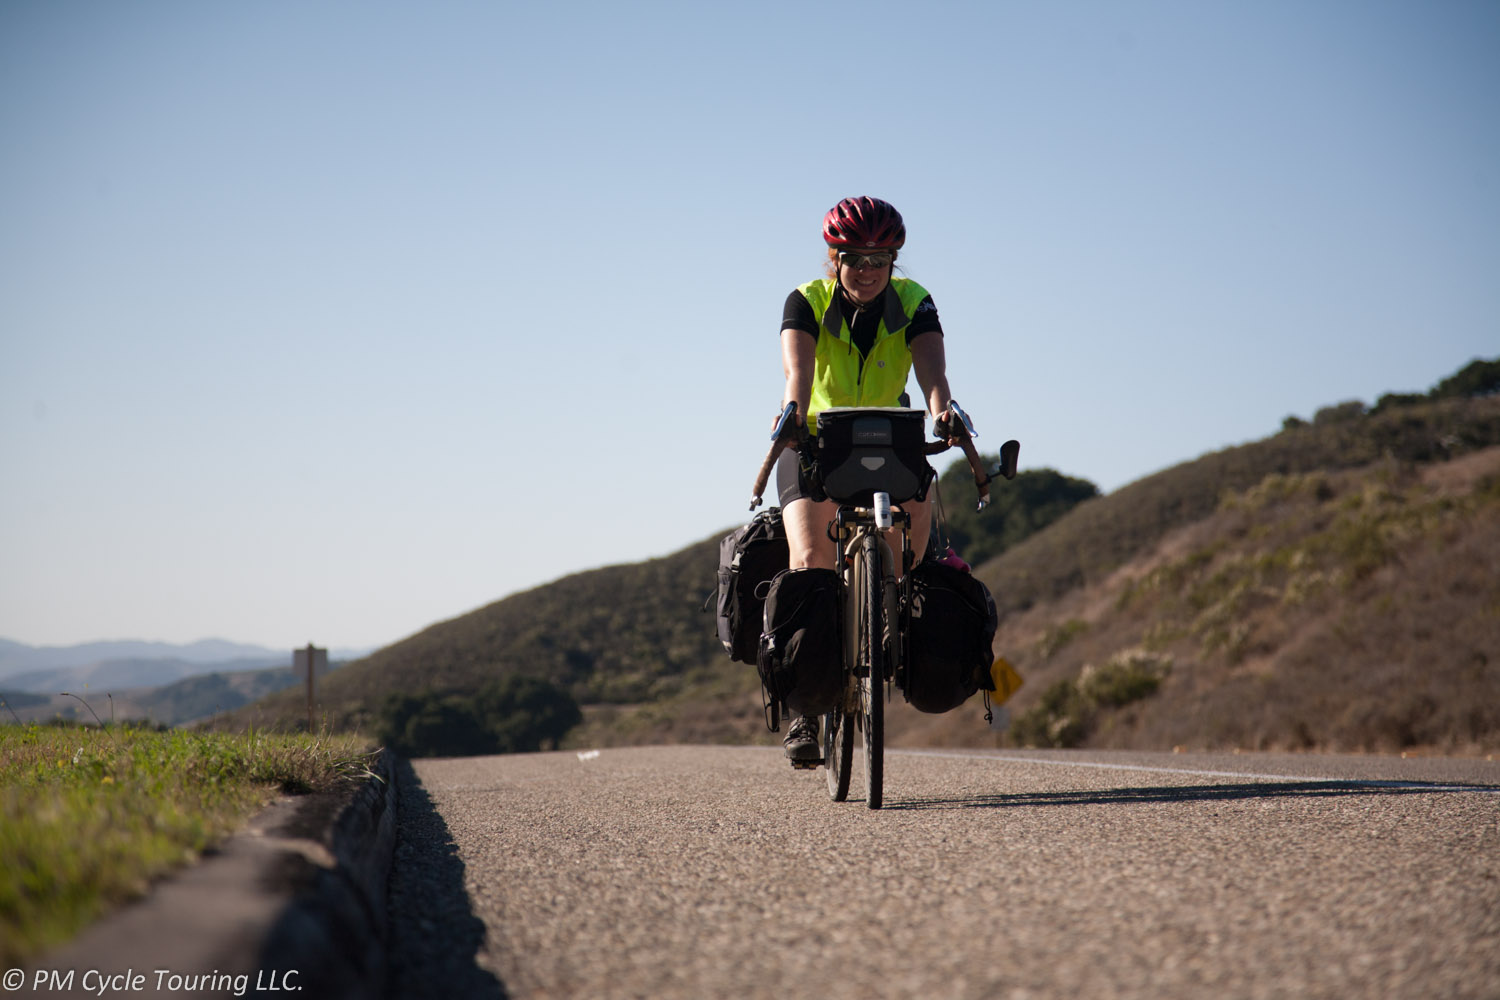
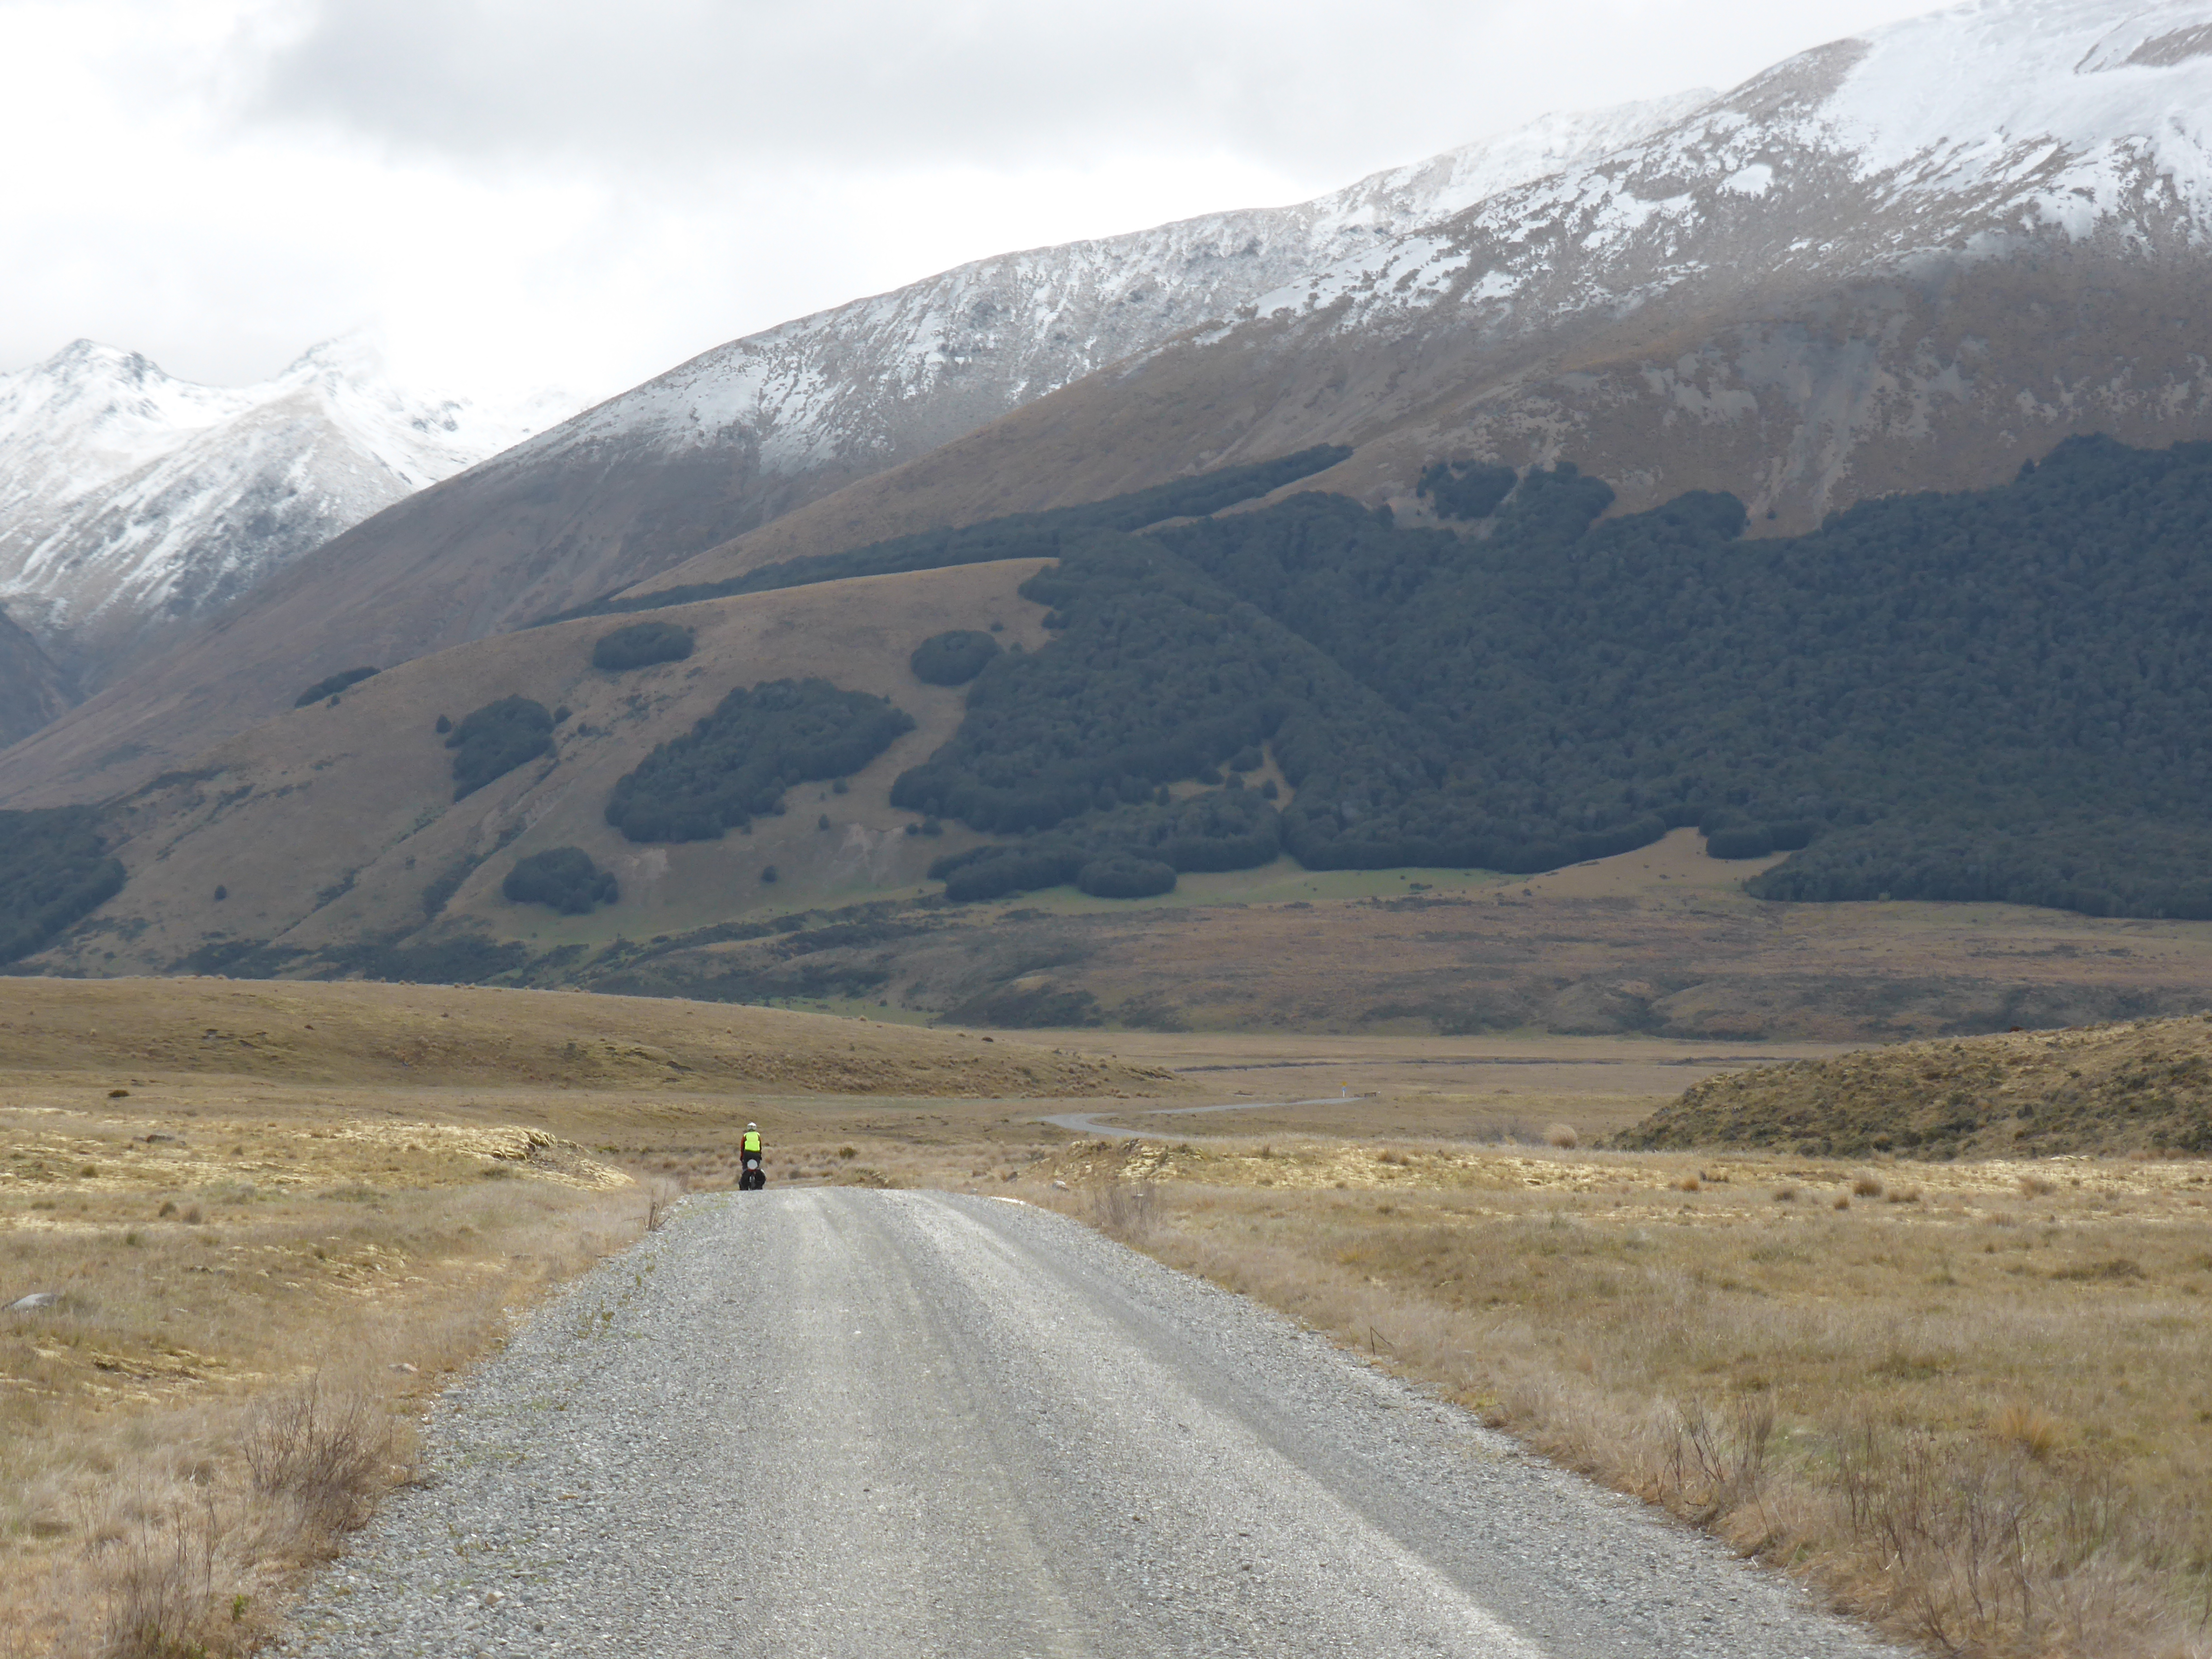
I think hills play a big part of our psyche as humans because they’re so visual. Starting as a little thing in the horizon, it grows and grows, then when you are standing at the base of the hill looking up you finally begin to understand what you are about to undertake. We’ve all climbed a challenging hill, felt the burn in our legs, lungs screaming for air. And then, eventually, the top is reached. With a sigh of relief, you catch your breath, and continue down the other side. Trust me, after our most recent tour in New Zealand, I have an even better appreciation for the incredible feeling of reaching the top of a hill.

But it’s not just climbing a hill on a bicycle. The same goes for any challenge in life that I face. I see it, and I’m a little nervous. Am I ready? Then I face it. I begin, and it may be hard, for a time. I might even want to stop. And sometimes I do. I take a little break, regroup, and collect myself. I might climb off the bike and walk up. But, I keep going, and then, I find myself at the “top,” where I can catch my breath and appreciate all the hard work I’ve just done. With a bit of pride, I continue on until the next challenge, the next hill. And this time, I’m a little stronger, the climb a little easier.

In his book “Spartan Up!” Joe De Sena, the creator of the Spartan Obstacle Course Races describes it perfectly: “To move freely, to breathe fully and deeply, and to have the ability to surmount physical obstacles is a privilege.” Just because something looks hard doesn’t mean it’s not worth doing. In fact, it’s really just the opposite. Every “hill” that comes our way is an opportunity for growth.

As Nelson Mandela said, “After climbing a great hill, one only finds that there are many more hills to climb.” But it all starts with that first one. The next time your route goes across a great hill don’t skip it, don’t go around, look at that hill and realize that hill is exactly why you are out here touring, to see the amazing world in ways that most people don’t, to feel what it takes for you to view the world powered by your own muscles, to conquer anything that mother nature can put in front of you. You can do it.

Eat to Ride, Don’t Ride to Eat

A common question that I get asked when I tell people I’ve ridden a bicycle across country is, “How much do you have to eat?” This is a great question. The answer is complicated: it depends. On our first tour, my husband and I definitely didn’t eat as much as we needed to in the beginning. We struggled with flagging energy levels by mid-afternoon.

At the two week mark, we assessed how much we were eating, versus how much energy we were using every day, and determined that we were eating about half as much as we needed. No wonder we were so exhausted! Once we figured it out, and started eating more and more often, things got a ton better.

I know a lot of people who exercise just so they can eat whatever they want. I can totally understand that. And it is really tempting when you’re cycling 7+ hours a day to go straight to the junk food aisle or the fast food restaurant. Cheap, easy calories are very appealing.

But here’s where I would caution you.  You’re not riding to eat. You’re eating to ride. That food is your fuel. Sometimes you put the low-grade, cheap gas into your car because you don’t have a choice. But if you want your car to perform its best, you usually want to give it the good stuff. The same goes with your body. Yes, it’s about calories and energy. But it’s also about nutrition and vitamins and minerals. Taking a multivitamin, although probably not a bad idea, won’t make up for eating a ton of junk on your tour.

Bottom line is, eat as much as you need to. Listen to your body, and find out what that means for you. By all means, enjoy yourself while you’re out there. Maybe even give yourself a reward for a particularly difficult ride. There is nothing wrong with that. Just don’t compromise your health by eating junk all the time. Eat some fruit and vegetables every once in a while. Buy some whole grain bread instead of bleach cheap white bread. Your body will thank you.

NewZealand.OnA.Bike

Hello all! As you may have noticed the stream of updates around here is going to slow down a little. We are heading off on a bicycle tour around the Southern Island of New Zealand! As part of that we are going to be journaling on a different site at http://NewZealand.OnA.Bike/ or you can click here.

Yes that is the web address, no www or .com required. Feel free to follow along and look forward to some articles, and lots of pictures, from our New Zealand trip in the near future.

Bicycle Helmets for Women

Ok, I don’t know about you, but it drives me crazy when gear manufacturers try to tap into the female market by changing nothing about the product except the color. Like making something in a pink color suddenly makes me want to buy it. No thank you! There are some differences between men and women, and color preference (while maybe a somewhat important consideration) is not the only one. I’ve been thinking about bicycle helmets lately, and one key difference between men and women could have a big impact on whether a helmet is perfect, or unusable.

Hair. Yep that’s right, hair! Bet you didn’t see that one coming, did you? I’ll tell you why hair is such an important consideration when choosing a helmet. My hair is of medium length right now. That means there are about 5 different ways I can style my hair before I put on my helmet. Each hairstyle adds a different amount of bulk to my head. Which in reality means my head could be a different shape each time I ride. In order for a helmet to do its job, it needs to fit snugly. If the helmet has no easy way to adjust the fit, it’s pretty much useless in my book. It needs to fit right, every time.

At the moment, I’m riding with a Lazer Genesis helmet. It has a knob on the back of the helmet that I can turn to tighten (or loosen) as needed. This ensures a good fit every time, regardless of how I decide to do my hair. (Within reason, ladies. Obviously a pony tail right on the top of the head is not a good idea when you’re putting on a helmet.) So, the next time you’re in the market for a new helmet, don’t get drawn in by style. Make sure the helmet has everything you’re looking for. And don’t forget to look for those micro-adjustment knobs. You won’t be sorry.


Disclaimer: This review contains my personal opinions. I have not received any compensation for this review. This review is for informational purposes only.

Maintaining Fitness While on a Long Bicycle Tour

Ok, I know what you’re thinking: Isn’t cycling enough physical activity? Why would you need to maintain fitness while on tour? Well, let’s think about it. Bicycling is a very leg dominant activity. Sure, you need a strong core to hold yourself up. And the calves of bicyclists are notoriously huge. But, generally speaking, the majority of your power for cycling is going to come from your upper legs. A bicycle is a very efficient machine, and over time, you’ll get more efficient at riding. That means you can actually lose some of your fitness over the course of a long tour, if you’re not careful.

So what do you do about it? I have some ideas. I am planning for an upcoming tour, and I want to incorporate some extra-curricular exercises to help maintain my strength and endurance, for when I get off the bicycle. Here’s what I’m thinking: Each day incorporate some or all of these into a post-ride workout. Nothing too strenuous, and followed by some good yoga stretching poses, such as downward dog and pigeon.

  • Core
    • Planks
    • Wall Walks
  • Upper Body
    • Handstands and Handstand Pushups
    • Pushups
  • Lower Body
    • Squats
  • Cardio
    • Running
  • Total Body
    • Burpees

It’s convenient to focus on bicycling while on tour. But let’s not neglect the other aspects of health and well-being. By adding some of these other activities in, we’ll be more ready to tackle any challenge that comes our way. What kinds of exercises do you incorporate into your daily lives? What about when you’re on tour? Let us know in the comments below!

Disclaimer: I am not a doctor, nor an exercise expert. This post is intended for information only and contains my opinions. Please seek medical advice before beginning an exercise regimen.

Santini Women’s Fiery Short Sleeve Jersey Review

I recently purchased a Santini Fiery cycling jersey (size Small), and wanted to share my experience and thoughts about this jersey. The manufacture Santini designs and produces their clothing in Italy. The description provided for this particular model describes it as a “short sleeve jersey for women in a soft fabric with Resistex Bioceramic thread”. The fancy Resistex Bioceramic thread claims to reflect far infrared rays generated from your body back to your body to aid with micro-circulation. With that in mind here is my take on the jersey.

A woman wearing a short sleeve, white, full zippered cycling jersey
Pam wearing a Santini Fiery S/S Jersey

Starting with the positives: the jersey is very well designed with stylish stitching and details. The fabric used over most of jersey feels amazing, it is very smooth and pleasant on the skin. On the back and near the underarms are small sections of micromesh fabric which breathes very well. All seams are smooth, with no stitches rubbing. Overall the jersey looks and feels very high-end. The back pockets are large enough to fit my cell phone and some snacks with no problem.

A woman wearing a short sleeved, white cycling jersey, the back side.
Pam wearing a Santini Fiery S/S Jersey

The jersey fit very well in almost every respect. However, the arm holes are too small. I have average-sized biceps, measuring 12 inches. The jersey sleeves are only 9 inches in circumference. The elastic cuts off the circulation in my arms and is uncomfortably tight.

2014-09-07 0811 Santini Fiery Jersey
Santini Fiery S/S cycling jersey
A close-up of the sleeve of a short sleeved Santini cycling jersey
Santini Fiery S/S Jersey

According to the sizing guide on the website, I ordered the appropriate size jersey for the chest measurement (33.5 inches). Unfortunately nowhere does Santini mention that the sleeves are sized so small. I would suggest that you either order another size up (I am unsure of the increase in the sleeve measurement for a medium) or find another jersey.

Recommendation: This jersey is a stylish, high quality garment. Verify that the sleeves will not be too tight before ordering.

Disclaimer: I have not received any compensation for this review. This review is for informational purposes only. I have not been in contact with the manufacturer. However, if they were to send me a size Medium jersey to try, I wouldn’t turn it down!

Hiker/Biker Campsite: Refugio State Beach, California

The Hiker/Biker (HB) site in Refugio State Beach is one of our favorite HB sites in the United States and is better than the nearby El Capitan State Beach sites. This site has it all, bathrooms, views, nice camping surfaces, and the sound of the waves crashing. However this campground is rather remote, there are no stores or food once you get out of Lompoc if heading southbound or Goleta if heading northbound. Plan accordingly.

Cost: $10 per person per night.

Getting To Refugio: Coming from the North or South on US101 take exit #120 Refugio Rd. Turn towards the ocean and follow the signs to the entrance to Refugio State Beach. If manned the ranger station will take your payment, otherwise immediately past the ranger station is an automated payment station.

HB Site: After entering the park take the first left and first right. Follow the loop around towards the beach and the HB sites will be on the left side of the road near the playground. The site consists of mostly flat grassy areas with some trees with a standard wooden bench.

Amenities: Bathrooms including warm showers (tokens required) are in sight of the HB sites. The beach is across the road, positon your tent right and you will get to see the sunset over the beach. There is a small camp store open on the weekends with extremely limited supplies; no grocery stores are within a 10 mile radius.

Off Bike Activities: Number one on this list is the beach. Be aware that natural tar deposits are present and walking on the sand will likely result in tar spots on the shoes/feet. However you can walk a reasonable distance enjoying the little caves and coves; the coast here is beautiful and worth exploring. Check the tide tables for high tide, and stay away from the crumbling bluffs.

There is a bike path heading east from Refugio toward El Capitan State Beach. The path used to extend all the way to El Capitan, however sections of it have been closed due to storm damage, so it is no longer possible to travel the entire way. Still, the bluff-top path gives amazing views of the ocean, and is worth a little hike or bike.

RefugioThe bottom line is: you’ll have a great stay at Refugio State Beach.

Exped Air Pillow M Review

Pillows can be considered a luxury for short tours, but for more than a night or two you probably want something to lay your head on. At 3 ounces the Exped Air Pillow M is lightweight (also available in a 2 ounce Ultralight version). Because it is an inflatable pillow it packs down extremely small, smaller than a can of soda.2014-03-03 1718 ExpedPillow

The pillow has two valves similar to all other Exped products. One for inflation which has a flap to prevent air leaking out between breaths and the other to allow for deflation. Both of these have a hole approximately the size of a quarter to allow for rapid inflation and deflation.2014-03-03 1713 ExpedPillow

To inflate it we use our Schnozzle Bag which takes about 15 seconds to completely fill the pillow. If you elect to fill it manually it takes between 4 and 6 breaths. Inflation pressure can be tweaked by keeping the inflate valve cover open and pressing on the flap to release small amounts of air. Deflation is nearly instant due to the large opening uncovered when you open the deflate cap.

The Pillow is constructed of polyester; this material feels somewhat like a very fine tightly woven nylon material. It doesn’t stick to skin like plastic, but Matt prefers wrapping his down vest around it for increased comfort; Pam prefers to just sleep on it bare. There are two small loops of extra material designed to allow you to use some clips to hold the pillow in place, however we never utilized them.2014-03-03 1715 ExpedPillow

Overall we were very pleased with these pillows and used them for our entire Southern Tier tour. There were no problems on the tour and they continue to work well; we plan to continue to use them for all our future tours. We highly recommend this pillow.

 Name  EXPED Air Pillow M
 Weight  Pillow: 75 grams
Packsack: 5 grams
 Packed Dimensions  5 in x 2 in
 Deflated Dimensions  38 cm x 27 cm
 Inflated Dimensions  38 cm x 27 cm x 11 cm
 Approximate Cost  MSRP: $39.00
 Other Similar Products  EXPED Air Pillow UL

Disclaimer: This review contains my personal opinions. I have not received any compensation for this review. This review is for informational purposes only.

Ultralight Bicycle Touring – Part Two

In my previous article I discussed some ideas for reducing your weight and embarking on the ultralight bicycle touring lifestyle. This time I am going to talk about some specific pieces of equipment that weren’t mentioned in the last article. As always our current personal tour packing list is available for you to reference.

Dry Sacks: These are terrific for keeping your clothes dry and organized. You will probably even see the compression version of these with straps for really cranking down the size. However you need to be aware of the weight penalty of these compression straps; I found that each bag weighed 100grams more than a lightweight, roll-tight dry sack. Additionally, with the compression sacks you may be inclined to take more clothing and thus more weight. For ultra-light it may be beneficial to actually have less room, which will force you to take less clothes. With Pam and me carrying 4 sacks, getting rid of the compression dry sacks saved almost a pound of weight!

Sleeping Bags: When shopping for a sleeping bag keep weight in mind, as weight can vary from 1 to 7 pounds. The lightest weight bags will be more expensive, but remember that you have to pay for the food to fill the calorie requirement of pushing the weight of the bag around the world. Thus, it may pay for itself to get a lighter weight bag. Once you get the bag make sure you care for it properly and it should last you for many years.

Camp Stoves: This is one area that you don’t necessarily have to spend an arm and a leg for some improvements. If you search the internet for a soda can alcohol stove you will find the cheapest lightest stove that you can use. If the soda can stove is a little too adventurous for your taste take a look the gas stoves which screw directly on to the top of a canister or don’t have much structure to them. Some examples are this generic stove top or if you prefer a name brand the MSR Whisperlite is a popular option. Carrying around a giant Coleman stove is just silly with all the options available these days.

Tent: Very similar to sleeping bags, the cheapest will not be the lightest. For less than $200 you can get the Kelty Grand Mesa 2 Backpacking 2 Person Tent which weighs in at ~5lbs. If you can spend a bit more we use the Big Agnes Copper Spur UL 2 Person Tent (2014) which weighs in at ~3lbs but has 2 doors and vestibules which is very nice for partners. Be mindful that a light weight tent will be more fragile that a heavy tent, but we have had no problems using the same tent for multiple tours.

By reducing the weight on our bicycles we have more energy during the day and put less stress on our bodies. If you are at all like us you probably aren’t doing your training rides fully loaded. In fact, before our most recent tour we didn’t even do a fully loaded ride until right before we left. When you strap 40lbs of gear on your bicycle and try going up those hills it may come as a rude awakening how much effort it takes to keep going. At some point you may decide that ultralight is the way to go. If you have any tips or questions, leave them in the comments below.

Ultralight Bicycle Touring – Part One

Touring is blissfully simple: you hop on your bicycle and pedal from where you are to some new place. Life doesn’t get more straightforward. However, I often see people struggling with way too much gear on their bikes. In fact, for my first tour I suffered myself. I inappropriately carried heavy books, a pasta strainer, an extra Camelback, and a few more things which I had to send back home.

Since that first tour I have become a believer in ultralight bicycle touring. With modern technology and modern industry there are now extremely lightweight products that perform with enough durability for use on even the longest of tours. On our last 2,500 mile tour of the Southern Tier my wife and I managed to pack 41lbs of gear between the two of us including the weight of the panniers (click here for our packing list). When planning to shed weight there are a few high return areas: unneeded equipment, sleeping bags, camp stove, and tent, as well as substituting single-use items with multiple-use items.

Unneeded Equipment: First and foremost lay out all of your items and ask yourself if you need each one. The chances are good that there are several things you think will be useful but after consideration you may change your mind. Remember that you will have to carry these items for hundreds (or thousands) of miles. A few common offenders are:

  • Hammers for tent stakes
    • Trust me. There will almost always be a rock or tree branch that you can use to drive your stakes into the ground. If nothing is available at the campsite you can always tie a string from the tent to a bicycle. If you’re in a campground, a fellow camper will probably let you borrow his.
  • Excessive amounts of clothing
    • Not only does excess clothing add weight to your total, it adds bulk to the packs. You can easily get by with 2-3 pairs of shorts and shirts for an extended tour. Rinse in the sink or shower as needed, and hang in a mesh bag off the panniers while riding to dry. There’s a fine line to walk in this area. See our packing list for specifics on what we like to bring.
  • Lanterns or extra-large flashlights
    • A simple head lamp placed next to a clear plastic water bottle creates an excellent camp light. The head lamp will be light weight and usually satisfies any laws for riding at night. If you are counting grams lithium batteries will be lighter and perform better in cold temperatures.

Multiple Uses: Analyze your equipment that you may be able to get two (or three) uses out of. For example our stove has a plastic insert to prevent the non-stick coating from getting scratched. That insert makes for a handy bowl to eat out of: no need to carry an extra one. Our cycling rain jackets work as camp jackets and wind breakers. Much of our clothing can be used either on or off the bike.

Finally, remember that fancy/expensive is not always the lightest weight nor the most functional. In the next article I will dive in to some specific pieces of equipment that I have found substantial weight savings, including dry sacks, sleeping bags, and tents. If you have any ultra-light bicycle touring tips or tricks let me know in the comments below.