Ultralight Bicycle Touring – Part Two

In my previous article I discussed some ideas for reducing your weight and embarking on the ultralight bicycle touring lifestyle. This time I am going to talk about some specific pieces of equipment that weren’t mentioned in the last article. As always our current personal tour packing list is available for you to reference.

Dry Sacks: These are terrific for keeping your clothes dry and organized. You will probably even see the compression version of these with straps for really cranking down the size. However you need to be aware of the weight penalty of these compression straps; I found that each bag weighed 100grams more than a lightweight, roll-tight dry sack. Additionally, with the compression sacks you may be inclined to take more clothing and thus more weight. For ultra-light it may be beneficial to actually have less room, which will force you to take less clothes. With Pam and me carrying 4 sacks, getting rid of the compression dry sacks saved almost a pound of weight!

Sleeping Bags: When shopping for a sleeping bag keep weight in mind, as weight can vary from 1 to 7 pounds. The lightest weight bags will be more expensive, but remember that you have to pay for the food to fill the calorie requirement of pushing the weight of the bag around the world. Thus, it may pay for itself to get a lighter weight bag. Once you get the bag make sure you care for it properly and it should last you for many years.

Camp Stoves: This is one area that you don’t necessarily have to spend an arm and a leg for some improvements. If you search the internet for a soda can alcohol stove you will find the cheapest lightest stove that you can use. If the soda can stove is a little too adventurous for your taste take a look the gas stoves which screw directly on to the top of a canister or don’t have much structure to them. Some examples are this generic stove top or if you prefer a name brand the MSR Whisperlite is a popular option. Carrying around a giant Coleman stove is just silly with all the options available these days.

Tent: Very similar to sleeping bags, the cheapest will not be the lightest. For less than $200 you can get the Kelty Grand Mesa 2 Backpacking 2 Person Tent which weighs in at ~5lbs. If you can spend a bit more we use the Big Agnes Copper Spur UL 2 Person Tent (2014) which weighs in at ~3lbs but has 2 doors and vestibules which is very nice for partners. Be mindful that a light weight tent will be more fragile that a heavy tent, but we have had no problems using the same tent for multiple tours.

By reducing the weight on our bicycles we have more energy during the day and put less stress on our bodies. If you are at all like us you probably aren’t doing your training rides fully loaded. In fact, before our most recent tour we didn’t even do a fully loaded ride until right before we left. When you strap 40lbs of gear on your bicycle and try going up those hills it may come as a rude awakening how much effort it takes to keep going. At some point you may decide that ultralight is the way to go. If you have any tips or questions, leave them in the comments below.
Ultralight Bicycle Touring – Part One

Touring is blissfully simple: you hop on your bicycle and pedal from where you are to some new place. Life doesn’t get more straightforward. However, I often see people struggling with way too much gear on their bikes. In fact, for my first tour I suffered myself. I inappropriately carried heavy books, a pasta strainer, an extra Camelback, and a few more things which I had to send back home.

Since that first tour I have become a believer in ultralight bicycle touring. With modern technology and modern industry there are now extremely lightweight products that perform with enough durability for use on even the longest of tours. On our last 2,500 mile tour of the Southern Tier my wife and I managed to pack 41lbs of gear between the two of us including the weight of the panniers (click here for our packing list). When planning to shed weight there are a few high return areas: unneeded equipment, sleeping bags, camp stove, and tent, as well as substituting single-use items with multiple-use items.

Unneeded Equipment: First and foremost lay out all of your items and ask yourself if you need each one. The chances are good that there are several things you think will be useful but after consideration you may change your mind. Remember that you will have to carry these items for hundreds (or thousands) of miles. A few common offenders are:

  • Hammers for tent stakes
    • Trust me. There will almost always be a rock or tree branch that you can use to drive your stakes into the ground. If nothing is available at the campsite you can always tie a string from the tent to a bicycle. If you’re in a campground, a fellow camper will probably let you borrow his.
  • Excessive amounts of clothing
    • Not only does excess clothing add weight to your total, it adds bulk to the packs. You can easily get by with 2-3 pairs of shorts and shirts for an extended tour. Rinse in the sink or shower as needed, and hang in a mesh bag off the panniers while riding to dry. There’s a fine line to walk in this area. See our packing list for specifics on what we like to bring.
  • Lanterns or extra-large flashlights
    • A simple head lamp placed next to a clear plastic water bottle creates an excellent camp light. The head lamp will be light weight and usually satisfies any laws for riding at night. If you are counting grams lithium batteries will be lighter and perform better in cold temperatures.

Multiple Uses: Analyze your equipment that you may be able to get two (or three) uses out of. For example our stove has a plastic insert to prevent the non-stick coating from getting scratched. That insert makes for a handy bowl to eat out of: no need to carry an extra one. Our cycling rain jackets work as camp jackets and wind breakers. Much of our clothing can be used either on or off the bike.

Finally, remember that fancy/expensive is not always the lightest weight nor the most functional. In the next article I will dive in to some specific pieces of equipment that I have found substantial weight savings, including dry sacks, sleeping bags, and tents. If you have any ultra-light bicycle touring tips or tricks let me know in the comments below.
What is for Lunch?

We’ve talked about breakfast, but now let’s talk about the second most important meal of the day: Lunch. (P.S. When you’re touring, all meals are important.) While breakfast and dinner are usually eaten in camp, bicycle tourists typically eat lunch “on-the-go”. A good lunch can take you right past that afternoon slump and help you finish your day’s ride strong.

Obviously, the sky’s the limit when it comes to what you can eat for lunch. For us, we prefer simple and easy lunches. I do, however, get tired of eating the same thing every day, so I like to switch it up as well (Matt would eat the same thing all tour if I let him). Here’s a list of our favorite bicycle touring lunches:

Peanut butter and jelly sandwiches. The old standby. Every kid’s favorite meal is definitely appropriate for a bicycle tourist. The protein/fat from the peanut butter and the sugar from the jelly restores energy reserves from the morning and helps energize you for the afternoon’s ride. Peanut butter jars are heavy, so we like to buy the small plastic ones (they also take up less space). We end up buying peanut butter more often, but that’s ok with us. Jelly, surprisingly enough, keeps for a long time without refrigeration. We like to buy the smallest jars we can find, which last us a couple days. If it smells off at all, we toss it, but they are definitely good for at least 3 days. To add variety, we try different kinds of jelly, or grab some honey and add fruit. If adding fruit bananas are especially great, but blackberries are also awesome. We’ve tried every type of bread that grocery stores carry, as well. Our favorite is Ezekial bread, with the sprouted wheat berries. We also like the sandwich thins, which don’t get smooshed as much as regular loaves.

Salami and cheese sandwiches. Getting enough protein while touring is key to keeping energy levels up. Salami is a great option, since it usually comes in small sizes and keeps well without refrigeration. Cheese also lasts longer that I would have thought. We just buy small blocks. Cheese is also great to add to your pasta dinner at night. So, bonus! Multiple uses [Symbol]

Deli Food. Most grocery stores in the US have a deli section with pre-cooked chicken or other meats, potato/macaroni salads, and other great picnic food. Normally they will pack as much or as little as you want and you pay by weight. This stuff easily will last for 2-3 hours so you can grab it mid-morning then sit down and have a proper picnic later for lunch with no preparation required.

Eating out. Sometimes, we’ll be riding through a town right around lunchtime. When this happens, we like to find a good local restaurant and enjoy a sit down meal. It’s nice to be able to support the local economy. Plus, we usually take the opportunity to freshen up a bit, use the restroom, and even charge up our phones if we need it.

Lunch is sometimes my favorite part of the day. It can be a chance to spread out our “picnic blanket” (really our emergency blanket/tarp) and enjoy the beautiful scenery. It’s times like those that make me feel really grateful to be alive and on a bicycle tour. What are your favorite lunches? Let us know in the comments below.
How to Change a Flat Bike Tire in 12 Easy Steps (With Pictures!)

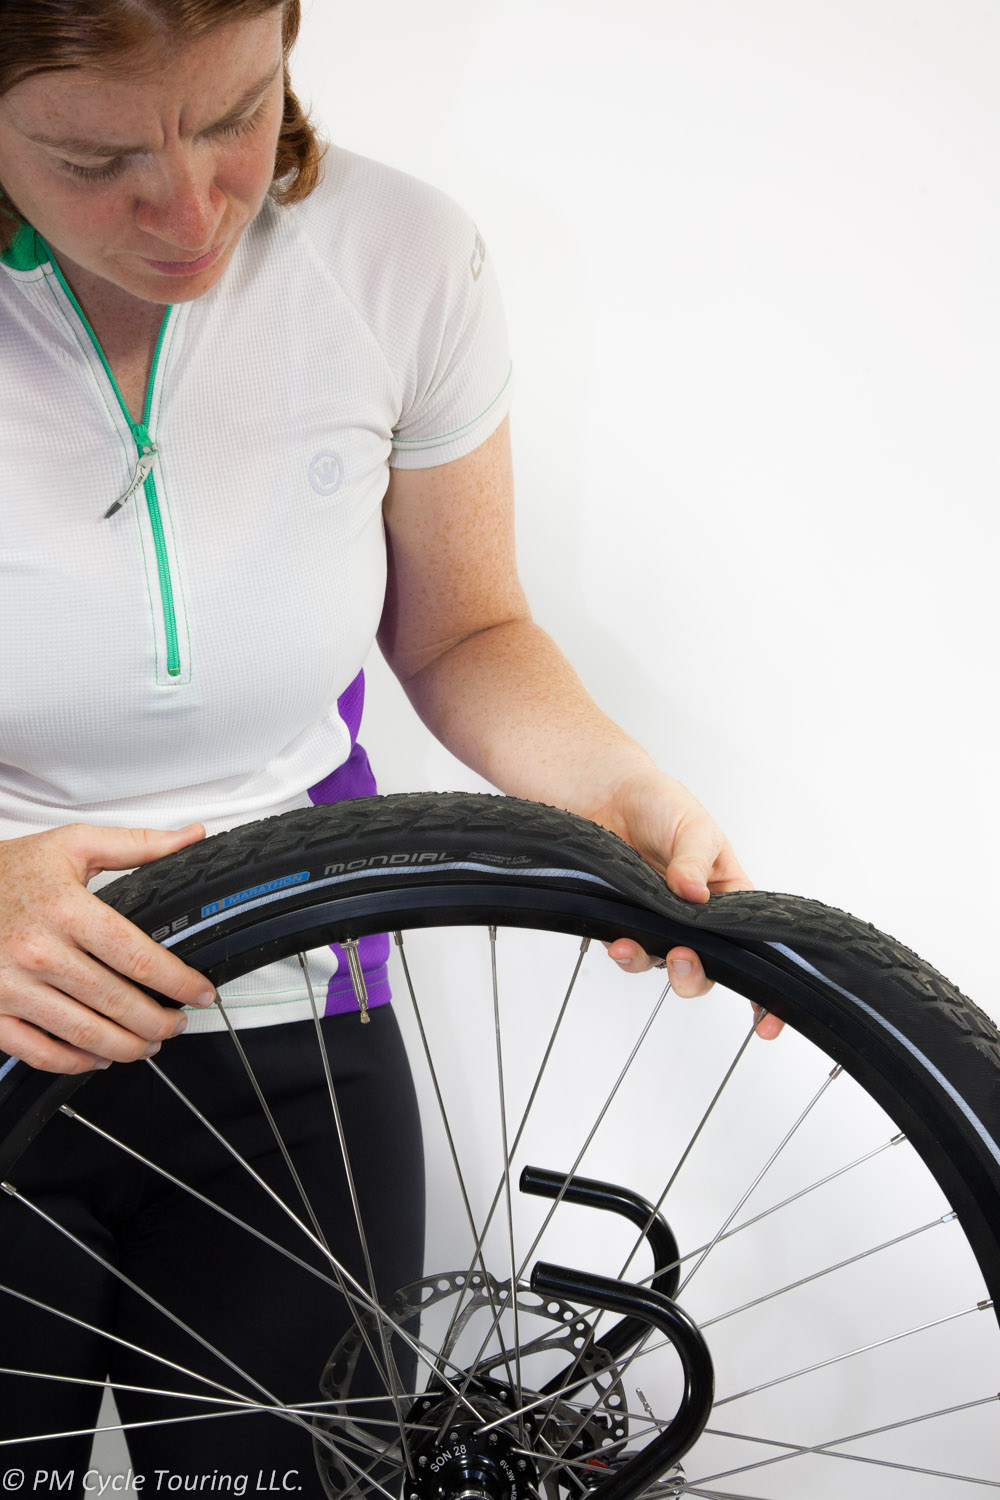
  1. Realize your tire is flat and stop your bicycle. Look for a safe place off the side of the road to change the tire. You don’t want to be doing this on a blind curve.
  2. Take off all your panniers and water bottles, otherwise your bicycle will be too heavy to flip and/or you will have things falling off your bicycle.
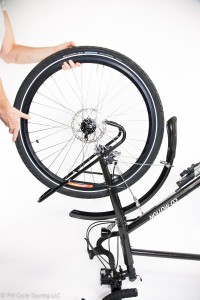
  3. Turn your bicycle upside down, and remove the wheel from the bicycle.Removing the wheel from the bike by unscrewing the quick release skewersClose up of the fork, make sure you unscrew the skewers enough to clear the fork.Removing the wheel from the bicycle.
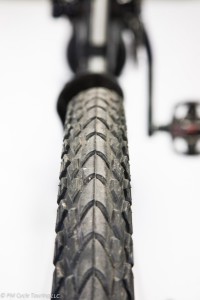
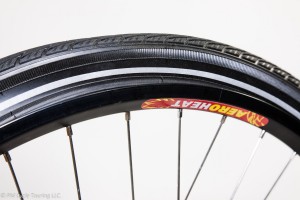
  4. Visually inspect the tire. You may find the culprit. If you do find something, don’t assume that’s the only one. There could be more than one hole in the tube.Close up picture of the tread on a tire
  5. Release any air left in the tube.
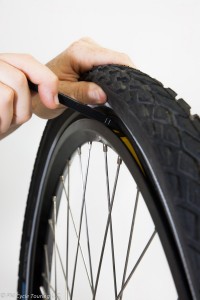
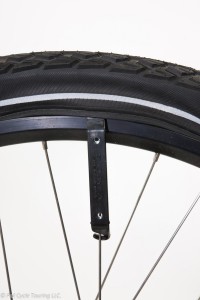
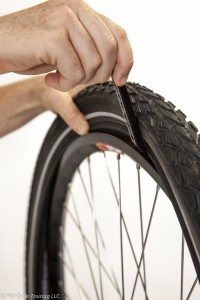
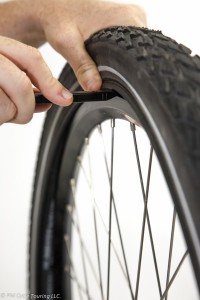
  6. Using tire levers, lift up one side of the tire to remove it from the rim, all the way around.Prying the tire over the rim by inserting a tire lever.Prying the tire over the rim by inserting a tire lever, then use the hook end to attach to spoke, freeing up your hands for a second tire lever.
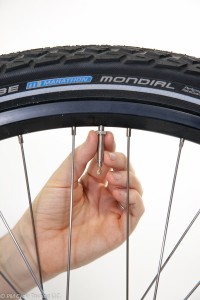
  7. If present, unscrew the nut on the valve so it can be removed from the wheel.Pam unscrewing the lock nut from the presta valve, some valves may not have this.
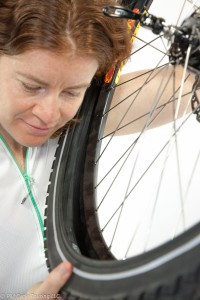
    • If you have not located a leak: Keeping the tube inside the tire, inflate using pump.Bicycle wheel on the ground with one side of the tire reomove from the wheel Holding your ear close to the tube, while still inside the tire, you may be able to locate the leak which may be either heard as a hiss, or felt as the air escapes.Pam listening for a hard to find leak.
  8. With the leak located, patch the tube. Follow the directions on your patch kit. We prefer the patches that are peel and stick, they work just as well as glue and are easier to apply and get pedaling.
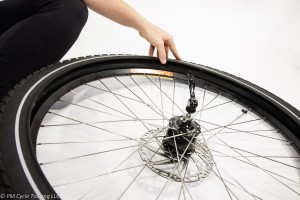
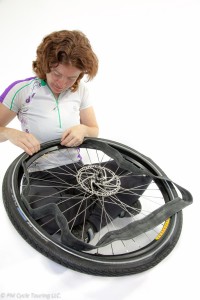
  9. Decide if you are going to replace the tube or reuse the just patched one. Put one side of the tire back onto the wheel, and lay the tube inside. Make sure the tube is not twisted. I like to inflate it just slightly here.Pam replacing the tube with a new tube.
  10. Using tire levers, or your hands, reseat the tire onto the wheel. Using a tire level to seat the tire back on the rim.Using a tire level to seat the tire back on the rim.Make sure the tube is not pinched between the tire and the wheel, and that the bead of the tire is seated properly in the hook of the rim.Straight on view of a tire, notice the hook (the bump on the inner edge of the tire which will engage with the rim to keep the tire on the wheel)
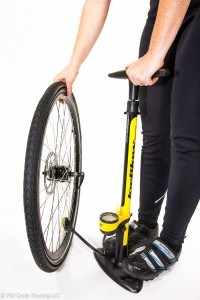
  11. Re-inflate the tube halfway watching for any signs of the wheel slipping off the wheel. While inflating watch carefully for the tire bulging or not seating. In this picture the hook of the tire did not catch the rim and if you keep inflating the tube will like burst.Make sure the tire is seated on the wheel all the way around. Bounce the tire on the ground a few times to settle the tire on the seat and the tube inside the tire.Inflating a tire with a stand up bicycle pump.
  12. Inflate the rest of the way and replace the wheel on the bike. Turn the bicycle upright, replace all panniers and water bottles, make sure your light is on, and congratulate yourself on a job well done.

On a related note, what if the flat tire is caused by damage to the tire itself? For example, the tire has been damaged and is now rubbing the tube, causing constant flats. One great remedy is using a dollar bill. Place the bill inside the tire, next to the tube. This creates a barrier and protects the tube until a more permanent solution can be found. Another thing that could help is rotating the tires. If the damaged tire is the rear, which is carrying most of the weight, you may want to rotate the tire to the front where it will be subject to less stress than the rear. That might save you from having to change it a few times, at least.

Do you have any tips or tricks you want to share? Feel free to leave a comment below!

Learning to Ride a Bicycle (Pam’s bicycle evolution)

I started riding bicycles when I was about 7 years old. My first bike was a fixed gear, with a coaster brake, you know, the one where you just push backwards on the pedals and the bike stops. I got my first bike with multiple gears (10) and rim brakes when I was a teenager, and I loved the speed I could attain on that bike. But then I got my driver’s license, and for some reason I stopped riding. I guess that happens to a lot of us. Driving a car was just more convenient, and gas was cheap.

About 9 years ago, I became interested in bicycling again. I bought a comfort bike, with twist shifters and 21 speeds. Even though I hadn’t been on a bicycle in more than a decade, it’s true what they say: once you learn how to ride a bicycle, you don’t have to relearn. I rode that bicycle everywhere from city streets to dirt trails. Getting used to all the gearing took some time, but I eventually got the hang of it.

Then came my first touring bicycle, a Raleigh Sojourn, with bar end shifters and clipless pedals (the adjective clipless is misleading and confusing. It really means “clip-in,” where the shoe is clipped into the pedal.) The very first time I rode the bicycle I was afraid to clip in completely. I was sure I wouldn’t be able to unclip in time when I stopped. So, I just rested my foot on the pedal while I rode, but when I did come to a stop, my clip was stuck to the pedal anyway, and I fell over. Right in front of the bike shop. I was so embarrassed, but less so when I found out that almost everyone falls at least once. Over time it became natural to clip in and unclip, and now I don’t even really have to think about it.

Bar end shifters were also an adjustment. However, once I figured it out, I liked the dependability of the shifting. My biggest problem at first was remembering which side controlled the front gear, and which the back. Unlike the twist shifters, there were no numbers on the shifters to clue you in. Also, I would sometimes forget which direction I was supposed to shift, and when I really needed an “easier” gear, I would accidently shift to a more difficult one, and lose my momentum. I had to make up a mnemonic to help me remember. To go UP the hill, the chain needs to go UP the cogs on the back. The lever gets pulled UP.

My latest bicycle has Shimano STI shifters, which are combination gear/shifters. This was yet another learning experience for me. It took quite a while, but the quick shifting that you can do with this style of shifter is amazing. The shifter is within easy reach, and if you have to brake quickly, your hand is right there.

After riding for many miles and many hills, I have begun experimenting a bit with different gears. A lot of people will tell you that the most efficient way to ride a bicycle is to keep a high cadence (how fast you pedal) of 80-90 rpms, no matter what gear you are in. I’ve always had a difficult time with this. At first, it was because of my lack of skill at shifting. I wouldn’t shift soon enough before a hill to keep up my cadence. Also, I’ve found that 80-90 rpms is way too high of a cadence for me to be comfortable. I enjoy riding at a much more reasonable 65-70 rpms (This is an estimate since I’ve never had a cadence meter installed on my bicycle).

With practice, I have become a pretty good judge of a hill. Looking at it, I can tell when I need to downshift in order to keep up my speed or cadence to get up the hill. Every once in a while, the steepness takes me by surprise, and I find myself rising out of the saddle to give myself a little more leverage. A skill that I had in my youth that I had to reacquire as an adult. For some reason, it felt unsafe with my shoes clipped into the pedals. Once I got over that feeling, I’ve been able to use the skill to my advantage. But mostly, I am able to choose the right gear to make my way slowly and surely up every hill I encounter.

As with everything in life, it all takes practice. Whether you are new to riding a bicycle, or new again to riding, it’s the same. Don’t be afraid to try new things. Whether it’s clipless pedals, bar end shifters, or brake/shift levers, you may find yourself loving the new technique even more than the old.


Lightweight Packing List for Bicycle Touring Couples

Before we left on our 2,500 miles ride along the Southern Tier I knew that I wanted to pack as light as possible. Thanks to the recent ultralight craze in backpacking there is a ton of gear available now for the tourist looking to lower the weight on their bicycle. We managed to get to 40lbs total for the two of us.

I consider it a huge victory that for two people going on a self supported tour we were able to get our weight down so far, and the 40lbs includes the weight of the panniers! When divided up my wife carried roughly 17 pounds of gear and I carried the remaining 23 pounds. We also were able to tour with only rear panniers, which allowed for removing my front rack saving another 3 pounds.

If you are looking to see the bare minimum that you need to get you and a partner along the Southern Tier with temperatures ranging from 15-102F in the late fall months this is the list. The only item that I know we could save more weight on is Pam’s sleeping bag, if we trade her bag for a bag similar to mine we will be at about 38 pounds of gear. Not sure how much more ultra-light you can go before losing your self sufficiency.

I hoped this helped you get some ideas for going lightweight on your next tour. Do you see anywhere we can improve, cut a few more grams from? Feel free to comment below!

Ultralight touring: how to reduce your gear weight

Bicycle touring historically has involved big heavy bikes with big, heavy gear. But carrying all that weight day after day can really wear you down. An alternative is joining the ultralight touring movement. This is gaining in popularity in many sports such as hiking and backpacking, and now cycle touring. The key to ultralight touring is to minimize the weight or your gear as well as have each item serve multiple purposes. Here’s some ideas to get you headed in the ultralight direction.

Panniers. One of the major areas you can save weight is by reducing the number of panniers and racks. Each pannier and weight of the rack adds up. Removing the front rack and front two panniers from Matt’s touring bike removed over 6 pounds! Plus, the fewer panniers you take means less space to carry stuff which forces you to carry less. Considering that most people over pack this will force you to discard unnecessary items. When we tour as a couple we only require two large panniers on each bike.

Camping Gear. Camping gear is also usually easy to target for weight reduction. Modern sleeping bags and tents come in a wide range of weight classes. The only concern is to strike a balance between lightweight and your warmth requirements. For sleeping bags check out some small manufactures like ZPacks. Matt’s 20F down sleeping bag weighs in at just a hair over 1 pound. When selecting a tent going lightweight can easily shed several pounds. Finally that nice memory foam sleeping pad which weighs 10 pounds can easily be replaced by a new inflatable pad measured in grams. Shave ounces, and sometimes pounds, by choosing the right equipment. The weight of the bike is another key place to reduce weight. Steel is the heaviest. Aluminum is intermediate, and carbon fiber is the lightest. While a lot of emphasis is put on the material of the frame, typically the components of the bike and wheels end up adding more to the total weight of the bike than the just the frame. Trimming down the weight of the bike can start off relatively simple, but can get expensive quickly so make sure there aren’t other areas your money can be better spent.

Cooking equipment. As you get into the ultralight mindset, you are going to have to start looking further into your gear list and instead of shedding pounds at a time you will be working on grams. Cooking equipment is a prime place to look at fine tuning your weight. Titanium pots, pans, and stoves are lightweight and durable components which should last for years. There are a lot of backpacking stoves that are measured in grams, with fuel bottles that are much lighter than the heavy Coleman varieties. For eating utensils plastic can be just as light as titanium and much cheaper.

Multiple uses. Another thing to think about is having multiple uses for each piece of equipment you have. For example, instead of bringing a windbreaker, we just brought our rain jackets and used them as windbreakers on and off the bike. Our rain pants added an extra layer for warmth.  Our down vests were used mainly for off-the-bike comfort, but also as an extra layer for on-the-bike warmth. We only brought one extra bowl for meals, using our cooking pot as another bowl.  The Schnozzel Bag acted as a storage sack for the air pads and pillows. Our emergency space blanket had many functions. We used it as a ground cover for our tent as well as a picnic blanket. On our coldest night it covered our tent, keeping us even warmer.

Hopefully this gives you a place to get started with pursuing ultra-lightweight touring. We went from an estimated 75lbs of gear to just 40lb on our most recent tour (Check out our packing list). Remember that every pound of weight that you reduce is a pound you don’t have to carry for the duration of the tour.

To get started don’t feel like you have to change out everything you have. By swapping out a few key pieces of gear you can get started in the ultralight direction. Who knows? You might soon be cutting off tags and weighing each item down to the gram (like Matt did before our last tour). Be careful, it can be addicting and expensive!

Disclaimer:
All opinions about any products mentioned in this article are my own. I have not been compensated in any way by anyone. I will, however, receive a small commission if you choose to purchase the item from Amazon after clicking the link I provide. Use your own discretion.

The Nature of Bicycle Touring

Bicycle touring can be many things. It can be a cross-country ride, or a cross-county ride.  It can involve packed-to-the-brim panniers stuffed with every possible convenience, or a support vehicle carrying your gear. It can be a slow easy ride, or a fast-paced adventure with long mileage days.

Distance. When you think of a bicycle tour, you may be picturing that one guy you heard about that has bicycled 45,000 miles around the world and you think “I could never do that!” Bicycle tours don’t have to cover such a great distance. A bicycle tour could be as straightforward as riding from your house to the next town, or as involved as riding from one side of the country to the other. The sky is literally the limit when it comes to distance covered on a tour.

Lodging. Many people camp while on tour. They carry a tent and all the necessary gear on their bike or in a trailer. Some people skip the gear and ride from hotel to hotel. This type of tour is nicknamed “credit-card touring” and typically costs a bit more than camping. Most tours end up being a hybrid of the two, with some nights camping, and others spent in hotels. Even some nights spent in a welcoming stranger’s house or yard.

Time. Bicycle tours last one day or many. Tours can be a sort of race, with the rider trying to see how far they can go in as little time as possible. Or you can leisurely enjoy the ride with no time constraints and stopping to explore everything along the way. I prefer the latter.

It doesn’t matter if you decide on a quick, long distance tour, or a slow, easy ride to the next town. What is important is to get out there. Decide where you want to go make it happen. You won’t be sorry!

Bicycle Touring: Where do you start?

My very first bicycle tour was a one night tour. My husband and I loaded up our bicycles and rode from our house to a campground 9 miles away, and then back the next day. I wasn’t sure I would like it; however, this wound up being a perfect test. We got to try out our tent and cooking gear, and we got to practice packing everything in our panniers. I had a ton of fun, and this little excursion whetted my appetite for much longer tours. If you’re thinking of going on a tour, but are hesitating, here’s my advice to get you over those hurdles.

Start small. The idea of bicycle touring might seem overwhelming at first. Let me just say that it’s not. It is so simple. That first overnight trip for me was an excellent example. We got to test out our gear in a non-threatening way. So, find a place to camp (or even a hotel) a short distance from your house (25 to 40 miles is great beginning distance). Or, drive yourself and your gear to a reasonable distance from a campground, ride to it, and then ride back. You want to challenge yourself, but don’t overdo it. It’s that easy!

Prepare yourself. Once you’ve tried it out touring, start preparing for a longer tour. You want to get started riding longer distances. If you don’t practice riding long distances don’t assume you will be able to do them on your tour! Make sure you get all your gear together before you go and that you try it out; you don’t want to be setting up the tent for the first time on your tour only to find it is missing pieces. Also ride your bicycle loaded, since it feels so much different than unloaded. Ride for multiple days in a row. If you start noticing pain or numbness on your longer ride consider getting a professional fit on your bike. Plan your route. Adventure Cycling Association maps are a great place to start, and they’re adding new routes all the time!

Get out there and do it. Prove to yourself that you are capable of touring. Long distance bicycle touring is simply a series of small day tours. Put them together, and you will find yourself a long ways from home enjoying the freedom of bicycle touring.

What is Bicycle Touring?

Bicycle touring comes in many shapes and sizes. There is no one definition of touring. Bicycle touring is simply riding your bicycle. Tours typically include an overnight stay, whether it is camping or in a hotel. Many tourists carry supplies with them, either in panniers (saddlebags) attached to the bicycle, or in a trailer. Or their gear may be carried by a support vehicle. Regardless, the only common factor for bicycle touring is a bicycle. Pretty much anything else goes.

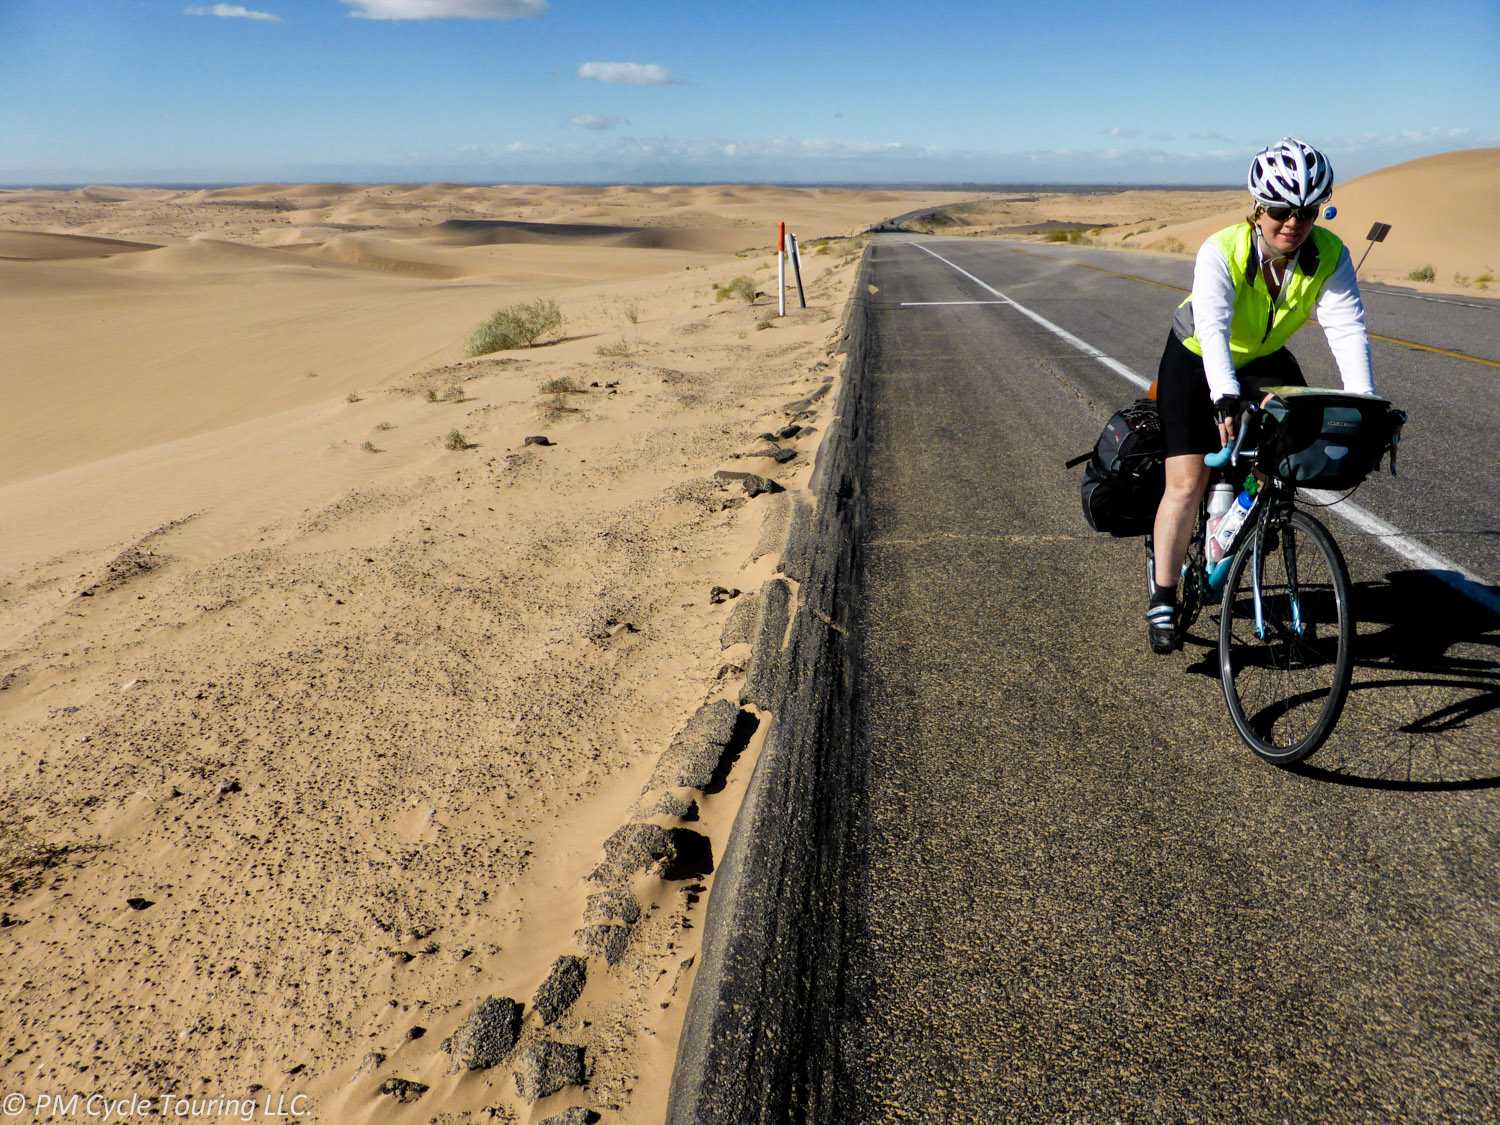
Touring is about getting out on the road and seeing the world from the saddle of your bicycle. It is about soaking in the sunshine, having enough time to enjoy the scenery and truly experiencing the power required to propel yourself around this world. You tend to spend more time climbing hills than anything else but when you get those long smooth downgrades good luck wiping that grin off your face.

Hopefully you are picturing the beauty of this endeavor and beginning to think that you can do it (because you can!). Now you need to decide which type of tour is right for you. Consider this:

  • How much money can you budget for this?
  • How much weight are you willing to carry? How much weight can your bicycle SAFELY carry?
  • What do you REALLY need to be comfortable riding a long distance over multiple days?
  • How much time do you have?
  • How far do you want to go?

But the most important question is how soon can you leave? Because, seriously, there are very few places that are off limits to travel by bicycle. And once you’ve been out on a bicycle tour and experienced the complete freedom and independence of the open road, you won’t want to stop.