Bicycle touring without a spare tube

One interesting component of running a website is seeing how people get to your site and take a look at what they are searching for. Low and behold there are quite a few people out there wondering about how to bicycle tour without a spare tube. I have been thinking about this for some time and wanted to share my advice / opinions on this topic.

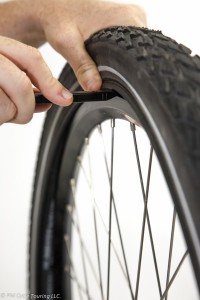
While touring you must assume that you are going to get flat tires. That being said that does not necessarily imply that you must carry a spare tube. While we are touring we have stopped using the glue and patch kits to fix holes in our tubes. Instead we are using the sticker kits available from Park. In our experience these little stickers work just as well if not better than the glue variety and they can be applied and pumped full of air without delay. If I were to not carry a spare tube I would make sure I have plenty of sticker type patches.

Location, Location, Location. If you are touring in a populated area, nearby friends or family, near public transportation, then you may be able to get away without carrying a spare tube. If something were to happen that a simple patch can’t repair at least you would have options for getting back home.

When considering what could possibly happen that a patch won’t fix let me share with you our experiences. One time while we were going to pump up the tube we just patched the entire Presta valve simply fell off of the tube. The point where the metal bonded to the rubber just gave up, no amount of patching can save you there.

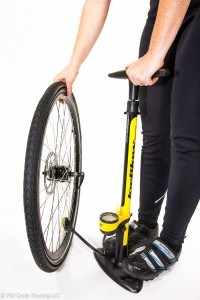
Another time we were changing Pam’s tire in a muddy area and some mud got in the rim, preventing the hook from seating properly. We didn’t notice and pumped the tire up. Right around 65 psi the tire started slipping off the rim and before I could release pressure the tube stretched out the hole and burst with a sound like a gun shot. Of course it was a slime tube and it was 7 in the morning in a crowded campground. I was left standing in a fog of green slime as every single camper nearby looked out their tent to give me the evil eye for waking them up. No patching that hole.

For our first tour we took along two spare tubes. Down the Pacific Coast we managed to have just one flat tire! Next tour was the Southern Tier, going west to east. We started again with two spare tubes, but after two weeks we were up to two patches on each tube and had two failures. At that point we started carrying four spare tubes and all of them had patches by the end of the tour. The Southern Tier took its toll on us with a total of 15 flat tires between the two of us.

So while it is possible to tour without a spare tube I suggest that you bring at least one. You never know what you are going to manage to run over on the road, if your tube is going to fall apart, or how long it will be until the next car drives by. Have you a done long tour without a spare tube? Any suggestions for those that want to try it? Leave a comment below.

How to Change a Flat Bike Tire in 12 Easy Steps (With Pictures!)

  1. Realize your tire is flat and stop your bicycle. Look for a safe place off the side of the road to change the tire. You don’t want to be doing this on a blind curve.
  2. Take off all your panniers and water bottles, otherwise your bicycle will be too heavy to flip and/or you will have things falling off your bicycle.
  3. Turn your bicycle upside down, and remove the wheel from the bicycle.Removing the wheel from the bike by unscrewing the quick release skewersClose up of the fork, make sure you unscrew the skewers enough to clear the fork.Removing the wheel from the bicycle.
  4. Visually inspect the tire. You may find the culprit. If you do find something, don’t assume that’s the only one. There could be more than one hole in the tube.Close up picture of the tread on a tire
  5. Release any air left in the tube.
  6. Using tire levers, lift up one side of the tire to remove it from the rim, all the way around.Prying the tire over the rim by inserting a tire lever.Prying the tire over the rim by inserting a tire lever, then use the hook end to attach to spoke, freeing up your hands for a second tire lever.
  7. If present, unscrew the nut on the valve so it can be removed from the wheel.Pam unscrewing the lock nut from the presta valve, some valves may not have this.
    • If you have not located a leak: Keeping the tube inside the tire, inflate using pump.Bicycle wheel on the ground with one side of the tire reomove from the wheel Holding your ear close to the tube, while still inside the tire, you may be able to locate the leak which may be either heard as a hiss, or felt as the air escapes.Pam listening for a hard to find leak.
  8. With the leak located, patch the tube. Follow the directions on your patch kit. We prefer the patches that are peel and stick, they work just as well as glue and are easier to apply and get pedaling.
  9. Decide if you are going to replace the tube or reuse the just patched one. Put one side of the tire back onto the wheel, and lay the tube inside. Make sure the tube is not twisted. I like to inflate it just slightly here.Pam replacing the tube with a new tube.
  10. Using tire levers, or your hands, reseat the tire onto the wheel. Using a tire level to seat the tire back on the rim.Using a tire level to seat the tire back on the rim.Make sure the tube is not pinched between the tire and the wheel, and that the bead of the tire is seated properly in the hook of the rim.Straight on view of a tire, notice the hook (the bump on the inner edge of the tire which will engage with the rim to keep the tire on the wheel)
  11. Re-inflate the tube halfway watching for any signs of the wheel slipping off the wheel. While inflating watch carefully for the tire bulging or not seating. In this picture the hook of the tire did not catch the rim and if you keep inflating the tube will like burst.Make sure the tire is seated on the wheel all the way around. Bounce the tire on the ground a few times to settle the tire on the seat and the tube inside the tire.Inflating a tire with a stand up bicycle pump.
  12. Inflate the rest of the way and replace the wheel on the bike. Turn the bicycle upright, replace all panniers and water bottles, make sure your light is on, and congratulate yourself on a job well done.

On a related note, what if the flat tire is caused by damage to the tire itself? For example, the tire has been damaged and is now rubbing the tube, causing constant flats. One great remedy is using a dollar bill. Place the bill inside the tire, next to the tube. This creates a barrier and protects the tube until a more permanent solution can be found. Another thing that could help is rotating the tires. If the damaged tire is the rear, which is carrying most of the weight, you may want to rotate the tire to the front where it will be subject to less stress than the rear. That might save you from having to change it a few times, at least.

Do you have any tips or tricks you want to share? Feel free to leave a comment below!

Paying it Back (and Forward)

Recently we found ourselves with some spare time after a trip to Monterey, California. Instead of taking the most direct route back home Pam and I decided to take the scenic Highway 1 down the coast. This put us on the prime bicycle touring route in the beginning of June. We thought it would be neat if we grabbed some snacks and drinks for any cycle tourists we encountered on our way home to Los Angeles.

We started off from Monterey and saw no one for miles and miles. In fact, we were beginning to believe that there were not going to be any bicycle tourist on our entire route. But finally we happened upon Jean from Quebec, Canada. We offered him water or snacks to which he politely refused (I never thought a bicycle tourist would refuse free food). However he did share some of his story, and as Pam put it: “He was full of happiness.” Jean and a partner have been going for 30 days straight with no rest days, yet Jean still had a smile on his face and was a blast to chat with.

After Jean we ran in to one more tourist who wasn’t interested in talking to us and a few tourists going northbound which we couldn’t stop to say hi to. We kept on driving down the coast and made it to Lompoc. From our own Pacific touring we knew that from Lompoc to the coast is a challenging ride. About ¾ of the way to the coast we saw a lone tourist battling a headwind and an uphill. We stopped to offer him some water and snacks. Dave graciously accepted and chatted with us.

Dave was also from Canada, but more from the Western side, and was 29 days into his tour, also with no rest days. We were certainly impressed; he was flying down the coast, and seemed to be a having a great time of it. We chatted on the side of the road for a bit and shared a little information on what was coming and where to stay.

Then Dave mentioned that we made his day by stopping and offering him some food and water. That in turn made our day. We had set out hoping to give a few people cheer along the way and had succeeded. Being tourists ourselves we know how much these random acts of kindness mean when you’re touring, and now we were able to pass that on to others.

What did it cost us other than a few moments of time, a bottle of Gatorade, and a few granola bars? Almost nothing, and we made a few people have a better day because of it. So as a thanks to everyone who has supported us on a tour, today we tried to pay it back, or pay it forward for the next adventure we embark upon. Either way, it was a terrific experience.