Topeak Turbo Morph Mini Pump Review

When you’re out on a tour (or any ride) you’re bound to get a flat tire at some point. At home, you probably have a floor tire pump to easily get your tires up to pressure. I do. But I can’t carry that pump with me on my rides (I don’t want to). So I use either CO2 or a hand pump. But have you ever tried to pump up your tire using one of those wimpy hand pumps? I like to run my tires at 100 psi, but I have yet to get up to that pressure using a typical hand pump. I’ve tried CO2, but without a gauge, I don’t know what pressure I can get from a cartridge.

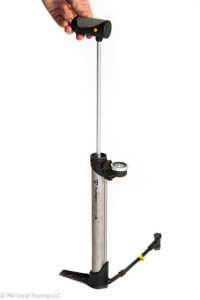
Enter the Topeak Turbo Morph Mini Pump. Here’s what makes this pump stand out from the rest:

  • Compact
  • Lightweight
  • Foot Stand
  • T-handle
  • Gauge
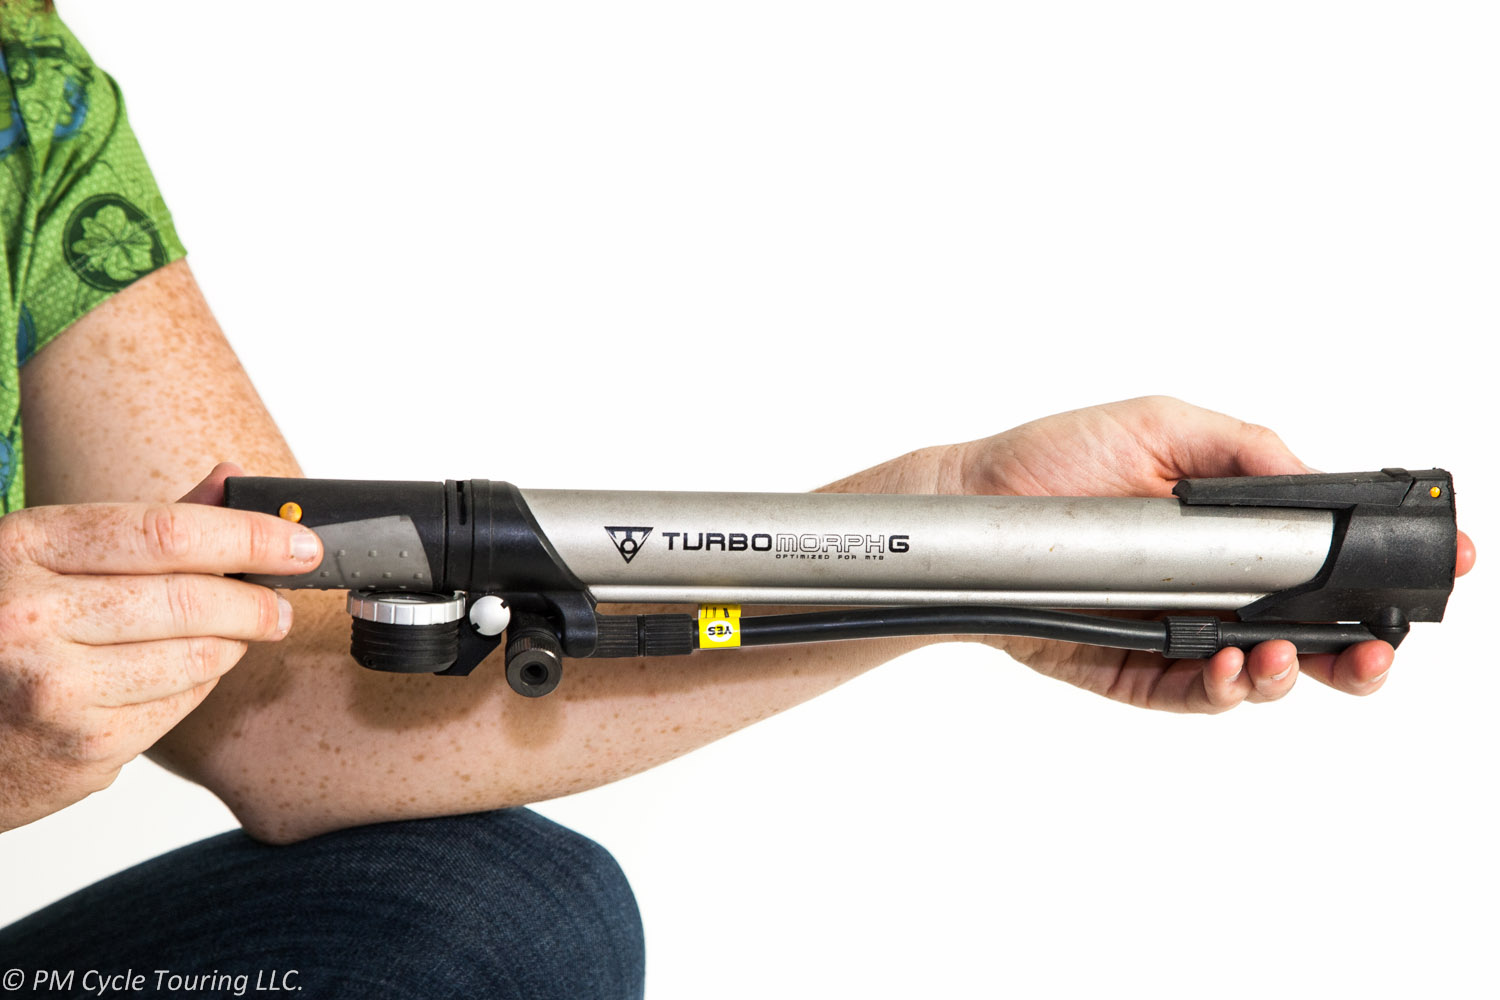
Miniature Hand Bicycle Pump with handle, foot stand, and gauge
Topeak Turbo Morph Mini Pump with T-handle, Foot Stand and Gauge

First of all, it is super compact. It easily attaches to any bike frame with the mounting bracket. It’s lightweight, at just 9.9 oz. (280 g). (Ok, so it’s not as lightweight as some other hand pumps, but the extra ounces are worth it, trust me!)

Using the foot stand and t-handle, it’s easy to get the leverage to pump your tire up to pressure. And the gauge lets you know when it gets there. There’s adapters for Presta, Schrader, and Dunlop valves, so no matter your valve type, you’re covered.

We got this pump midway through our latest tour, and we won’t go anywhere without in the future. Highly recommended.

Disclaimer: I have not received any compensation for this review. This review is for informational purposes only, and reflects my own opinion. I have not been in contact with the manufacturer.
My Favorite Thing About Bicycle Touring

You’re driving in a car on the Blue Ridge Parkway and an incredible view opens up before you. You want to stop and take it all in, but that car trailing behind you begs otherwise. You hope for a pullout, but by the time it comes, you’ve lost the moment.

How many times has something like this happened to you? As much as I enjoy a good car ride, this is irritates me to no end. The inability to stop whenever I want actually causes frustration, and I end up enjoying the car ride much less than I would have.

Enter, the bicycle. When you’re riding a bicycle, you have the ultimate freedom. Not only are you experiencing nature full on- you feel the wind, the rain, the sun, and the subtle air temperature changes. You are also able to stop whenever and wherever you want.

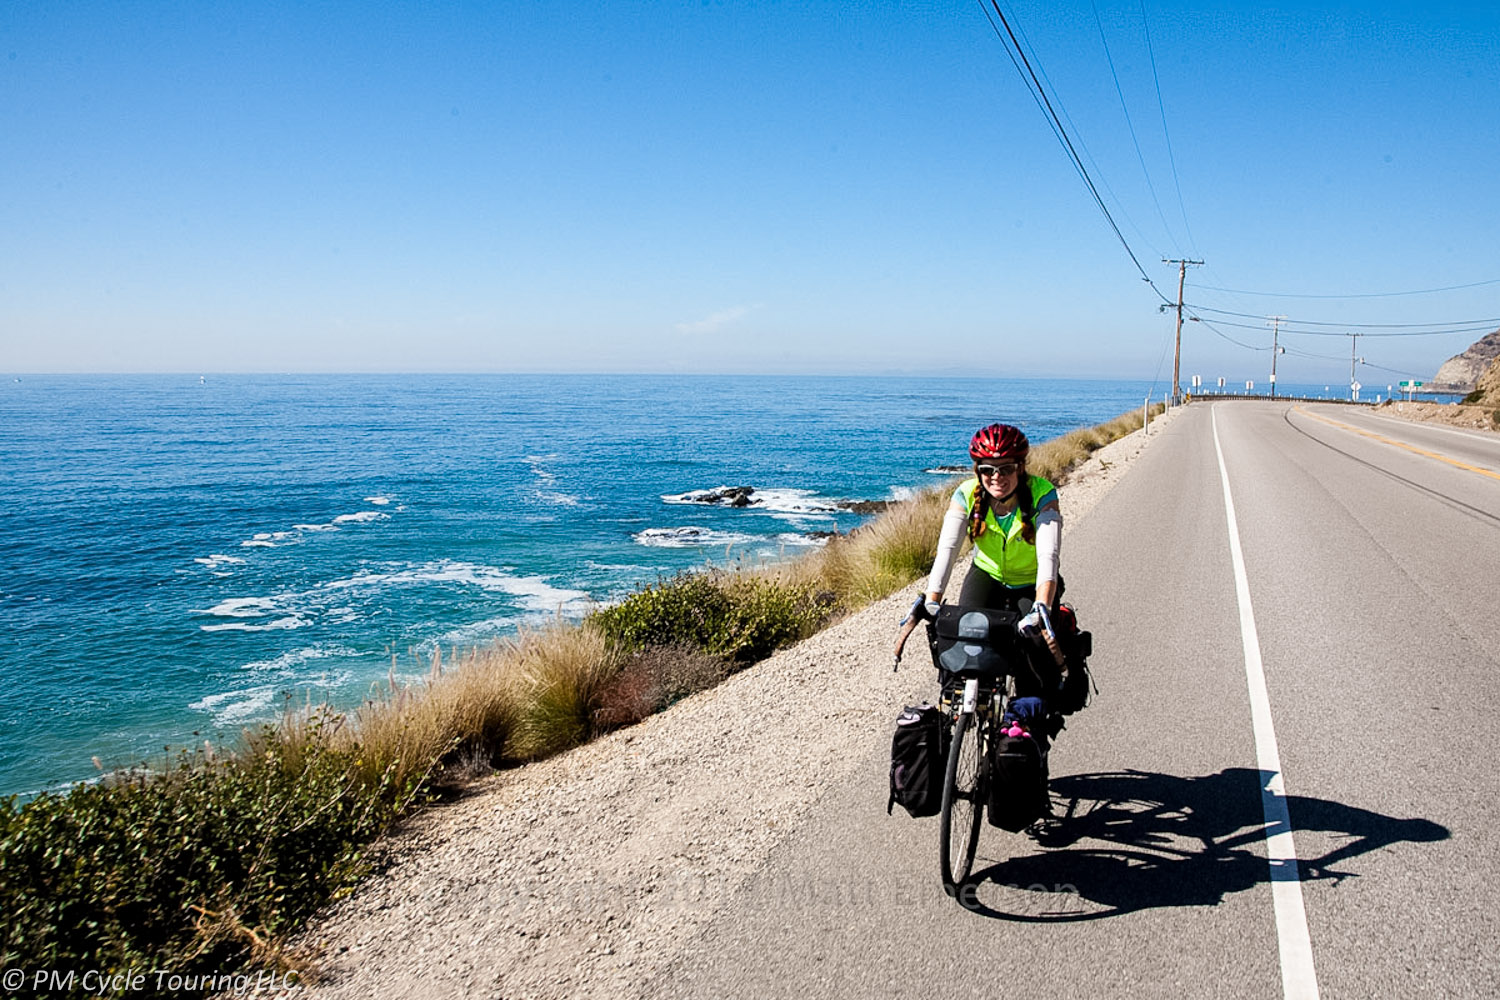
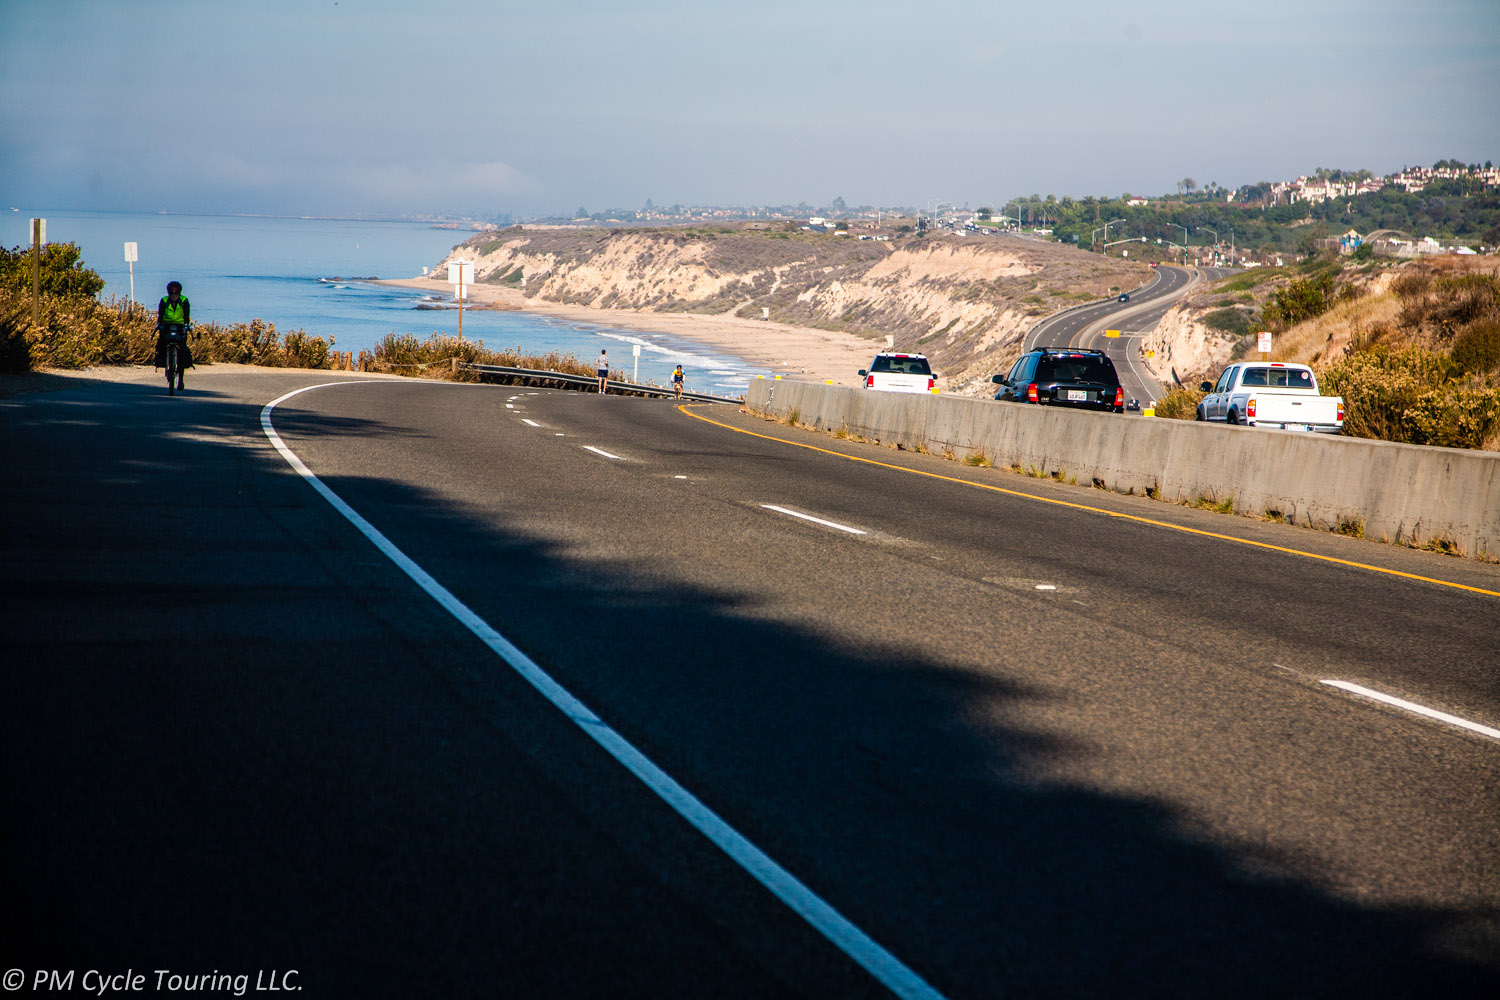
This freedom was especially evident on our tour down the Pacific Coast. Riding California Highway 1 along some of the most scenic stretches is something I will never forget. While we were sharing the road with vehicles trying to enjoy the same scenery, we ultimately had the better method of transportation. Whenever the beauty would take my breath away, and I wanted to enjoy it a little longer, I just stopped. No waiting for a turnout. I just scooted off the road, put my foot down, and took it all in. Since a bicycle easily fits in much smaller spaces you can pause to enjoy a view just about any time you want; no waiting for a pull-out crowded with other vehicles.

On the other hand, riding a bicycle may make you appreciate even the “less scenic” rides. Traveling in a car going 70+ miles an hour with everything whizzing past you causes you to miss so much. The slower pace of a bicycle allows you to gain an appreciation for the subtle beauty of nature. The small details come into focus, allowing you to experience life more vividly. Instead of seeing something briefly and passing by you have the time to really admire the view. Even views that may be boring in the car can have subtleties which will amaze you as you are pedaling your way to your destination. On the Southern Tier I would have completely missed that along the side of the road in the deserts of New Mexico and Texas there are wild melons that grow. Who knew? On my bicycle I got the pleasure of learning something new and unexpected.

So, the next time you’re riding your bicycle, pause a moment and take it all in. Enjoy the fact that you can stop and admire the view any time you want to. This is a gift, and take advantage of it. What’s your favorite thing about bicycle touring? Let us know in the comments!

Rear-View Mirrors For Bicycle Touring

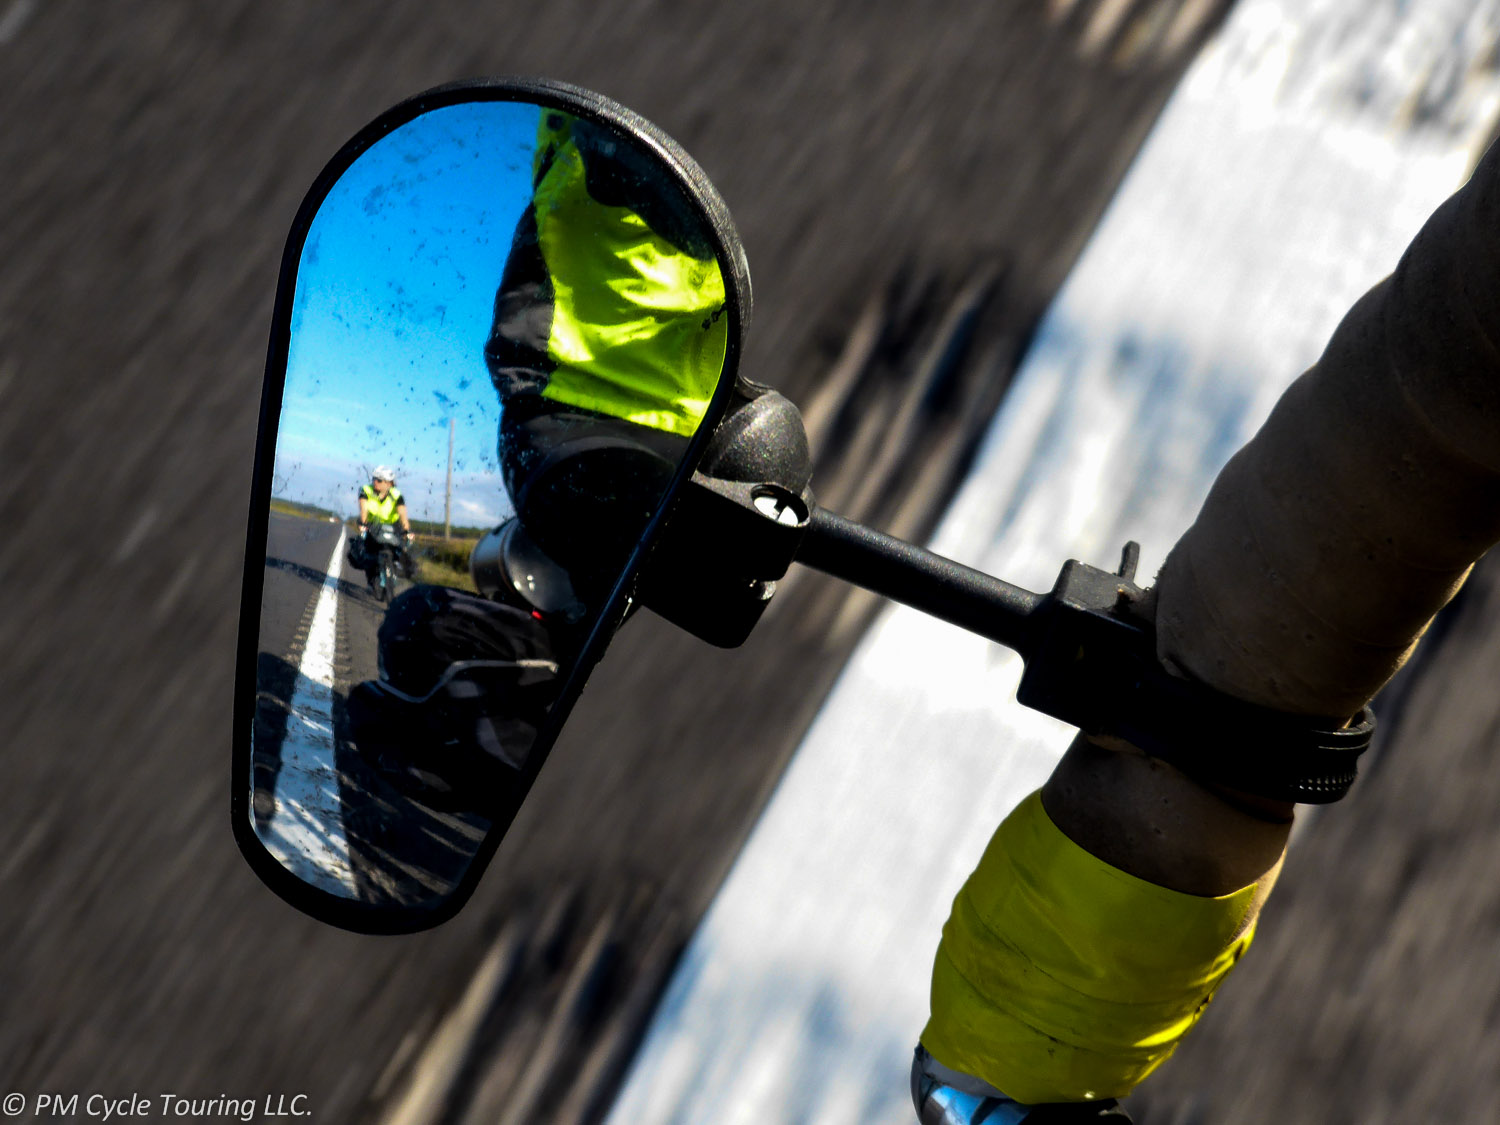
There are several variations of mirrors available to cyclists these days. As a tourist I’ve personally tried three kinds: clamp-on, bar-end, and helmet. There are pros and cons to each, but ultimately I use a helmet mirror, and want to share my experience with each:

The bar end mirror

  • Pros
    • Permanently attached to bicycle
    • Ability to make slight adjustments.
    • Easily moved from left to right side for changes in traffic patterns.
  • Cons
    • May not be able to see around panniers on a loaded touring bike.
    • Only slight adjustments can be made.
    • Susceptible to road vibrations. {the chip seal of Texas made the mirror unusable}
    • Cannot use on bike with bar-end shifters.

The clamp-on mirror

  • Pros
    • Easily removable; can be moved from bike to bike.
    • Easily adjustable to see past panniers on loaded bicycle.
    • Easily moved from left to right side for changes in traffic patterns.
  • Cons
    • Highly susceptible to road vibrations.
    • Can get knocked about.
    • Needs frequent adjustments depending on how tightly it’s clamped on.

The helmet mirror

  • Pros
    • Not susceptible to road vibrations.
    • Easily adjustable
    • Can easily see past panniers.
  • Cons
    • Needs frequent adjustments
    • Takes getting used to: it does block a small portion of your field of view.
    • May not be easily moved from left to right side for change in traffic pattern.
    • Glass models can be fragile and crack if dropped

After trying all three types of mirrors, I decided to go with the helmet mirror. Unfortunately, the Tiger Eye I have is not able to be switched to the right side of the helmet, which I’ll need for our tour in New Zealand. However, the helmet mirror gives the best view behind, which is so important. Any time I need to see what’s coming up behind, I simply glance up, turn my focus to the mirror, and then my eyes are back on the road. Simple, efficient. Just how I like it.

Why Scheduling Rest Days is a Good Idea

I recently ran a 7.5 hour race with some friends. OK, so I didn’t so much run as hike. The course was at a mountain ski resort, and took us up and down some pretty steep ski runs. I’m in decent shape, and the hike itself wasn’t super challenging. The duration was what almost did me in. My body is not used to moving constantly for that length of time. I was definitely feeling it the next day. And the next. And, I’m ashamed to say, the next. Three days later, and I finally feel close to normal.

This experience got me thinking about some of my past tours. Tour number one was really rough. We had anticipated being able to cover many more miles in the first days than we were actually able to. However, since we were unprepared, and our bodies weren’t used to that much physical stress, we found ourselves needing breaks. We took twice or even three times as many days off as we planned, which put us way behind schedule. Since we had a hard deadline to finish, the last fourteen days of the tour came with zero breaks. Fourteen straight days of riding almost did me in. After, I felt very similar to the 7.5 hour hike, and spent several days recovering. To me, it’s not fun to have difficulty walking first thing in the morning. And I’m sure it’s not really good for your muscles and connective tissue, either.

Bottom line is, your body needs rest. You build your most strength during rest days. That’s not to say you should sit around on your butt on your day off. Nope! Go on a hike, walk around, explore. Even take a short, unloaded ride. Plan the next few days of riding. Get plenty of sleep. Make sure you’re ready to get back on the bike and give it your best effort.

Everyone is different, and every tour is different. On our most recent tour, we typically rode 6 days and rested one. That seemed to work pretty well. I’m sure other people can ride more days (or less) before needing a break. Do what works for you. Just don’t plan your trip, anticipating 70-100 mile days with no rest days factored in. You’ll make it very difficult to accomplish the goals you’ve set for yourself. What kind of riding schedule do you like to keep? Let us know in the comments below!

ACA Pacific Coast Section 5 Maps 56-59

If you live in Southern California, or you have family in the area, and are looking for a great 4 day practice ride, I might suggest Goleta to Los Angeles. There are a few advantages to this ride: ease of transport to the start line, beautiful ocean riding, and access to convenient state campgrounds.

First off, take the Pacific Surfliner train to Goleta. Amtrak is a great option for bicycle tourists. It’s easy to purchase a ticket and reserve a spot for your bicycle (advanced reservations for bicycles are required). When the train gets to the station look for the conductor waving you towards him, you will either wheel your bike directly on to the train or lift the bicycle up to the conductor in a cargo car near the rear of the train. Panniers can stay on the bike if it is not too heavy to lift.

Upon arrival at Goleta use ACA Section 4 Maps 55 and 54; make your way north to Refugio State Beach. You might be tempted to stop at El Capitan State Beach, but trust me, the hiker/biker sites at Refugio are worth the extra few miles; you will be staying as close to the beach as you can get.

For Day 2, retrace your route from Day 1, and continue on through Santa Barbara to Carpinteria State Beach. This makes for a very short, approximately 35 mile day 2. Enjoy the ride, especially on the bike path through UC Santa Barbara. As you ride through campus, you will notice all the bike racks for the students, and if between classes the hundreds of people biking around. It truly is amazing.

Day 3, leave Carpinteria State Beach, and head south through Ventura and Oxnard, around Mugu Point and follow the ocean to Malibu. Leo Carrillo State Beach has a very nice, isolated hiker/biker site behind the dumping station, hidden in the trees. You can walk to the beach or just enjoy the sunlight filtering through the trees.

For your final day, make your way into Santa Monica. The ride through the transition from Malibu into Santa Monica is the most harrowing part of the ride. Keep your eyes open for doors opening on the right, and cars wishing to pass on the left. It’s just a few miles, and then you have the dedicated bike path to look forward to. Although you have to share the path with runners, walkers, roller bladers and other cyclists, it is still a pleasant ride past the pier.

From Santa Monica, there’s a few options. Ride into LA, find a metro station, and head back to Union Station. From there you can return to your starting point via MetroLink or Amtrak. If you ride the Balloona Creek bike path upstream (away from the ocean), you can pick up the Expo Line at the end of the bike path.

And there you have it. A nice, four day bicycle tour, through some of the best that Southern California has to offer. Can anyone else suggest a short tour? Leave your ideas in the comments!

Pain While Touring

So, you’ve bought your bike, and it’s been professionally fitted. Great! You’ll never have any pain, it’s a perfect fit, forever, right? Wrong! Chances are, at some point as you put miles on your bike, you’ll experience some pain. I’ll give you an example. Before my first long distance tour, I put about 500 miles on my bike, and it felt great. However, after just 250 miles of the tour, my knees were killing me and there was a pain in my shoulder that wouldn’t go away. What gives?

Well, turns out that as you ride, especially loaded, your body changes. If you do all of your training unloaded and then load up to go, there will be an adjustment period while your body gets used to the extra weight and you may pedal, sit, or grip different than your training.

Proper seat height is crucial to saving your knees over long distance rides. I’ve met some riders who are afraid of changing the fit of their bikes from what the professional fitter set it at. Unless that fitter is following you on your rides, he won’t be able to get the perfect fit for you, and it may need to be adjusted as time goes on. Initially he may be able to get the fit mostly there, but you’ll still may need to dial it in to get it just right.

I’m not a doctor or a professional, so take my advice for what it’s worth. I am a person who is not afraid of making the small adjustments necessary throughout my tours to minimize aches and pains. Here’s something that I find key: small changes can make a big difference. On that first tour, my seat height needed a few millimeters of adjustment to give my knees relief. My shoulders were helped by a smaller stem and a slight change in handlebar angle. I’m constantly tweaking my bike to fit better. I have found that if I pay attention to my body, and make an adjustment early on, I can prevent an injury before it happens. I can then ride longer and further, and enjoy my rides much more.

If you’re not sure how to make adjustments to your bike, find a local bike shop and talk to the mechanic. Hopefully he’ll show you where the adjustments are and how to do it. It’s much better to ask the questions before you leave instead of trying to figure it out on the road.

I cannot stress it enough: if you’re in pain while riding, make an adjustment. For example, mark where your seat currently is then change the seat height a few millimeters. Then ride 10 miles. If it didn’t make a difference, move it back, and adjust the seat forward or back. Ride another 10 miles. And so forth. (Another adjustment that you can make is where the clip is on your shoe. I had to change that one time, and it helped.) Don’t fear change. It just might make all the difference

High Altitude Riding

I don’t know about you, but I live at a pretty low elevation. We’re not right at sea level, but pretty close (just over 1000 feet). When we’re planning our bicycle tours, it’s inevitable that we’ll be running into some high altitude stuff, even just momentarily. Riding at sea level doesn’t prepare you very much for the challenges of higher elevations. Luckily for us, we have a National Forest nearby, with elevations up into the mid to high 7000s feet. We definitely like to get up there and ride as much as possible, not only because it’s cooler on a hot summer day, but it helps train our bodies to know how to breathe when the oxygen levels are lower. When we climbed up over the pass from Arizona into New Mexico last fall, we were unprepared for the difficulty of breathing. We just took it slowly, and tried to rest when we needed it.

I recently visited a family member in Wyoming, and found myself struggling to breathe doing normal activity. My brother’s house sits at about 6700 feet, and I could sure tell a difference. One thing I found useful to getting myself acclimated was physical activity. The second day after I arrived, I went for a run. Sure, my pace was slower than normal, and I didn’t go nearly as far as I usually do, but after the run, I felt better and had an easier time breathing. And then came the real challenge: a bike ride. After I’d been there a few days, I borrowed a bicycle and went for a climb. By the time I had climbed 1000 feet and reached the summit, I was huffing and puffing. I took a break at the top, enjoyed the view, and then coasted back down. It took just about a week to get fully acclimated, but the addition of physical activity made a huge difference.

One thing to keep in mind if you’re making a big climb and you’re is not used to the elevation is to take it slow. Don’t expect too much from your body. Even a few thousand feet of elevation higher has a noticeable difference in oxygen levels. You will have to breathe more to get the same amount you are used to. So, go easy on yourself. If you have a chance to do some high altitude training before your ride, great! It can only help. But if you don’t, that’s ok, too. Just take it slow and steady. Give yourself lots of breaks. And enjoy those views from the top!

Interpreting California Mileposts

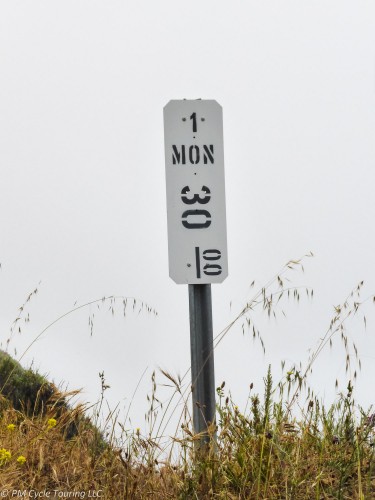
There are many different kinds of road signs in California. There are the big green signs that tell you how many miles you have left to get to your destination. There are the route signs that tell you what road you’re on. And then there are the little white, rectangular signs you’ll find posted at every mile. Knowing what these signs mean can be a big help. The ones that look like this:

Milepost 30, California State Highwy 1, Monterrey County
Milepost 30, California State Highway 1, Monterrey County


Well, here’s a little primer on how to interpret these milepost signs.

First, check out the top. That number? In this case it says “1” but it could also say 001. This is the road you are on. This one in particular means California State Route 1. I’ve also seen an abbreviation of the name of the road, for instance HGR for Harris Grade Road.

Next, there is a two or three letter designation for the county. There are 58 counties in California, therefore, 58 different abbreviations. This is county MON for Monterrey County.

Finally, there’s a number. This is the mileage from the county line. Generally, the mile numbers increase as you go from south to north or from west to east, depending on the general direction of the road. When you get to a new county, the mileage numbers start over.

You can count on these milepost signs to be posted at every mile, but also marking bridges and roadside call boxes. I can honestly say that looking forward to the next milepost has saved me on many a monotonous bike ride; when I think I can go no further, I just say, “at mile 12 you can rest.” And when I get there I say “now mile 13.” It’s also especially handy when traveling from north to south (or east to west) as the numbers count down to the next county. Anything to help keep your motivation to keep pedaling!

What is for Lunch?

We’ve talked about breakfast, but now let’s talk about the second most important meal of the day: Lunch. (P.S. When you’re touring, all meals are important.) While breakfast and dinner are usually eaten in camp, bicycle tourists typically eat lunch “on-the-go”. A good lunch can take you right past that afternoon slump and help you finish your day’s ride strong.

Obviously, the sky’s the limit when it comes to what you can eat for lunch. For us, we prefer simple and easy lunches. I do, however, get tired of eating the same thing every day, so I like to switch it up as well (Matt would eat the same thing all tour if I let him). Here’s a list of our favorite bicycle touring lunches:

Peanut butter and jelly sandwiches. The old standby. Every kid’s favorite meal is definitely appropriate for a bicycle tourist. The protein/fat from the peanut butter and the sugar from the jelly restores energy reserves from the morning and helps energize you for the afternoon’s ride. Peanut butter jars are heavy, so we like to buy the small plastic ones (they also take up less space). We end up buying peanut butter more often, but that’s ok with us. Jelly, surprisingly enough, keeps for a long time without refrigeration. We like to buy the smallest jars we can find, which last us a couple days. If it smells off at all, we toss it, but they are definitely good for at least 3 days. To add variety, we try different kinds of jelly, or grab some honey and add fruit. If adding fruit bananas are especially great, but blackberries are also awesome. We’ve tried every type of bread that grocery stores carry, as well. Our favorite is Ezekial bread, with the sprouted wheat berries. We also like the sandwich thins, which don’t get smooshed as much as regular loaves.

Salami and cheese sandwiches. Getting enough protein while touring is key to keeping energy levels up. Salami is a great option, since it usually comes in small sizes and keeps well without refrigeration. Cheese also lasts longer that I would have thought. We just buy small blocks. Cheese is also great to add to your pasta dinner at night. So, bonus! Multiple uses [Symbol]

Deli Food. Most grocery stores in the US have a deli section with pre-cooked chicken or other meats, potato/macaroni salads, and other great picnic food. Normally they will pack as much or as little as you want and you pay by weight. This stuff easily will last for 2-3 hours so you can grab it mid-morning then sit down and have a proper picnic later for lunch with no preparation required.

Eating out. Sometimes, we’ll be riding through a town right around lunchtime. When this happens, we like to find a good local restaurant and enjoy a sit down meal. It’s nice to be able to support the local economy. Plus, we usually take the opportunity to freshen up a bit, use the restroom, and even charge up our phones if we need it.

Lunch is sometimes my favorite part of the day. It can be a chance to spread out our “picnic blanket” (really our emergency blanket/tarp) and enjoy the beautiful scenery. It’s times like those that make me feel really grateful to be alive and on a bicycle tour. What are your favorite lunches? Let us know in the comments below.

Bicycle touring without a spare tube

One interesting component of running a website is seeing how people get to your site and take a look at what they are searching for. Low and behold there are quite a few people out there wondering about how to bicycle tour without a spare tube. I have been thinking about this for some time and wanted to share my advice / opinions on this topic.

While touring you must assume that you are going to get flat tires. That being said that does not necessarily imply that you must carry a spare tube. While we are touring we have stopped using the glue and patch kits to fix holes in our tubes. Instead we are using the sticker kits available from Park. In our experience these little stickers work just as well if not better than the glue variety and they can be applied and pumped full of air without delay. If I were to not carry a spare tube I would make sure I have plenty of sticker type patches.

Location, Location, Location. If you are touring in a populated area, nearby friends or family, near public transportation, then you may be able to get away without carrying a spare tube. If something were to happen that a simple patch can’t repair at least you would have options for getting back home.

When considering what could possibly happen that a patch won’t fix let me share with you our experiences. One time while we were going to pump up the tube we just patched the entire Presta valve simply fell off of the tube. The point where the metal bonded to the rubber just gave up, no amount of patching can save you there.

Another time we were changing Pam’s tire in a muddy area and some mud got in the rim, preventing the hook from seating properly. We didn’t notice and pumped the tire up. Right around 65 psi the tire started slipping off the rim and before I could release pressure the tube stretched out the hole and burst with a sound like a gun shot. Of course it was a slime tube and it was 7 in the morning in a crowded campground. I was left standing in a fog of green slime as every single camper nearby looked out their tent to give me the evil eye for waking them up. No patching that hole.

For our first tour we took along two spare tubes. Down the Pacific Coast we managed to have just one flat tire! Next tour was the Southern Tier, going west to east. We started again with two spare tubes, but after two weeks we were up to two patches on each tube and had two failures. At that point we started carrying four spare tubes and all of them had patches by the end of the tour. The Southern Tier took its toll on us with a total of 15 flat tires between the two of us.

So while it is possible to tour without a spare tube I suggest that you bring at least one. You never know what you are going to manage to run over on the road, if your tube is going to fall apart, or how long it will be until the next car drives by. Have you a done long tour without a spare tube? Any suggestions for those that want to try it? Leave a comment below.