Tire Size Confusion

So, who out there is confused about tire sizing? Anyone? I know I’m not the only one out there confused by the terminology, sizes, types, etc. Just the other day, my husband and a bike shop owner had an in depth conversation about the various attributes of different size tires, and I was completely lost. I decided I should learn a bit about tires, and maybe pass that info on to you. It seems that there are two major things to consider: Wheel Diameter, and Tire Width.

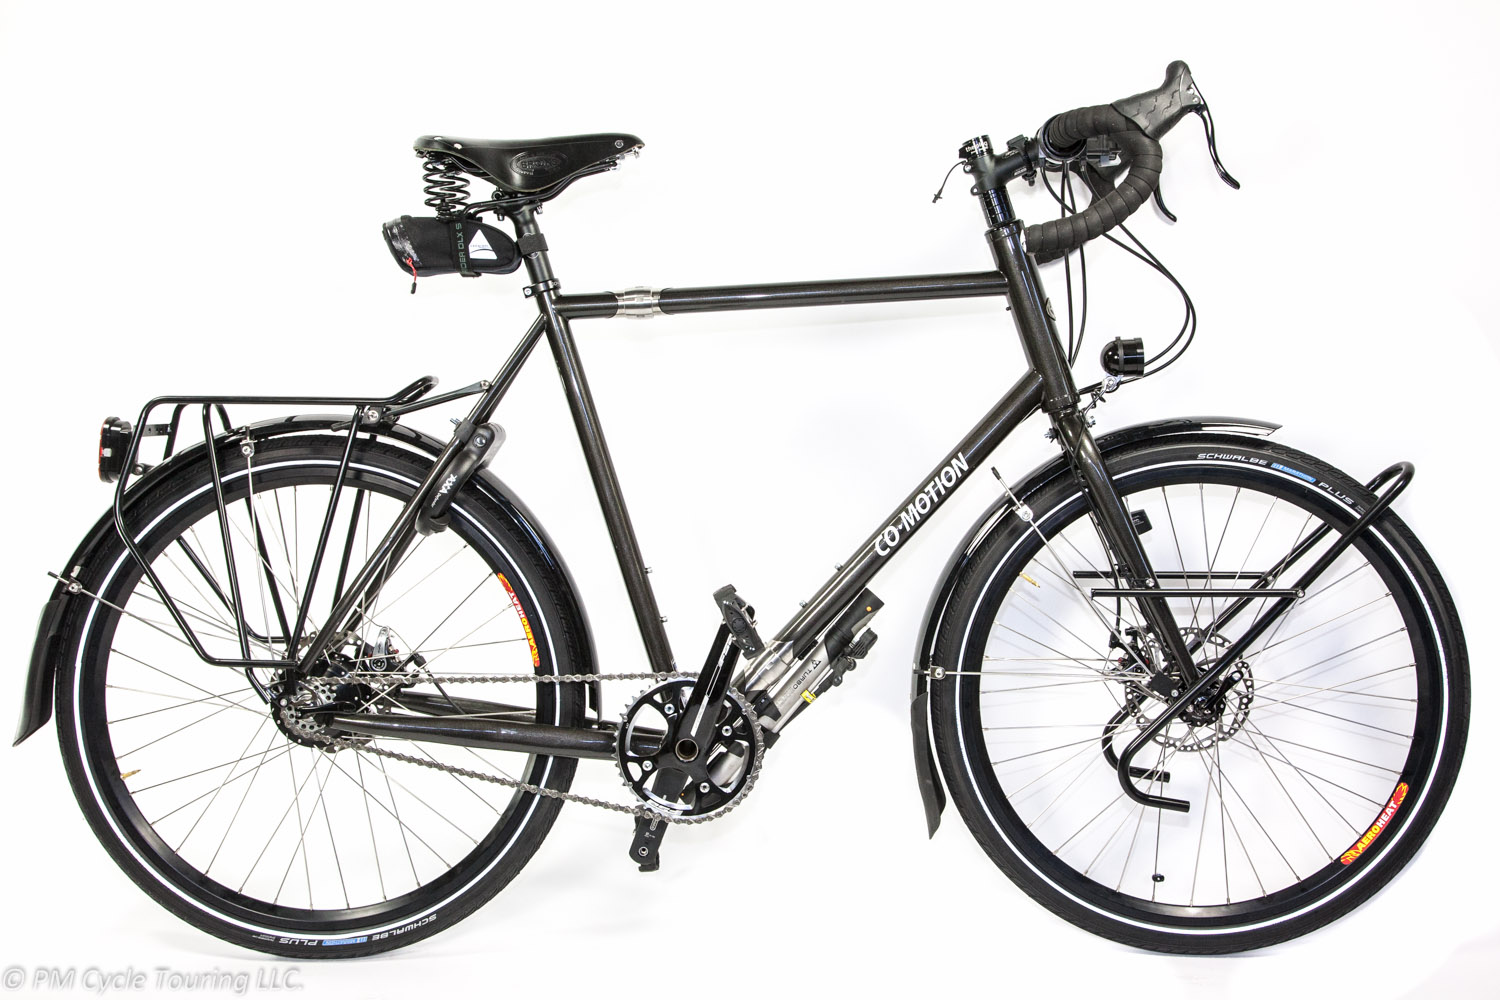
As I listened to their conversation, all I heard was a bunch of numbers, 700C, 26 inch, 590 mm, 29er, and I was very confused. Now I know that wheels come in lots of sizes, but the two main ones are 700C and 26-inch. 700C means a 622mm diameter wheel. And 26-inch is 559mm diameter. There’s a third less common 650B which may become more popular in the future with 584mm diameter. {In reality, the 700C or 26-inch is supposed to refer to the diameter of the outside of the tire, but this is not the reality. We’ll keep it simple and say that 700C refers to a standard size wheel, which is true. See how complicated this can get?} What about 29er’s? Well, to add more confusion, they are simply 700C mountain bike wheels measuring at 622mm. Sheesh!

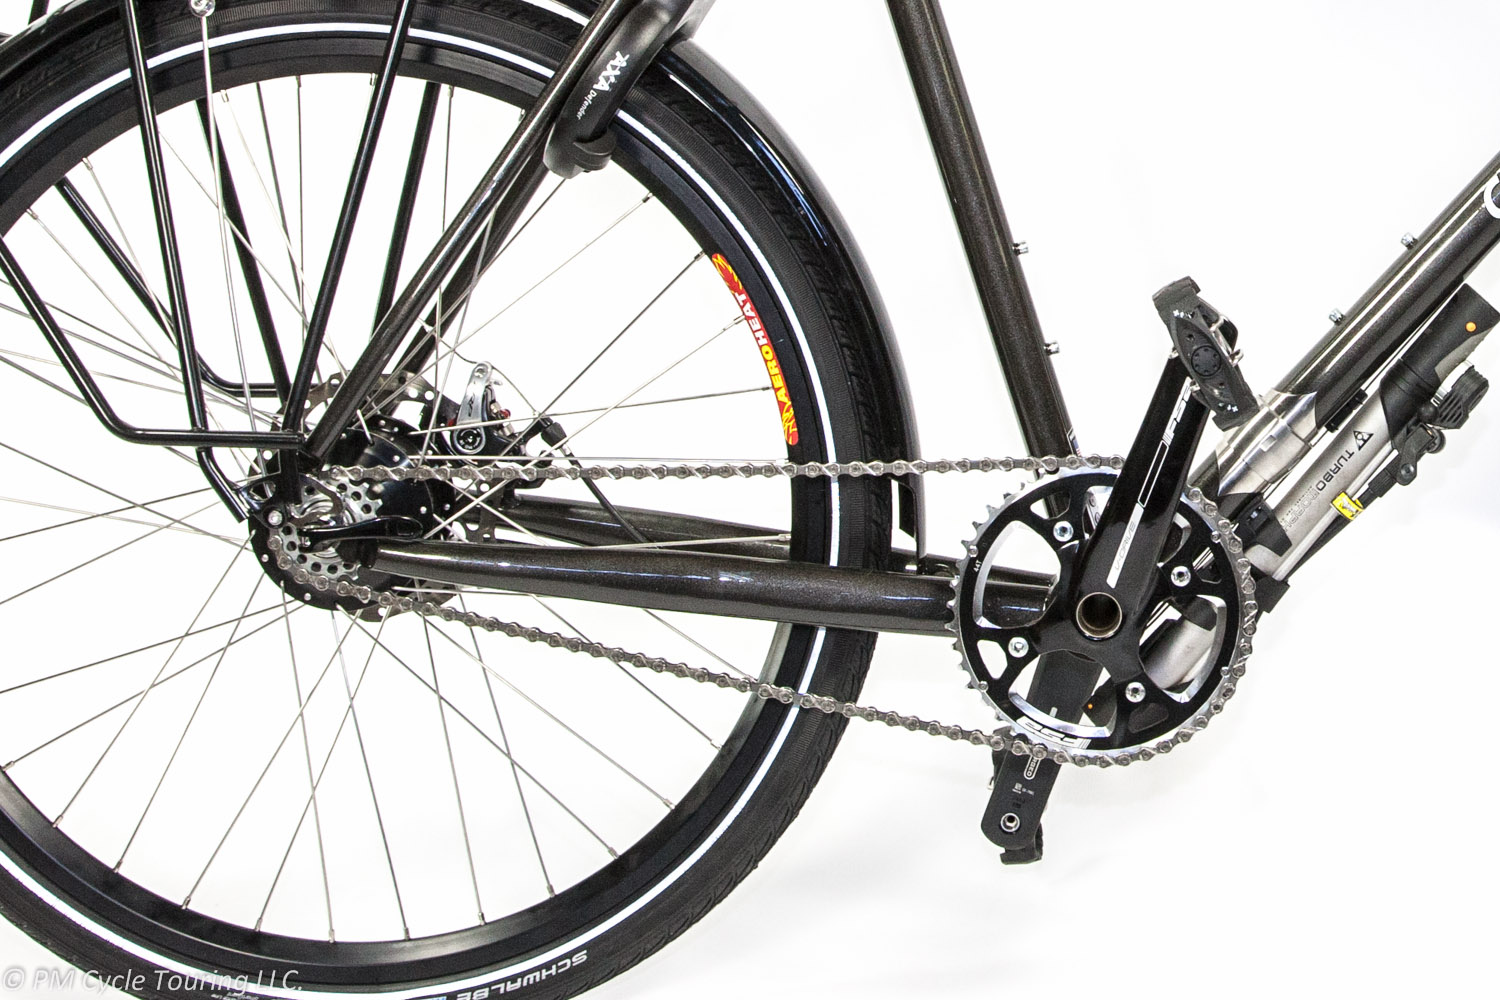
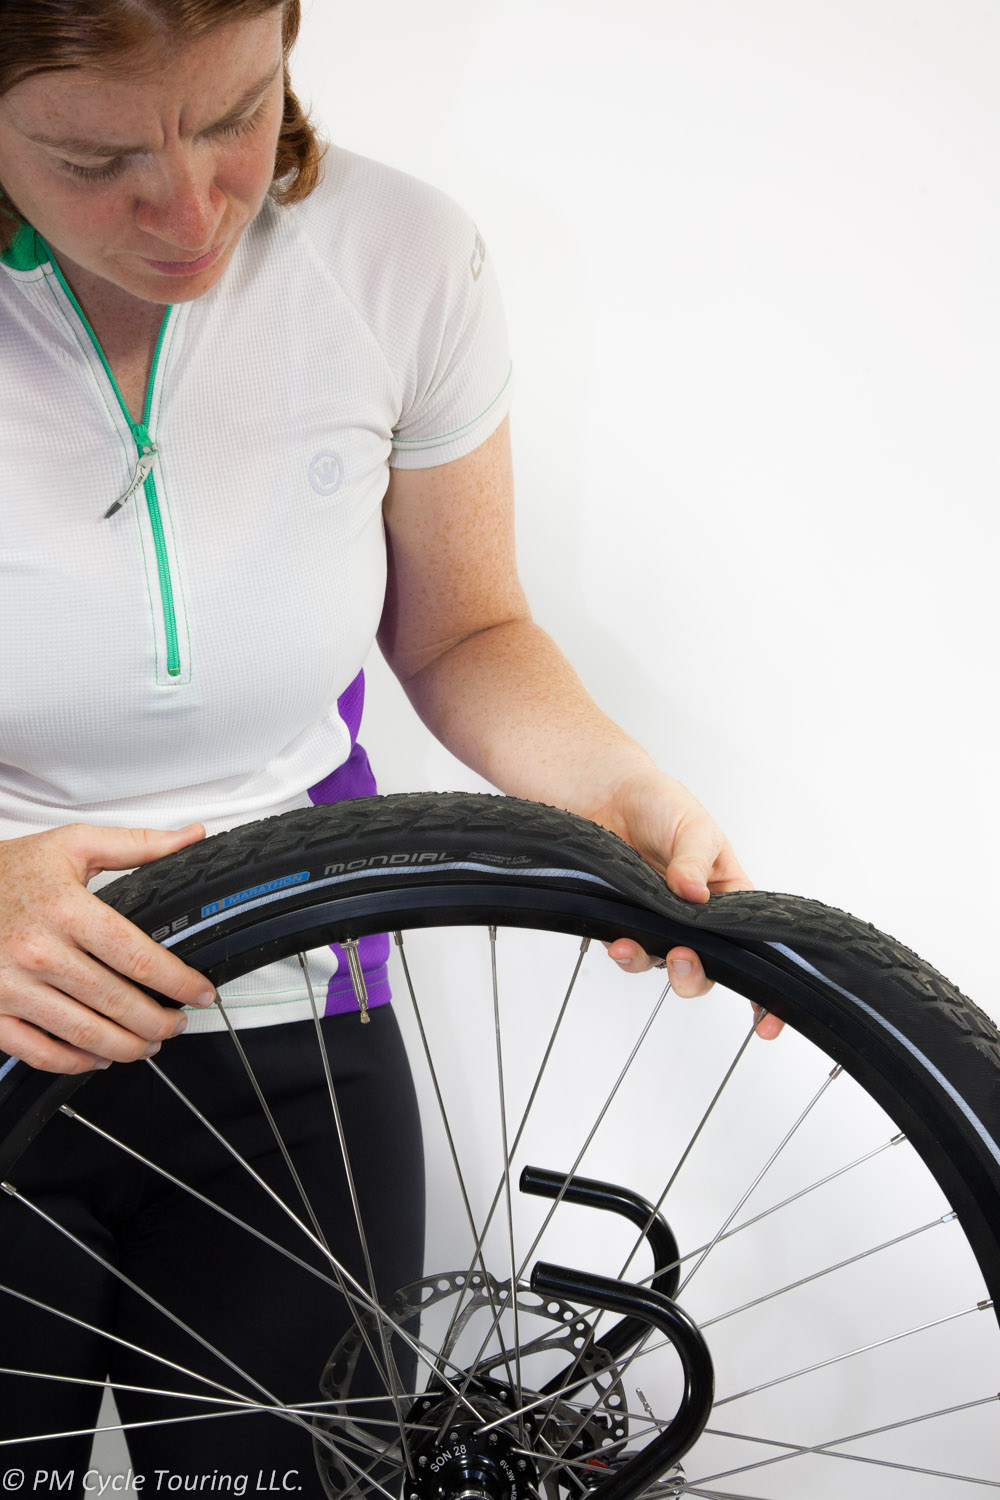
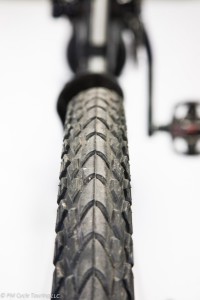
Next is the tire width. Depending on how narrow or wide your wheel rim is, determines the width of tire that you can have. You shouldn’t put too narrow of a tire on a wide rim: it won’t seal. Also, go too wide on a narrow rim, and your tire will pop off. Dangerous! Most people think that a wider tire means slower speeds, and a thinner tire makes you go faster. This is generally the case. But, a wider tire tends to mean a smoother ride, whereas a narrower tire gives a stiffer, bumpier ride. That being said, your body can get used to almost anything, and your ideal tire width ultimately comes down to personal preference.

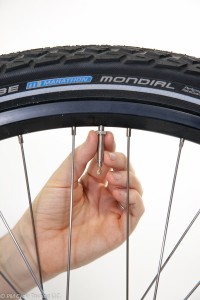
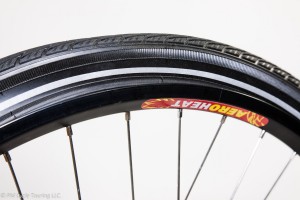
So, if you take a look at a tire you will see the size of the tire, for example, 700C x 23mm (23-622). This means the tire size is 700C with a 23mm width. The second number, in parentheses, is the ISO (the standardizing organization) designation, which says the same thing as the first number, but with width of the tire followed by diameter of the wheel. Thank goodness for standards! As long as you have a new bicycle, finding the appropriate size shouldn’t be a problem. Unfortunately, older bicycles might have non-standard size wheels, therefore the standard size tires might not fit properly.

I hope this helped. Just trying to decipher all the information really made my head spin. But, once you wade through it, it’s not really too bad. Now, trying to figure out which set of tires to get for your bicycle is a different story, and we’ll tackle that one another time!

Note: I got a lot of help for this article from Sheldon Brown’s website and if you want more information it is a great place to start.

Dream Bike: Gates Belt Drive or Conventional Chain

A relatively new concern when selecting your dream touring bike is the drivetrain. If you have decided on an internal gear hub it used to be a very simple choice: all bicycles had chains. However, over the last decade a new competitor has entered the arena: the Gates Belt Drive system. After taking an in-depth look at this new system I wanted to share my results and opinions.

Conventional Chain: This is the tried and true system. A metal chain connects the front cog to the rear cog on the rear wheel driving the bicycle forward. The downsides of a chain are that it requires lubrication, is difficult to keep clean, and can rust. The upsides are the durability, low risk of failures, and availability of replacements.

Gates Carbon Belt Drive: The newcomer to the bicycle industry, this is a carbon fiber belt connecting two special sprockets. At first glance there are some powerful incentives to this system. It is lightweight (~120grams lighter than a chain) and requires no lubrication or maintenance. In fact, if I were getting a commuter bicycle for around town I would really be interested in trying a belt drive. Touring around the world is a different scenario and I found problems with the carbon belt system.

On a tour in remote areas of the world my first concern is the availability of repair parts. If you damage the sprockets or belt there is virtually no possibility that a local bike shop will have repair parts. With that in mind you might starting wondering what it will take to damage a belt.

If you look at the manual for the Belt Drive (available here) there are several different actions which are listed as improper handling of a belt that may cause damage: crimping, twisting, back bending, inverting, zip tying, using as a wrench, mounting with a lever, or mounting by spinning the cranks. If any of those happen to your belt it is considered damaged and needs to be replaced (Page 5-7). While this may not be of much concern to the average rider, what if you wanted to carry a spare? Can you store the spare in your panniers in a fashion that does not violate any of the above? Basically, if any force is applied to the belt other than driving a bicycle it may be damaged.

Further in the manual, on page 34 it describes other scenarios that may damage the belt and require replacement: “… if a stone, a root, or a piece of clothing has been caught in the belt and pulled between the belt and the sprocket.” At this point it is advised that you always replace the belt. So let me think on this a minute. Do I want the drivetrain of my bicycle to require replacement because my pant leg got caught between the sprocket and the belt? Or if a rock drops on to the belt and rides through the sprocket? For a touring bike, no, and I don’t want to be stranded somewhere in the world waiting for a new belt to be shipped to me.

Another concern of mine is that the belt is tensioned much tighter than a bicycle chain. I have seen numbers in the range of 85-100 pounds of force being quoted for the tension. That tension is always there placing stress on the bearings of the drivetrain. Additionally, checking that tension is covered on page 15-19 which requires one of two special tools, or that you apply 20 to 45 Newtons of force (~10lbs) and measure that the belt deflects approximately 10mm. Once again I feel that this may be fine for a normal around town bicycle, but on a tour I would prefer not to be dealing with this.

And the last straw for me is that the belt requires a break in the frame. Because the belt is one solid piece the rear triangle must be capable of being separated to allow the belt to be installed and removed. Placing a break in the rear triangle of the frame seems like a less than desirable option on a bicycle that you want to take to the end of the world and back.

With all of this in mind I settled on the conventional chain with my Rohloff. It just fits the requirements that I am looking for in a bike and has a proven track record. I look forward to further advances in technology and one day being free of lubricating the chain, but for now touring on a carbon fiber belt doesn’t seem like the most reliable option.

Deciding on my dream touring bike

After pinching pennies and saving for years, and setting aside a tax refund I finally had saved enough to order my dream touring bike. You may think this very exciting; however, this meant that I actually had to decide on what bike that would be. Unlike the Raleigh Sojourn which I just picked up from a bicycle shop, I needed to educate myself and make some important decisions.

Before I could even think about anything else I needed to really nail down what I was looking for this bicycle to do. I am not going to have the luxury of purchasing another bike like this for a long time so I need durability. I wanted to travel around the world with no boundaries so I need versatility: it needs to be at home on dirt and gravel as well as on the pavement. It must be comfortable to ride and should be made in America to support my local frame builders and needs to be able to packed up for easy travel. With all of these criteria in mind I began looking at each piece of the bike.

Frame Material: This ends up being incredibly easy; if looking for comfort, repair-ability, and durability only one material really meets these criteria. Steel. A bike framed out of steel rides well, can be welded by any stick welder in the world, and should last forever.

Drivetrain: Currently there are two viable options: a derailleur system or and internal geared hub. The derailleur setup technically meets every criteria I laid out, however I am sick and tired of tweaking the shifting of these systems and cleaning the dirt and grime off them. Not to mention my wife’s experience with a stick snapping her rear derailleur right off and me having to tow her 2 miles on a dirt road back to civilization.

Internal gear hubs (IGH) move all the gears inside the rear hub. There is really only one option for touring with an IGH because of the large gearing required for a touring bike and that is the Rohloff Speedhub. With 14 gears covering a 526% gear range, it is the equivalent of a 27 speed derailleur. Additionally, you can change gears while stopped, no real cleaning is required since the gears are inside the hub, and if the shifting cables break you can set the gear manually. It will not auto return to the lowest or highest gear like a derailleur. The downsides are that no one will likely be able to repair it in remote areas of the world, and it weighs slightly (~150grams) more than a full derailleur system.

The last piece of the IGH puzzle is deciding if you want to use a chain or a Gates Carbon Belt Drive. While the carbon belt drive offers a grease free option and is lighter weight than a chain, I decided there were several significant negatives. You can read more about this comparison in its own article. My final choice was to use a chain for my long distance touring bike. While I will still have to grease the chain, I will always be able to find a replacement chain and my frame will be one solid piece of steel.

Wheel Size: 700c or 26” is the simplest way to sum up this question and I will try to make this short and sweet. 700c wheels tend to feel smoother and have less rolling resistance. 26” wheels accelerate quicker, are less likely to have toe-overlap and are available world-wide. Because I didn’t need speed, and wanted to go worldwide I choose 26” tires. However I do think that there will likely be a time in the future where 700c wheels are the dominate tire size since it seems to be the direction manufactures in the US and Europe are going.

Manufacturer: There are several touring specific manufactures in the US, however only Co-motion happened to have a dealer nearby me that stocked bicycles for me to test ride. This let me actually try out the Rohloff and feel the geometry of the bike, and after riding it I knew that this company knew what they were doing. Since they hand build each bike in Oregon if you need a custom frame change it is only $300 extra.

Conclusion: After all the research and time I spent looking I finally, nervously, decided that the Co-Motion Pangea Rohloff was the bike for me. I will document my experience ordering the bicycle, and give a review of it further down the road. If I missed any considerations, or you want to share your dream bike, leave a comment below!

How to Change a Flat Bike Tire in 12 Easy Steps (With Pictures!)

  1. Realize your tire is flat and stop your bicycle. Look for a safe place off the side of the road to change the tire. You don’t want to be doing this on a blind curve.
  2. Take off all your panniers and water bottles, otherwise your bicycle will be too heavy to flip and/or you will have things falling off your bicycle.
  3. Turn your bicycle upside down, and remove the wheel from the bicycle.Removing the wheel from the bike by unscrewing the quick release skewersClose up of the fork, make sure you unscrew the skewers enough to clear the fork.Removing the wheel from the bicycle.
  4. Visually inspect the tire. You may find the culprit. If you do find something, don’t assume that’s the only one. There could be more than one hole in the tube.Close up picture of the tread on a tire
  5. Release any air left in the tube.
  6. Using tire levers, lift up one side of the tire to remove it from the rim, all the way around.Prying the tire over the rim by inserting a tire lever.Prying the tire over the rim by inserting a tire lever, then use the hook end to attach to spoke, freeing up your hands for a second tire lever.
  7. If present, unscrew the nut on the valve so it can be removed from the wheel.Pam unscrewing the lock nut from the presta valve, some valves may not have this.
    • If you have not located a leak: Keeping the tube inside the tire, inflate using pump.Bicycle wheel on the ground with one side of the tire reomove from the wheel Holding your ear close to the tube, while still inside the tire, you may be able to locate the leak which may be either heard as a hiss, or felt as the air escapes.Pam listening for a hard to find leak.
  8. With the leak located, patch the tube. Follow the directions on your patch kit. We prefer the patches that are peel and stick, they work just as well as glue and are easier to apply and get pedaling.
  9. Decide if you are going to replace the tube or reuse the just patched one. Put one side of the tire back onto the wheel, and lay the tube inside. Make sure the tube is not twisted. I like to inflate it just slightly here.Pam replacing the tube with a new tube.
  10. Using tire levers, or your hands, reseat the tire onto the wheel. Using a tire level to seat the tire back on the rim.Using a tire level to seat the tire back on the rim.Make sure the tube is not pinched between the tire and the wheel, and that the bead of the tire is seated properly in the hook of the rim.Straight on view of a tire, notice the hook (the bump on the inner edge of the tire which will engage with the rim to keep the tire on the wheel)
  11. Re-inflate the tube halfway watching for any signs of the wheel slipping off the wheel. While inflating watch carefully for the tire bulging or not seating. In this picture the hook of the tire did not catch the rim and if you keep inflating the tube will like burst.Make sure the tire is seated on the wheel all the way around. Bounce the tire on the ground a few times to settle the tire on the seat and the tube inside the tire.Inflating a tire with a stand up bicycle pump.
  12. Inflate the rest of the way and replace the wheel on the bike. Turn the bicycle upright, replace all panniers and water bottles, make sure your light is on, and congratulate yourself on a job well done.

On a related note, what if the flat tire is caused by damage to the tire itself? For example, the tire has been damaged and is now rubbing the tube, causing constant flats. One great remedy is using a dollar bill. Place the bill inside the tire, next to the tube. This creates a barrier and protects the tube until a more permanent solution can be found. Another thing that could help is rotating the tires. If the damaged tire is the rear, which is carrying most of the weight, you may want to rotate the tire to the front where it will be subject to less stress than the rear. That might save you from having to change it a few times, at least.

Do you have any tips or tricks you want to share? Feel free to leave a comment below!

First Look: AXA Defender Frame Lock

If you are unfamiliar with frame locks you can read my previous post. The AXA Defender weighs in at 670 grams and is available in several colors. Before purchasing an AXA Defender frame lock there are a few things to consider: Understanding the limitations of a frame lock, where the lock will be mounted, how it will be attached, and how the key performs.

Limitations: A frame lock alone will not prevent someone from picking up and walking away with your bike or throwing it in a pickup truck. However higher end frame locks like the AXA Defender have a special plug-in for a cable or chain when it is desirable to attach the bike to prevent it from being carried away. Lastly it is important to realize that any lock can be defeated by a determine thief, you have to balance security/weight/hassle with any locking mechanism.

Location: The ideal location for the AXA frame lock is inside the rear triangle of the bicycle. In this location even if the lock mounts are cut and the wheel is attempted to be removed the shape of the lock will prevent the rear wheel from being taken. This is a particular benefit if you are using an internal gear hub, like the expensive Rohloff Speedhub, and want some protection to prevent it from being stolen.

Attachment:Mounting the lock is the trickiest part and should be considered carefully before purchasing. First you should know the size of the AXA Defender and ensure that it will fit including fender and tire clearance. To assist with this I have provided picture of the lock on ¼” graph paper and included measurements as practical.

Secondly, you need to determine how to attach the lock; most North American bicycles do not have mounting points for a frame lock. There are two methods that I am aware of for attaching the lock. First is using a set of straps that act like a hose clamp around the seat stays of the rear triangle. The second method is a top bolt option which has two long bolts and a clamp attachment, this is pictured below.

AXA Defender RL top bolt mount on 1/4 inch graph paper

Key: The AXA Defender will retain the key in the lock until the lock is locked. This is a double edged sword. The up side is that you always have the key in the lock ready to go until it is locked, then you can remove the key. The hypothetical down side is that if you leave you bike unlocked, the key will remain in the lock, allowing a cruel individual to lock the lock and take the key. Leaving you with a locked bike and no key. An easy solution to that problem is to always lock you bike, or take a spare key along with you.

Overall I am very excited to use this lock, while there is a weight penalty to carry it around I will always have a lock on my bike ready to be engaged. After some use and actual touring I will come back and provide a follow up review of this lock, but for now the AXA Defender seems to meet all the criteria I could ask for in a frame lock.

I actually had some much trouble finding the AXA Defender for sale in the USA that I bought some extra locks and have them for sale. Please e-mail me at Matt@PMCycleTouring.com if you are interested in buying from us as our online store is a work in progress. If you have any questions leave a comment below!

Learning to Ride a Bicycle (Pam’s bicycle evolution)

I started riding bicycles when I was about 7 years old. My first bike was a fixed gear, with a coaster brake, you know, the one where you just push backwards on the pedals and the bike stops. I got my first bike with multiple gears (10) and rim brakes when I was a teenager, and I loved the speed I could attain on that bike. But then I got my driver’s license, and for some reason I stopped riding. I guess that happens to a lot of us. Driving a car was just more convenient, and gas was cheap.

About 9 years ago, I became interested in bicycling again. I bought a comfort bike, with twist shifters and 21 speeds. Even though I hadn’t been on a bicycle in more than a decade, it’s true what they say: once you learn how to ride a bicycle, you don’t have to relearn. I rode that bicycle everywhere from city streets to dirt trails. Getting used to all the gearing took some time, but I eventually got the hang of it.

Then came my first touring bicycle, a Raleigh Sojourn, with bar end shifters and clipless pedals (the adjective clipless is misleading and confusing. It really means “clip-in,” where the shoe is clipped into the pedal.) The very first time I rode the bicycle I was afraid to clip in completely. I was sure I wouldn’t be able to unclip in time when I stopped. So, I just rested my foot on the pedal while I rode, but when I did come to a stop, my clip was stuck to the pedal anyway, and I fell over. Right in front of the bike shop. I was so embarrassed, but less so when I found out that almost everyone falls at least once. Over time it became natural to clip in and unclip, and now I don’t even really have to think about it.

Bar end shifters were also an adjustment. However, once I figured it out, I liked the dependability of the shifting. My biggest problem at first was remembering which side controlled the front gear, and which the back. Unlike the twist shifters, there were no numbers on the shifters to clue you in. Also, I would sometimes forget which direction I was supposed to shift, and when I really needed an “easier” gear, I would accidently shift to a more difficult one, and lose my momentum. I had to make up a mnemonic to help me remember. To go UP the hill, the chain needs to go UP the cogs on the back. The lever gets pulled UP.

My latest bicycle has Shimano STI shifters, which are combination gear/shifters. This was yet another learning experience for me. It took quite a while, but the quick shifting that you can do with this style of shifter is amazing. The shifter is within easy reach, and if you have to brake quickly, your hand is right there.

After riding for many miles and many hills, I have begun experimenting a bit with different gears. A lot of people will tell you that the most efficient way to ride a bicycle is to keep a high cadence (how fast you pedal) of 80-90 rpms, no matter what gear you are in. I’ve always had a difficult time with this. At first, it was because of my lack of skill at shifting. I wouldn’t shift soon enough before a hill to keep up my cadence. Also, I’ve found that 80-90 rpms is way too high of a cadence for me to be comfortable. I enjoy riding at a much more reasonable 65-70 rpms (This is an estimate since I’ve never had a cadence meter installed on my bicycle).

With practice, I have become a pretty good judge of a hill. Looking at it, I can tell when I need to downshift in order to keep up my speed or cadence to get up the hill. Every once in a while, the steepness takes me by surprise, and I find myself rising out of the saddle to give myself a little more leverage. A skill that I had in my youth that I had to reacquire as an adult. For some reason, it felt unsafe with my shoes clipped into the pedals. Once I got over that feeling, I’ve been able to use the skill to my advantage. But mostly, I am able to choose the right gear to make my way slowly and surely up every hill I encounter.

As with everything in life, it all takes practice. Whether you are new to riding a bicycle, or new again to riding, it’s the same. Don’t be afraid to try new things. Whether it’s clipless pedals, bar end shifters, or brake/shift levers, you may find yourself loving the new technique even more than the old.


Choosing the Right Lock for your Touring Bicycle

Because Pam and I tour as a couple we always have one person to watch the bicycles while the other runs to the store or bathroom. However, if you want to leave your campsite and hike, or take a day trip somewhere else, a lock can do wonders to ease your mind. Last tour we brought a tiny portable lock on tour with us, which a pair of scissors probably could have cut through. We basically would just lock our bikes together to keep honest people honest. However, there were a few times I wished that I had brought a more substantial lock.

After some research I decided that a frame lock (which attaches to the rear triangle of the bike and stops the rear wheel from moving) is the ideal touring lock. While a frame lock alone is not going to prevent someone from picking up your bike, the fact that it is fully loaded and said person would have to carry 50+ pounds where ever they wanted to take the bike might be enough of a deterrent.

Another benefit of a frame lock is how easy it is to engage the lock, you simply partially twist the key while pushing down on the lock lever and the bike will not roll away. If a bit more security is needed a plug in chain or any cable with loops can be attached to a fixed object. But there isn’t any fiddling with getting a lock out of your bags and finding an appropriate place to attached it. The lock is always on your bike ready to go.

Additionally when the lock is engaged your rear wheel won’t turn. Since neither of us have kickstands, engaging the lock means we can lean the bike against anything we want and it will stay upright and not roll away.

If someone really wants to steal my bicycle they will; no lock can stop that. But this will give me peace of mind that someone can’t just ride away with my life, and it is so easy to use that it is unlikely for me to not lock the bike. It may even allow my wife and me to spend more time together (in case being on a tour wasn’t enough time together anyways).

Bicycle Repair Equipment: 5 Must-haves for your next tour

Where you plan to tour and how long you’ll be out there play a big factor in deciding how much repair equipment to bring. If your tour is in the US on highway and state roads, chances are that you can get away with bringing fewer repair items. However, if you are touring in the Siberian Tundra, you might want to bring everything, including a spare bike if you can! Here are 5 things I think every cycle tourist should bring.

  1. Multitool. Do not leave home without it! Instead of having separate tools in varying sizes, the multitool makes it so much more convenient. You will need this at some point on the tour to make adjustments, or to make repairs. A proper bicycle multitool with the appropriate sizes for your bicycle is very, very important. If you are going around the world the Topeak Alien III  has every tool you can cram in. For something simpler try the Avenir Woodsie 10.
  2. Spare tubes. Even with the world’s best, toughest tires, you will have a flat tire at some point on the tour. Road debris or nails or thorns will most likely cause a flat. Make sure you have at least two spares; we have had valves fall off and other oddities that would have left us stranded if we didn’t have more than one spare. Tube manufacturers recommend no more than 2 patches per tube, however we have easily doubled that. Slime tubes can help prevent tiny holes, but are still susceptible to large punctures; we found them less useful than we hoped. Tubeless tire systems are touted as being better, however a common complaint is the difficulty of riding with them. It is easiest to bring along spare tubes and know how to change a flat before you leave.
  3. Tire Levers. It is much easier to change a flat with these. They are usually cheap and you can pick them up at any bike shop or store that sells bicycles. Make sure you get a sturdy pair; the flimsy thin ones will break. They come in packs of three typically however two is all you really need.
  4. Hand Pump with Gauge. Many hand-held pumps are difficult to use and impossible to tell how much air is in the tire. With a gauge, you know you’re putting the right amount of air in. We’ve tried several small pumps and the Topeak Turbo Morph G Mountain Mini Pump  was by far the best. I would recommend it to any tourist.
  5. Duct Tape. When all else fails, duct tape can be the difference between having to walk and being able to hobble to a bike shop for repairs. We like to keep a roll wrapped around parts of our pannier racks for emergencies. You can use duct tape as a tire boot, to patch clothing/tents, an emergency bandage, and much more.

If you are traveling to extremely remote areas, consider bringing along some extra tools. For example, a chain tool, extra spokes, lube, extra tires, cassette removal tool, pedal wrench, and spare derailleur cables might come in handy. These tools all add weight and take up space, but might be necessary if you are hundreds (or thousands) of miles from the nearest bike shop.


What to Pack: Clothing

As with everything related to cycle touring, careful planning beforehand can payoff big time. This is especially true when it comes to clothing. Weather prediction is a tricky thing, and having the appropriate clothing for any weather situation is difficult. But, with a few guidelines, you can make the right decision and pack your panniers with the right amount of clothing.

The key is to pack only what you need and not a thing more. As I look over my gear list for my last two tours (check them out here and here), I notice a theme. Many items have multiple uses. Versatility is the name of the game.

Tops. Cycling jerseys come in a variety of sleeve lengths. Sleeveless, short-sleeve, long-sleeve, three-quarter sleeve. The most versatile is short sleeves in combination with arm warmers. However, I’m starting to find long-sleeved jerseys to be the best for me, as it cuts down on the amount of sunscreen I have to apply. Plus, if it’s really cold, I put my armwarmers on under my jersey, and then with my rain jacket as an over-layer, I have 3 layers on my arms and I’m very comfortable. I usually bring one short-sleeved jersey along as well. If the jersey is made of a material such as wool, it can go a few days before starting to smell funky. I like to at least air my jersey out from the day, using a clothesline (such as this one) or just draping it over the tent. Unless it rains or is overly humid, it dries overnight. Another great thing about wool is that it lends very well to hand washing, which can be great in areas where you are away from a washing machine.

Bottoms. Cycling shorts also come in a variety of lengths, from super short shorts to long leggings, and everything in between. The most versatile would be shorts, in combination with leg warmers. I’ve found that two pairs of bicycle shorts are all I need on a tour. I wash the pair I wore that day, let it dry overnight, and wear the other pair the next day. I generally wash the shorts in the shower with me at night, making sure to get all the soap out. You can even wear the shorts multiple days in a row if required, just make sure the shorts are dry completely, because wet shorts can rub you the wrong way. I also like to bring a pair of rain pants, which act as a windbreaker layer as well.

Undergarments. The other essentials would be underwear, bras, and socks. I don’t wear underwear while I ride, because of the rubbing and chafing that can happen. I bring 2 pairs of easily washable travel underwear (like these), 2 sports bras, 1 regular bra (which I recommend for every woman. Sports bras can be so restrictive, and having an actual bra can make you feel more human at the end of a long day’s ride.), 3 pairs of riding socks, and one pair of camp socks.

Rain gear. Invest in a good set of waterproof outer layers. For more on what makes raingear great, see this post.

Camp clothes. I recommend bringing a pair of pants and a long-sleeved shirt to wear about camp. I prefer pants that unzip down to shorts, because this adds to the versatility.

Miscellaneous. Other recommendations are a beanie (to keep your head warm in camp), a pair of walking shoes (so you can enjoy exploring camps and towns), and a down vest.

By getting pieces that have multiple uses, you can cut down on the amount of clothing you bring with you on tour, and still be ready for anything Mother Nature can throw at you.


Solar Panels and Bicycle Touring: Bushnell Mini Wrap Review

My husband and I were on a short 4 day training ride last summer. As with most bicycle tours, we found ourselves becoming friends with a fellow tourist and the obligatory checking out the different things he brought with him on his tour. We took particular interest in his solar panel for charging his phone and other electronics. This got me to thinking: maybe we should get a solar panel for our next tour. We checked out the various options and found that portable solar panel technology has come a long way.

We wanted a solar panel that was: lightweight, durable, and had a battery capable of holding a decent amount of charge. We ended up going with the Bushnell Mini Wrap solar charger for our 2,500 mile trek across the Southern Tier. The Mini Wrap met almost all of our needs and we were satisfied with the purchase. Here are our takeaways:

Product: Bushnell Mini Wrap

Weight: At just 96 grams, this solar panel is very lightweight. As a luxury item, I didn’t feel like it was too much extra weight to bring along. It also rolls up and takes up very little space.

Durability: Made of a flexible material, I didn’t feel like we were going to break this solar panel. We used Velcro to attach it to the top of our Bearikade can while riding. It laid around the can perfectly. The Bear Grylls version claims to be waterproof as well. We used it for one tour and haven’t really given it any more use since.The Bushnell Solar Mini Wrap laying over a Bearikade cannister

Functionality: This solar charger has a battery that charges up in about 10 hours of direct sunlight. It charges even on a cloudy day, it just takes longer. The battery also comes with a mini-usb in port so you can charge it using a wall outlet. The USB output means you can charge up your phone, camera, e-reader, or anything else that has a USB cord.Bushnell Solar Mini Wrap unrolled next to a 12 ounce can.

Cost: At around $60, this is a great addition to your cycle touring tool bag.

Recommendation: Highly recommended for sunny tours.


Disclaimer:
All opinions about any products mentioned in this article are my own. I have not been compensated in any way by anyone. I will, however, receive a small commission if you choose to purchase the item from Amazon after clicking the link I provide. Use your own discretion.