Powering Your Tour

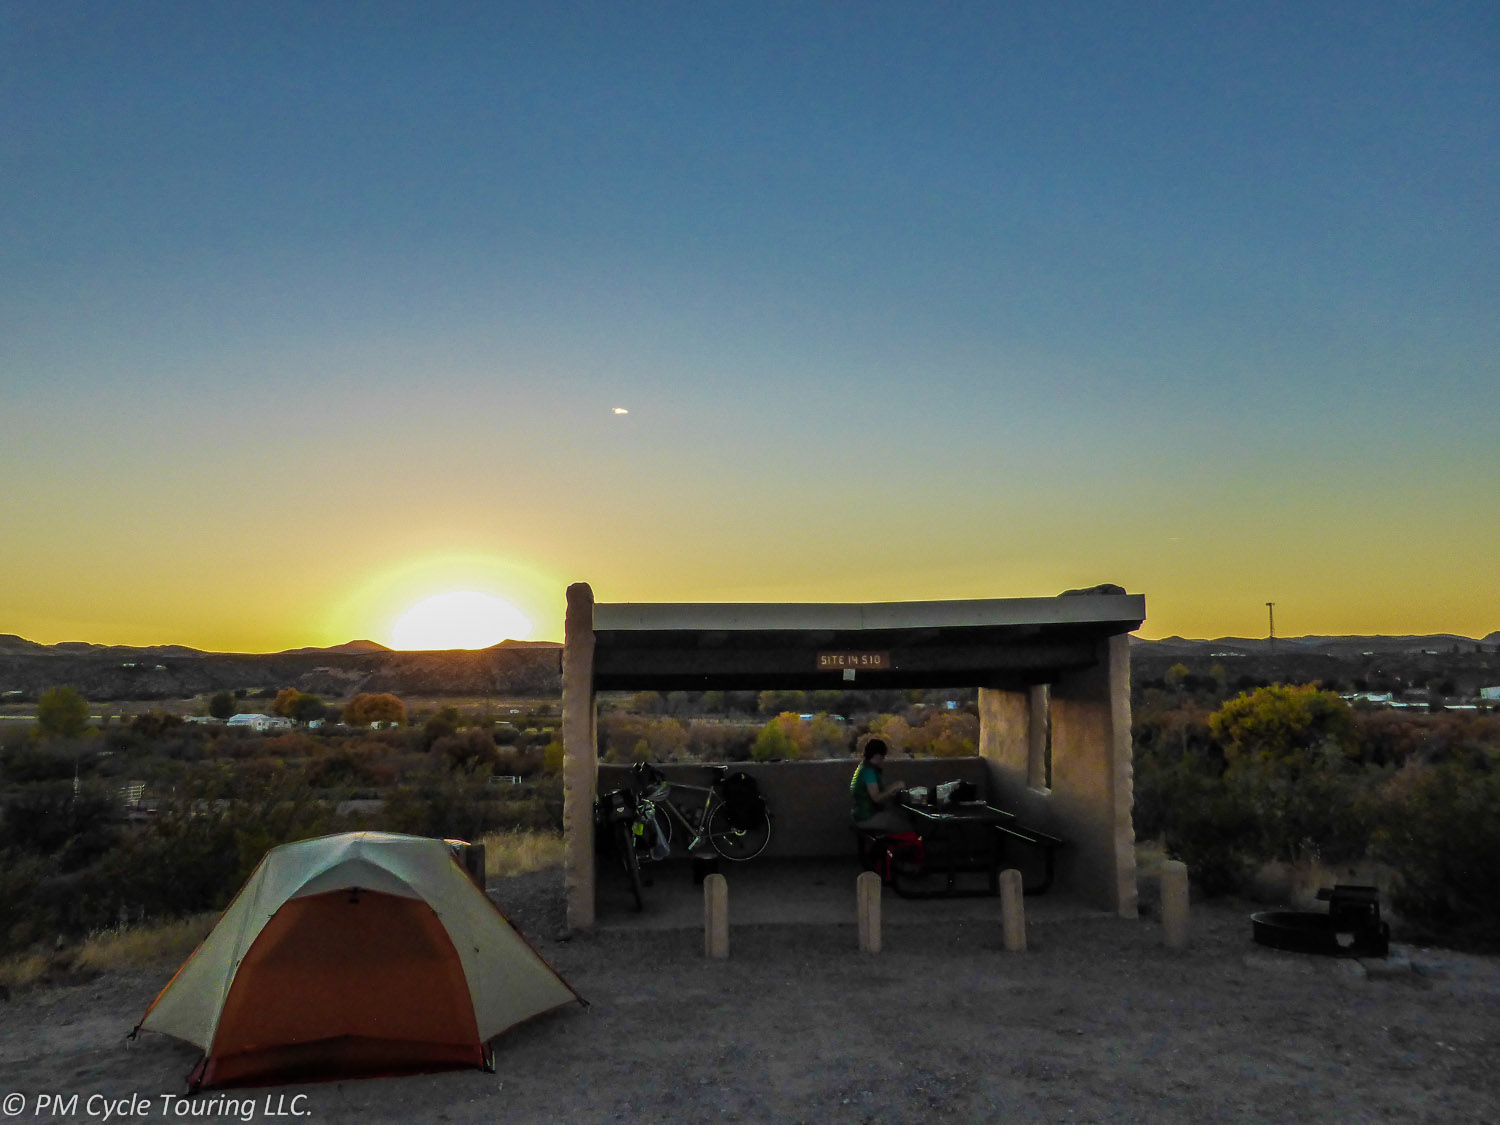
Now that you’ve decided to go on this crazy thing called a tour and have purchased all the cool gadgets to make your tour awesome, you’re worried that you will be stranded with a low cell phone battery in the middle of nowhere. I’ll admit, I was afraid of this same thing. Ok, maybe not afraid so much as concerned; after all, one of the best things about touring is the ability to unplug and get away from the noise and distraction of the digital world. However there are some amazingly cool apps and doo-dads that require power and can make your tour better and easier. For those of us unable to completely unplug, here are some ideas to help you keep your electronics powered while you’re on tour:

Solar Power.

One thing we found worked for us on the Southern Tier (where it was sunshine and blue skies most of the trip) was a Bushnell Solar Wrap which we kept exposed during our days’ rides, and charged up an internal battery which could then be used to charge any USB device. Additionally the internal battery could be charged from a USB wall charger allowing us to top it off at night or after cloudy days.

The downsides are that it takes ten hours of direct sun to charge fully and doesn’t work in inclement weather. Both of those can be challenges when you are riding a bicycle. The solar charging equipment seems to be a tough product to engineer well, with many solar charging have a large number of negative reviews. This probably shouldn’t be your only method of charging at this time.

Battery backup.

We use a Jackery Bar which is a small battery with a USB port that our devices could be plugged into. Our initial intention was to use this as a backup. We would charge the bar up using any outlet we came across, and use it to give our phones and cameras a boost. This ended up being our favorite option: it charged quickly and lets you use your device where ever you want.

Also in risky situations you can leave the battery bar charging unattended instead of your expensive devices. Our favorite part of this solution is that it freed us from having to sit near an outlet while charging the phone, simply plug the phone into the Jackery Bar and you can now use your phone anywhere. No more hanging out in those lovely state park bathrooms while trying to get a charge.

On the grid.

Any time you’re stopped in a place with a wall outlet, take advantage of it if possible. Plug in your devices when you can. Some common charging spot include hotels, the bathrooms at the campground, or even the local library. Make sure that you ask the owners/operators before charging, however most people are very understanding and willing to help you out.

Conservation.

One of the easiest ways to reduce your charging requirements is to conserve battery power. Turnoff your devices when you don’t need them, put your phone in airplane mode when you’re not using it. I’ve found airplane mode works better than powering it completely down and then back up, which seems to take more juice. Also this allows you to have the phone available and ready to use versus waiting for it to startup. Most smartphones have a widget which can turn airplane mode on and off with one click.

Remember, bicycle touring is all about solving those little problems as they come up. And, don’t forget, it’s not the end of the world if you can’t check your Facebook that night. But with a little pre-planning, you can be as plugged in (or as unplugged) as you want to be on your bicycle tour.


Using Cell Phones While Bicycle Touring: How to get the most out of your battery

Bicycle touring is a great time to unplug from technology, to immerse yourself in the natural world. However, those tiny, handheld computers we call smartphones are so darn handy! Camera, GPS, journaling device, googler, calculator, you name it. They seem to be too useful to leave behind. Although I remove myself from Facebook as much as possible while I’m touring, I bring along my phone for all those other useful purposes.

Initially when I started touring I would get so frustrated with my cell phone. Even using it only to make journal entries in camp, I would only get two or three days of journaling on a single charge. This was a newish phone, and I wasn’t using it all day, every day. In fact, I was turning it off when I wasn’t using it. Why was the battery not lasting longer? My husband, on the other hand, seemed to have unlimited battery on his phone. We had the same phone. What was the deal?

Well, turns out I was doing it wrong. Once I changed two simple things, my battery lasted longer and my frustration level lowered.

Airplane mode: I thought that turning the phone off when I wasn’t using it would make the battery last longer. Boy was I wrong. Powering down and powering up takes a decent amount of battery power. Who knew? Well, once I started putting my phone into airplane mode, it lasted for longer. Sometimes a whole week.

If you’ve never put your phone into airplane mode, it is simple. Most cell phones have this mode and you can usually access it in the same menu as the power down menu. It should be as simple as selecting “airplane mode”. This keeps the phone on and lets you use the phone, but turns off the part of the phone that searches for a cellular signals. Without doing this your phone will constantly search for a signal unless you tell it not to. Silly phone! Be aware this will prevent you from accessing the internet or making phone calls, but it is pretty quick to turn airplane mode off if you need more from your phone.

Display brightness: Another battery eater is the display. Most phones have a way to turn down the brightness of your display. Once I turned this down to the lowest setting, even though it was now difficult to see what was on the screen, it saved precious battery power.

Essentially, by changing these two settings, you turn your high powered phone into a low power phone. But the camera and non-internet apps will still work if you need them. If you need to make a phone call or check where you are on the map, simply turn airplane off for a couple minutes then turn it back on. So, save your battery. And perhaps your sanity.

Do you have tips for saving your cell phone battery? Tell us in the comments below!

How to Stay Clean (without a proper shower) While on Bicycle Tour

At the end of a long day of hard bicycle touring, you ride into a primitive camp gritty and grimy from the day’s ride. The sunscreen you slathered on in the morning and then reapplied has now mixed with sweat and dirt and chain grease to give you a nice film on your skin. If you’re lucky, you have a shower waiting for you in that camp. Sometimes, though, you have to make do with what is available. Here’s a few things I’ve done when I have to improvise.

1. The towel rinse: If there’s water available at your campsite, just not a shower, you can still freshen up. I’ve been known to strip down to my sport’s bra and shorts, or even put on a bathing suit, to stand under a spigot. I also wouldn’t shy away from wetting down my towel really well and giving myself a “sponge bath”. It does the trick of getting the grime off and making you feel better.

2. Baby wipes: I’ve used baby wipes in the past. However, these are made for wiping, um, babies, and aren’t particularly durable. I find I need to use a LOT of them to get the job done. On the other hand, I love having baby wipes on hand to clean my hands after changing a flat tire or putting a chain back on. (Yeah, you could just wipe them on your shorts, but who wants to do that?)

3. Bathing wipes: These things are awesome. They’re thicker than baby wipes, and more durable. They don’t fall apart on the first go. The ones I’ve been using lately come with directions on the proper way to wipe (hint, you clean your face first, not last!). Some varieties are biodegradable, too, which is a plus. Although, that doesn’t mean you can just throw them on the ground. (Pack it in, Pack it out!) I bring along a special ziplock bag just to store them until I can find a trash can.

I tend to really enjoy a nice shower at the end of the day so it’s not my favorite thing to do when I have to skip one, but once in a while there will be no other option. And hey, it’s not going to kill you to go without a shower every once in a while. Trust me!


Lessons Learned from my First Bicycle Tour

September 20, 2011
Ferndale, WA to Deception Pass State Park, WA
52 Miles

Woke up early this morning to a beautiful sunrise at Aunt Robin’s house. She made us a delicious breakfast (bison with eggs and hashbrown casserole). Finished up the bike prep, and away we left! We departed at 9am or so, and headed to Bellingham. We got to the bike shop in Bellingham around 11, and picked up two wireless bike computers. The guy at the shop was nice enough to help us install them. Then it was back on the road. We should have eaten in Bellingham then, since it was another 3 hours until we made it to a café for lunch. It was a hard fought 3 hours of riding, too. By then, we had gone 17 miles from Bellingham, only 29 miles for the day, and I was already so tired. That ride through the mountains was beautiful, and we even picked some blackberries, but I wasn’t sure I could keep going. But we did keep going. And going. Past Padillo Bay and Anacortes, up over Deception Pass to Deception Pass State Park. We had trouble finding the campsite, and then had to pay $21, but I’m so glad to be done. Tomorrow will be better! It is 730pm, getting dark, and after a baby wipe refresh, I’m ready for bed!

This was my very first journal entry from my very first bicycle tour. I did pretty well conveying the mood of the day. But there were some details I left out. I didn’t really describe how miserable and tired I was. How I almost broke down and cried 5 miles from camp because I didn’t think I could keep going. We took a wrong turn trying to find the campground and ended up climbing up a steep hill, and I was so dejected and disheartened. If this was bicycle touring, I wanted to quit. But here’s the good news. As I said in the journal entry, it WAS better the next day. And the next. It just kept getting better. I got stronger, and it became easier to enjoy the little moments. There are definite moments bicycle touring when you will want to quit. But there are many more when you’ll just be amazed. At the scenery, at your strength, at how far you’ve come. I’d like to share with you a few of the lessons I learned (from that very first day of touring) that can benefit all of us.

  1. If you shipped your bike to your starting location, make sure you know how to put it back together again.
  2. Train (with distance and weight) before you leave.
  3. If you don’t train, plan for shorter distance days in the beginning until you get stronger.
  4. Make sure you know how many miles you are traveling the first day. Nothing is worse than thinking you’ve already finished the ride for the day, only to find out you have to go 12 miles further.
  5. You WILL get stronger and it WILL get easier.
  6. Eat, eat, eat!
  7. Always have an extra meal, just in case you need it. Peanut butter and jelly sandwiches are perfect for this.
  8. Bring fuel for your stove. Sterno cans just don’t cut it!
  9. You don’t need a pasta strainer! And it’s ok to ship back unneeded things you thought you would need on the trip, but really ended up just being extra weight.
  10. It will be harder than you think, but much more rewarding than you can imagine.

I thought I had prepared myself for that first tour. Boy was I in for a surprise. But the thing is, even though I collapsed onto my sleeping pad that first night and passed out from exhaustion, and even though my whole body was sore in the morning from all the hard work I had done the day before, I never gave up. And everything eventually came together. When I think of that first tour, the difficulties of the first day (or week) are a dim memory compared to the rest of the tour. I’m so glad I was able to push past those speedbumps and keep going. And I’m a better person for it.

Gradients and Categories: How Steep is that Hill?

For me, there is nothing better in this world than the accomplishment of reaching the top of a mountain, looking back on the road behind, and eagerly awaiting the descent ahead. I’m fairly new to cycling, and as I’ve learned how to be a better cyclist, I’ve thought of hills in terms of how difficult they were to climb. But I’ve also noticed those signs, you know, the ones with the %. I’ve also heard other cyclists refer to a category system for hills. It was all confusing to me, but now that I’ve been riding for a bit, I figure it’s about time to understand what those signs mean.

The % grade signs that the highway department installs are put in place for vehicles. Some trucks have a hard time with steep hills, going up or coming down. That percent grade is usually accompanied by a distance, as well. For example: 6% downgrade next 4 miles. Percent grade is simply a numerical value given to the average gradient of the hill. The gradient is a fraction, rise divided by run. In simpler terms, it is (the number of feet traveled vertically) divided by (the number of feet traveled horizontally). To turn this into a percent, times the number by 100. For example, if you travel up a hill 9 vertical feet over 100 feet, then the percent grade would be (9/100)x100=9%. Since the road sign gradients are averages, this could mean sections of the hill are steeper or less steep, depending.

You could actually calculate the grade of the road by carrying a level and a ruler (and a calculator). (I don’t know anyone who carries around either on their bicycle, but I suppose if you were curious, you could do it.) Lay the level down on the ground with the ruler at one end. Raise the end of the level by the ruler until it reads level. Your run will be the length of your level (for example 24”) and the rise will be the reading on the ruler. This will tell you the grade at that exact point on the hill, but not the average grade of the hill. (If you want a more high tech way of determining the grade, try a cycling computer with the function built in, such as the one Matt used on our recent tour, the CatEye Adventure cycling computer. This computer uses altitude to calculate the % grade and feet climbed, as well as many other features.)

But what does a percent grade feel like? Well, here’s how I look at them personally:

  • 0%- Flat road. You’re actually not going to find many of these anywhere. Except maybe Holland.
  • 1-3%-This is sometimes known as “false flat”, especially the low grades. You’ll find yourself working to maintain your speed, and might even push it a little too hard. You won’t necessarily feel like you’re traveling uphill, but trust me, you’re working.
  • 4-6%-With good low gears, a strong rider can easily maintain this grade for many miles. It does take work, but you’ll know you’re going uphill. Slow and steady is always my mantra!
  • 7-9%-Most strong riders will do well for short distances, as long as you have low enough gears. In northern Washington I found myself pushing my bike up many 9% hills.
  • 10-15%-Difficult. If it’s for very long, you might have to walk a bit.
  • Above 15%-Extremely difficult. Even experienced riders will find grades this steep to be challenging. Without low enough gears, you’re definitely going to be walking this one!

Another way that cyclists use to categorize hills is the category system. There are 5 categories: Category 1-4 and Above Category (or HC). These categories are based on the difficulty of the climb, with Category 4 being the easiest, Category 1 the most difficult, and HC off the charts. This method originated with the Tour de France(TdF). Maybe that’s why it is counter intuitive that the most difficult is Category 1, but there’s an even more difficult. For the TdF, both steepness and length are considered. Other groups use the category method, but simplify the criteria. For example, the Tour of California only considers the elevation gain of the climb. Category 4 climbs are of 250 to 500 feet in elevation gain. Category 3 are of 500 to 1,000 feet. And so on until HC which are climbs above 5000 feet in elevation gain.

Some riders get hung up on the idea of what hills are coming up. They stress and fret over big Category 2 hills, or steep 7% grades. What I’ve found is that it is irrelevant. If there’s a hill, I have to climb it. While climbing, I try to enjoy it. That slow steady burn, that’s where I get most of my thinking done. And the view from the top, well, that’s the icing on the cake. After an especially tough climb, I like to stop, take in the view, and give myself credit for what I’ve just accomplished. And then I grin all the way down the other side.

Choosing a Bicycle Route

Why can it be so difficult to decide where to ride on a tour? We’ve been on two long bicycle tours (and countless small ones) and we are always pleased with the experience. However, in the early planning stages we tend to waffle on the details. Things like: where are we going? When are we going? How long do we plan to go? Answers to these questions continuously change as the planning continues.

Our latest tour took us across the southern tier of the United States through autumn. However, the trip was originally planned as a northern crossing in the spring. Why the drastic change?

As with many things in life, timing is everything. To complete a successful northern tier tour, without suffering through intense heat or deep snow, the timing needs to be perfect. If you travel west to east, you want to leave late enough to avoid snow in the mountain passes, but early enough to avoid hot, humid weather once you reach the plains. For us, this proved too uncertain. The southern route has similar issues, but we found that it worked for our schedule. We could leave late enough in the season to avoid horrendously high temperatures, but early enough to avoid snow in the mountains.

The main consideration when we plan a tour is flexibility. We give ourselves plenty of time to account for illness and injury, since these are two things generally out of our control. We plan for rest days. We’ve found that a rest day every 5 or 6 days is usually sufficient, and we account for this in our mileage estimates. We also try to plan for several different “early outs”. If something goes wrong on the tour, we think about where we could end it prematurely. Is there an airport along the way we could shoot for? What about the railroad? A large town with a rental car? Several friends and family members have offered to save us if we need it, as well. We’ve never had to call in that favor (yet), but it’s sure nice to know it’s there.

What’s that old saying? “An ounce of prevention is worth a pound of cure.” I think it’s applicable to planning a bicycle tour. You can’t, and shouldn’t try to plan for everything on a bicycle tour. But thinking about the route before you leave can help you have an enjoyable, safe ride. We have found most of our least favorite days touring are when you lock ourselves in to being at a certain place at a certain time and have to push too hard to get there. In the end, it’s about the journey, not the destination. No matter where your tour takes you, you will learn things about yourself that you never knew before. And that’s what really matters!


Adventure Cycling Association has many preplanned routes, and their maps are top notch. Check them out!

You Don’t Need a Hammer on Your Bicycle Tour: Life Lessons

On a recent tour I encountered a particular cyclist who stands out in my memory. Like all tourists, we happily regaled each other with stories and wisdom, swapping tales over a snacks. We talked about gear, and tours, and the weather. And then I noticed something strapped to the back of her pannier: a hammer. I couldn’t believe my eyes. I had to ask. She said that she doesn’t go anywhere without it.
I couldn’t help but think about the wasted energy that this tourist had to expend carrying that hammer thousands of miles. In all of my tours, I’ve never set up my tent in a place that didn’t have some sort of substitute for a hammer. Usually a big rock nearby does the trick. In a pinch I’ve asked fellow campers, and have never been turned down. Even after I told her that, she insisted that the hammer was an essential part of her tool box, and we left it at that.
After we parted ways, I thought about that hammer. Do we all have something like that that we don’t want to let go of? Something we’re hanging onto even though we don’t need to? Is it so obvious to others even though it’s difficult for us to see it ourselves?
I made a resolution that day to let go of some of the stuff I’ve been holding onto. The past is the past, and the only thing that matters is the present. I’ve realized that bicycle touring can be a metaphor for life. Don’t sweat the small stuff. Solve problems as they come. Focus on the road ahead. Don’t worry about that storm that has already passed, enjoy the weather right now.  Keep going. Don’t give up. The climb might be steep, but the ride down the other side makes up for it. Life is like this. It’s full of grit, and pain, and joy, and wonder, and agonizingly beautiful things. It can even be a little scary at times. Live each day proud of yourself for all that you’ve done. But don’t bring a hammer on a bike tour. It’ll only make you tired.

Don’t feed the wildlife

Two weeks into our first bicycle tour, we set up our camp the same way we had the previous 13 nights. We put all of our panniers tied together hanging from a tree limb. Moments after we crawled into our tent for the night, we heard a commotion outside. Matt investigated, only to find raccoons fighting over our panniers and the food inside. They were vicious! He had to fight them off, and with no better option, we brought the panniers into the tent with us for the night, terrified the raccoons would come clawing through our tent. There had to be a better way!

One of the joys of bicycle touring is getting back to nature. Bicycle tours can take you to remote places, where it’s just you and nature in all its glory. Unfortunately, wildlife encounters can turn an enjoyable tour into a nightmare. There’s a few things you can do before you set out that can make all the difference.

Bear can: We found this is the most convenient method of keeping the critters out of your food. Raccoons, rats, skunks, possums, and other nocturnal animals can be very persistent when it comes to going after food, and in some areas bears can be a huge problem. Keep in mind that smells from any food items will linger on your belongings and tempt the animals. Panniers are not animal resistant! A bear canister will prevent any animals from getting your food (and may even be required depending on where you’re going). You should keep everything that smells (toiletries included) in the bear proof container. On our latest tour we used the Bearikade (the Weekender size), and highly recommend it.

At night, place the bear can at least 100 yards from where you’re sleeping (if there’s bears) and make sure it’s in a safe place-that is, it won’t roll off a cliff or into a river or other natural hazard. The bear proof container won’t keep the critters from smelling the food, it will just make it impossible for them to get to it. They will invariably check it out, and maybe even claw at it for a moment; after some time they’ll probably get tired of it, and your breakfast will be safe for the morning.

We found it to be very convenient and easy to use the bear can. It kept our panniers from getting smelly or dirty, and the food was always easy to access. When we came it camp we could just leave our panniers on the bicycles and not have to worry about anything clawing at them. It made camping very simple and less stressful.

Bear box: Some campsites will have bear boxes to put your food in. Again, don’t limit what you put in it to food; put all toiletries into them as well. This means all sunscreen, lip balm, toothpaste, etc. If there is no bear box available, but there have been critter sightings, check to see if it would be ok to leave your panniers in the restroom. A lot of times the door will be enough of a deterrent to the smaller animals. Be careful in some bear areas, though, because they are smart enough to get in. Check with the ranger or camp host to find out the best thing to do with your food.

Smell proof bags: These can be a deterrent, however they should not be your only protection. Smell proof bags are a great place to put your snacks for the day in. This can help you reduce the smell of food in your panniers or handlebar bag. We used these bags on our latest tour and had no issues with animals.

Bring your food in your tent: This is one of the oldest trick in the books and many people swear by this method. Make sure that the food is only in your tent while you are in the tent with it, if you leave food unattended animals may claw through your tent. While we have done this in the past, I hesitate to do this now. It could teach animals that a tent means food and seems risky versus our positive experiences with our Bearikade.

Bottom line: be smart. Think about your food and what you’re going to do with it. Make it as difficult as possible for animals to get it. You’ll be glad you did and sleep better if you aren’t worrying about it.

Breakfast: Starting the day off right

Making good food choices early in the day will help set you up for a successful ride. We often joke when we’re riding about needing not only breakfast, but second-breakfast as well. There’s a reason we eat so much: we’re burning a lot of calories throughout the day, and food gives us the energy we need to help avoid energy crashes.

Here are a few things to keep in mind when planning your meals for the day.

First, try not to eat anything too heavy or rich. If your body has to work too hard to digest it, you’ll be diverting energy away from your ride. As your exert yourself your body diverts blood from your stomach to your muscles slowing digestion.

Look at foods that are both filling and satisfying. You want the meal to give you energy for as long as possible.

Finally, convenience is a factor. A quick, satisfying breakfast can get you going and on your way.

So what do we eat when we are out touring? We prefer hot cereal grains. We usually rotate between oatmeal and other cereal grains, such as Oat Bran or 5 / 7 / 11 grain mixes from Bob’s Red Mill brand. Bob’s cereals come in conveniently sized packages which last about a week between the two of us and are sold in most grocery stores throughout the United States. You can also check the bulk bins for different cereal grains. Cereal grains are not heavy, are very filling, and take just moments to cook (simply add to boiling water and eat when thickened). We would recommend staying away from packaged, instant oatmeal, it is just not as filling as the real stuff.

Pam likes her breakfast sweet, so here are a couple of methods to make your breakfast cereal even tastier. Honey sweetens nicely, and has the added benefit of tasting great added to a peanut butter sandwich for lunch. Additionally, adding peanut butter and jelly to cereal gives it a nutty flavor and adds protein. You can also add dried fruit, or trail mix to your bowl. But our all-time favorite addition to hot cereal is chocolate. Place half (or all) of a chocolate bar into the cereal, which melts, and viola’! Instant chocolate cereal! It is such a treat in the morning to get you going.

A downside of cooking your own breakfast is the cleanup, and washing dishes after breakfast can be a pain. If you’re not into that, there are other options. Scope out restaurants in the area that serve breakfast, or pick up some muffins, fruit, and yogurt the night before. Granola bars can stave off hunger if you need to eat first thing in the morning (like we do) until you can reach a breakfast spot. Just plan ahead. There’s nothing worse than trying to ride hungry.

Calories = energy. You need energy to get you going and to keep you going. Plan ahead, figure out what works best for you. We enjoy a hot, satisfying breakfast to get us started on the right foot. How about you?