Snacking on the Go

The only way to maintain energy levels throughout your bike ride is food. While meals are necessary, probably the most important thing you can do is snack, and snack often. Sometimes while I’m touring with my husband, I find myself getting irritated or overly emotional at small things. The first thing he asks me is, “When is the last time you ate something?” And it’s true! If it’s been a while, I grab something to eat. My handlebar bag is full of goodies to snack on through the day.

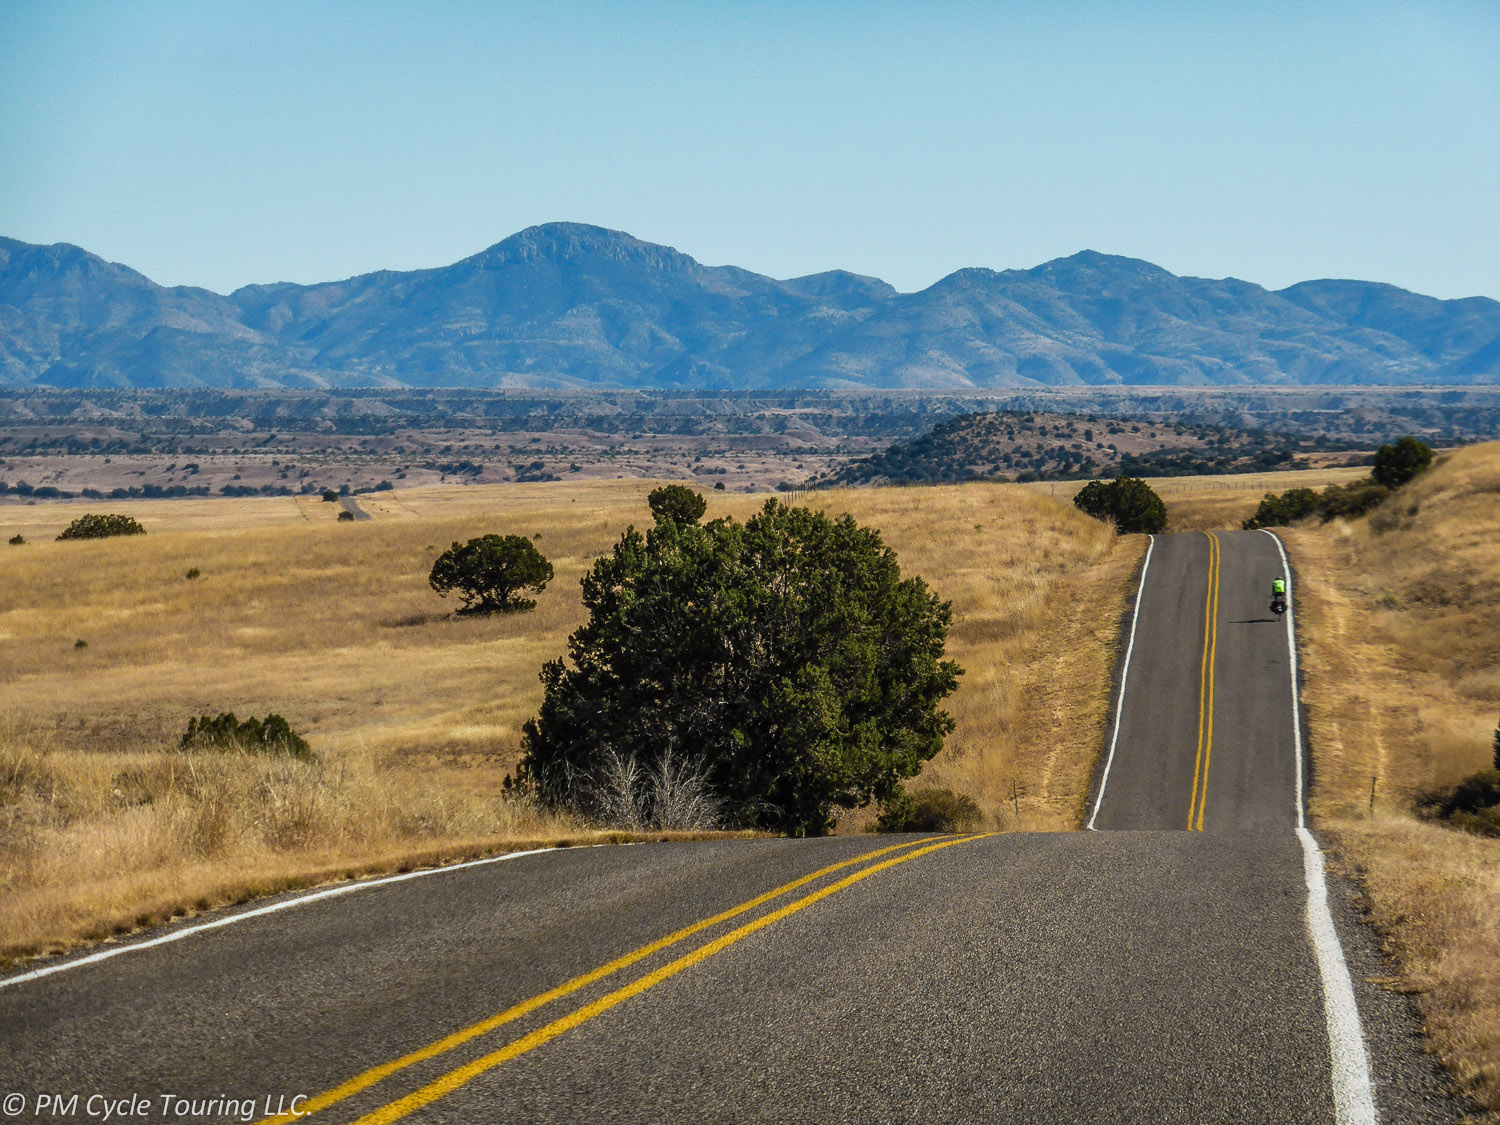
I don’t eat while I’m pedaling, so I take a break and snack. Part of touring is enjoying the surroundings, wherever I happen to be. One of the best ways to do this is to pause every 10-15 miles, eat something, and take in your current location.

Additionally I like variety when I eat. I get tired of eating the same thing over and over. Here’s a few types of snacks I’ve tried on my tours:

  • Fruit: Whether dried or fresh, fruit is an awesome snack. When touring in summer, stop into a fresh fruit stand and enjoy peaches or plums. Bananas are also great. Blackberries growing on the side of the road in the Pacific Northwest are also amazing. Can’t get fresher than that!
  • Gels or Gu: I find sport gels to be most useful when I need a punch of energy, like right before a big climb. I like the ones with caffeine. Be careful, though, because sometimes these can make your stomach upset and you may need a bathroom; try them before you go.
  • Granola Bars: In a pinch, we’ll eat those little Quaker granola bars, but these aren’t my favorite. They’re small, and there’s not much to them. I feel like I have to eat 2 or 3 to make a dent in my hunger. An alternative are locally made bars or the Nature’s Own two packs.
  • Energy Bars: For example, Cliff or Power Bar, or other varieties. My favorite are probably Cliff or Luna bars. While some of them taste like cardboard (Power Bars), the Cliff Bars are rather tasty and pack a good amount of calories. I prefer candy bars, but just because I have such a sweet tooth.
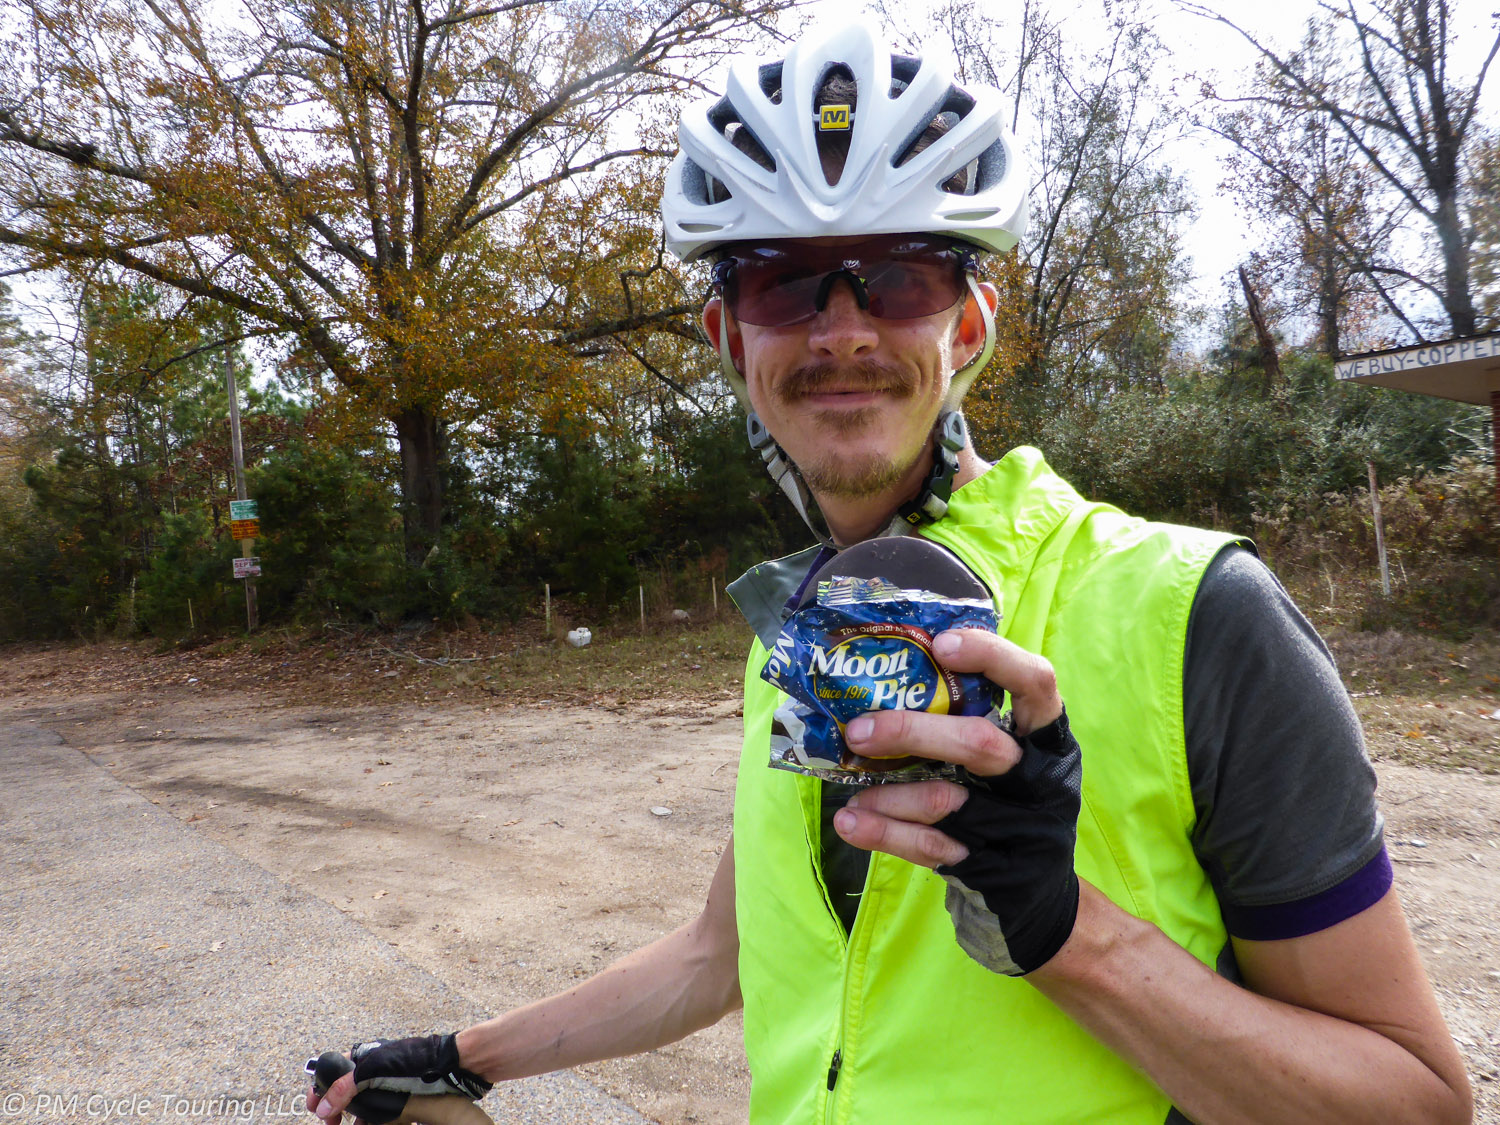
  • Sweets: A fellow tourist from the UK called candy in general “sweets” and it stuck with me. On my last tour I kept craving sour gummies. Hard candies work, basically anything with some sugar, too. Just a little bit of sugar, which gets converted straight to energy.
  • Candy Bars: My favorite go-to snack is Snickers. The combination of peanuts and chocolate, along with the sugar of the caramel is pretty much the perfect cycle touring energy bar. I also like to switch it up with other candy bars, but most often return to Snickers. I’ve found Payday bars are also good, with all the peanuts.

Touring is different than everyday living. You have to keep your energy up so you can expend it. This doesn’t mean you can or should just eat anything and everything you want. But it’s important to maintain a certain level so you don’t have an energy crash (or a literal crash, either). So snack, and snack often.

What are your favorite snacks? Share with us in the comments below!

Lightweight Packing List for Bicycle Touring Couples

Before we left on our 2,500 miles ride along the Southern Tier I knew that I wanted to pack as light as possible. Thanks to the recent ultralight craze in backpacking there is a ton of gear available now for the tourist looking to lower the weight on their bicycle. We managed to get to 40lbs total for the two of us.

I consider it a huge victory that for two people going on a self supported tour we were able to get our weight down so far, and the 40lbs includes the weight of the panniers! When divided up my wife carried roughly 17 pounds of gear and I carried the remaining 23 pounds. We also were able to tour with only rear panniers, which allowed for removing my front rack saving another 3 pounds.

If you are looking to see the bare minimum that you need to get you and a partner along the Southern Tier with temperatures ranging from 15-102F in the late fall months this is the list. The only item that I know we could save more weight on is Pam’s sleeping bag, if we trade her bag for a bag similar to mine we will be at about 38 pounds of gear. Not sure how much more ultra-light you can go before losing your self sufficiency.

I hoped this helped you get some ideas for going lightweight on your next tour. Do you see anywhere we can improve, cut a few more grams from? Feel free to comment below!

High Visibility Clothing: To wear or not to wear?

High visibility clothing, commonly referred to as “high-vis,” is a matter of contention among bicyclists worldwide. You can be pretty much be assured that every bicyclist has an opinion about whether or not to wear high-vis. Even government is getting involved. At the beginning of this year, officials in New Zealand considered making it mandatory for all bicyclists to wear high-vis. Take some time to consider your visibility before you embark on that cycle tour.

So what is the big deal? Many bicyclists feel that high visibility clothing is uncomfortable, unfashionable, and doesn’t actually help the bicyclist be seen. There also is the feeling that it is not their responsibility to stand out. Unfortunately none of the above matter when someone does not see you and you are hit/injured.

Modern high-vis comes in many shapes and sizes. Matt and I like to wear high-vis vests over our normal cycling clothing that we are wearing at the time. The vests don’t hinder our movement, have vents & mesh to keep us from overheating, and give us peace of mind that we are going to be seen. We even get compliments from drivers about how visible we are.

As far as fashion goes, we feel that this is a non-issue. We cycle not to look good, but for enjoyment and fitness and the ability to enjoy the outdoors. Most importantly we cycle to enjoy being alive. Wearing high-vis helps keep us visible to drivers, thus letting us live longer. These days there are many more fashionable versions of high-vis clothing and jerseys available to keep you visible while still fitting your fashion sense. However if you are looking for something cheap, not much will beat the construction vest.

Many studies have been done on this subject of visibility, mostly on the related subject of motorcyclists, and they come to varying conclusions. The consensus seems to be that contrast is the major factor in being able to see an object. Most cycle/auto interactions occur during rush hours and dawn/dusk/night, times when the number of cars is high and visibility is low. High-visibility clothing can help with that contrast. Good lights also increase your visibility. We’ve tried many different lights, but the most recent that we love are the Dionette LED taillights. There are many brands and styles on the market. Do your homework before you make a purchase.

Of course, just being visible doesn’t mean you can’t be hyper vigilant and aware of the cars around you. After all, they are protected by a metal box, and you have nothing. Don’t take anything for granted, and pay attention to what’s going on around you at all times.

Think about it. Why not do everything in your power to make sure you are as safe as you can be? If this means wearing a high visibility vest, it is such small thing to do, and it may save your life. We’d rather be out there enjoying our bicycles than be injured or worse.

How to Dress for a Bicycle Tour

What should you wear on your tour? I know that when I started thinking about touring, this was a big concern. I didn’t know how much or what kind of clothing to pack. After experimenting a little bit, here’s what I’ve found that works for me.

Shorts. If you’re new to bicycling, you’ve most likely noticed that cyclists generally wear close-fitting, spandex, padded shorts. Why is this? Well, I’ve got one word for you: chafing. When I started riding, I was too embarrassed to wear cycling shorts, and I wound up with painful, raw patches of skin. It was terrible! So, I bit the bullet and bought a pair of women’s specific bicycling shorts and let me tell you! No more rubbing. And the padded butt, well, let’s just say that it made a huge difference. If you’re planning on riding for many hours a day, many days in a row (aka, a bicycle tour) you’ll need to be comfortable and you need to take care of your skin. Bicycling shorts (and pants) are essential for long distance comfort and after several days on the road you don’t care what anyone thinks about how you look. (Also think about getting a chamois cream or stick to help minimize friction. We recommend Bodyglide Original Anti-Chafe Balm.)

Shirts. If you go into a shop that sells bicycling clothing, you’ll see many different types of jerseys. The two most popular material choices are polyester/lycra blends and wool. In my experience, wool jerseys are the way to go. I’ll tell you why: smell. Polyester (like most man-made fibers) tends absorb and retain your body odor after just a short time. Even after washing it has a funky smell*. On the other hand, you can wear a wool jersey for a few days before it starts to hold onto body odor. It dries quickly, is super durable, and feels great on. I like to take two short-sleeved jerseys and one long-sleeved.

Armwarmers and Legwarmers. One of the amazing things about being on a bicycle all day is the immense range of temperatures you cycle into. It can be literally freezing in the morning when you wake up and sweltering by noon. I prefer shorts to leggings and wear leg warmers in the morning, and remove the leg warmers as it gets warmer. Same with arm warmers. Another advantage of layering up is the fact that your body will warm up as you exert yourself. If you start out with a big climb first thing in the morning, chances are you’ll be wanting to shed a few layers before you reach the top.

Rain gear. Unless you are cycling through Death Valley, you will probably get rained on at some point during your tour. This is a cause of great concern to new cyclists, but very quickly you realize that it is not a big deal. While good waterproof gear will help keep you dry on the outside, even the most expensive gear won’t keep you from sweating on the inside. Realistically the main purpose of rain gear is to keep you from getting too cold and to block the wind. If you are riding through warm rain, it oftentimes is easiest to just ride in it and enjoy it; you will dry off shortly after it passes. Windproof/waterproof gloves are a must if you are riding in cooler temps. Also, a good rain jacket will be one of your most valuable tools. It should have many zippers for venting and if it is truly made for cycling will have a long tail to keep your back dry as you lean over pedaling. Most importantly it will block the wind which does wonders for making cycling more bearable.

Camp” clothes. After a long day on the bike, there’s nothing better than showering and changing into regular clothing. We typically bring one extra set of clothing with us on tour. This includes a pair of long pants and a long sleeve merino wool shirt. I also bring at least 2 pairs (one to wash, one to wear) of travel underwear (like Exofficio), and one normal bra (I bring two sports bras for riding). For cool evenings we like to bring lightweight down vests that double as a pillow cover for Matt, and use our rain jackets as windbreakers around camp. Other must haves include a beanie and a lightweight pair of shoes, in case we want to go for a walk in the evening or explore town on a rest day.

Clothing on a bicycle tour is about balancing comfort and weight. Using clothing that has multiple uses will cut down on the weight of the clothing that you have to carry.  Careful planning will see you out there as comfortable as possible, ready for any weather situation.

One last hint: Got some funky smelling clothing? Try Nathan Penguin Sport wash. A small capful and your clothes come out clean and smelling fresher than other detergents.

Wondering what a packing list for a bicycle tour might look like? Check out this post with a rundown from our latest tour.

Disclaimer:

All opinions about any products mentioned in this article are my own. I have not been compensated in any way by anyone. I will, however, receive a small commission if you choose to purchase the item from Amazon after clicking the link I provide. Use your own discretion.


How to avoid dog bites

You’re out there on the bike, enjoying the freedom of the road, when you see it. The movement catches your eye and you hear the growl, or even a bark.  You know it’s coming.  Like a bullet the dog begins chasing after you and your tires. Gotta get it. Gotta get it! Kill the bike! What do you do?

There are many different strategies to dealing with dog chases. Ask any bicycle tourist and they’ll each give you a different idea for the best way to defend yourself. We’ve tried a few different ways but there may be others, and you have to find the way that’s right for you. I call my strategies the 4 S’s.

Speed.  The simplest way to deal with a chasing dog is to out-ride it if you can. Dogs can be fast, but if you have a head start you may be able to stay ahead of them. Most dogs have a clearly defined territory and they’ll stop chasing once you cross their invisible boundary. Of course, if you’re climbing a steep hill or are already maxed out on speed, this won’t help you. Also, sometimes the dogs can get a head start or will be quite fast, and you can’t outrun them.

Shout. One of my favorite ways to deal with a dog chase is to simply shout “No! Stay! Bad Dog!” I am always surprised at how effective this method is. It works probably 50% of the time. The key is to wait until the dog is close to you before you shout in a clear, loud voice. Keep the words short. The majority of dogs seem to chase bicycles because they have no idea what the bicycle is. They don’t realize that humans are on the bike, but once you shout at them it snaps them out of the chase mentality and they stop, stunned. This could at least slow them down and you can out-ride them.

Stop. If shouting doesn’t work, and you can’t out-ride them, the next thing to try is the stop. That’s right, stop your bike. Put your foot down. Now you look like a human and the dog will probably stop and stare at you. I have found this method to work 100% of the time and I’ve heard the same from many other cyclists. While it can be a scary thought, particularly if you are already afraid of dogs, once the dog sees that you are no longer something to chase they get disinterested quite quickly. Also, if you feel threatened, once you’re stopped, you can place your bicycle between you and the dog, which will probably make you feel safer. The biggest downside to this method is that it slows you down and takes time out of your day. One other problem is that the dog may resume chasing you the second you decide to proceed down the road again.

Spray. Finally if the dog is still threatening you, get your pepper spray ready. Pepper spray should be used as a last resort. The best kind is the stream kind, since the spray variety puts out a fine mist and has a tendency to get blown back to the sprayer if there’s a slight wind, and the only thing worse than getting bitten by an angry dog is to get bitten by an extremely angry dog after you’ve just pepper-sprayed yourself. So, use the pepper spray sparingly, only as a last resort, and while the dog is confused, get back on the bike and get yourself out of there. Also be aware that the dogs owners may be less than thrilled that you just sprayed their pet. If you are looking for a pepper spray recommendation we use Fox Labs because of its high potency and stream spray. Be careful if crossing international borders, pepper sprays may be considered a weapon.

Unfortunately, dog chases are all too common while bicycle touring. Many dog chases are of the “hey, what are you?” variety, and those dogs can be easily outrun or are not a threat. A very small percentage of dog chases are actually angry dogs that want to harm the bicyclist. But, either way, when a dog comes running toward you, it can be scary. Keep your head, stay calm, don’t forget about other road traffic, and you will do fine. Don’t let your fear of dogs keep you from enjoying your ride.

Places to Carbon Fiber Tour

Carbon fiber touring can be very fun and rewarding. As we’ve said before, an ultra-lightweight bicycle frame has many advantages. But before you plan your tour through the mountains of Mongolia with your Carbon Fiber bicycle, you’ll want to think about the following:

  • Types of road surface
  • Amount of services available

First, don’t think you’ll be doing a lot of off-roading on your carbon fiber bicycle (unless it is a mountain bike). A gravel road for a short distance is fine, but dirt trails in far off remote locations? Forget about it! I found myself riding a rugged 1 mile trail to a campsite on my last tour and it was awful! I pretty much had to walk the bike the whole way. My tires couldn’t handle the mud, leaves, and huge rocks that I came across. While Carbon Fiber frames are super hard, it would be awful to crack your frame on a bump out in the middle of the mountains. So, proceed with caution when encountering non-paved roads with carbon fiber.

One of the appeals of steel framed bicycles is the ease with which they can be repaired. This is not the case with carbon fiber. If something happens to the frame, you are done, there is nothing to repair. While touring on carbon fiber, in the unlikely event that something happens to you or your bicycle, you’ll want to be traveling through areas that have more services available. Several hundreds of miles between services would not be ideal if you’re on Carbon Fiber, just due to the fact that once the frame is done, it’s done.

A good place to carbon fiber tour would be a place where the roads are smooth and there is lots of support along the way. People passing by on a nearby road is always a plus because you can flag down a ride if you need it. If you’re going to be mainly riding on US highways and byways, carbon fiber touring can be perfect. In the USA all of the paved Adventure Cycling routes are great choices to enjoy long distance touring while also enjoying the thrill of using a lightweight carbon fiber bike to tour.

Unpacking and putting together a boxed touring bike

For our first tour we flew from Los Angeles to Seattle and had our bicycles boxed up. We had never really thought about how to put the bicycles back together once we got there. I suppose we just assumed it would be super easy. Thankfully our host had a bicycle stand and some tools to help us get them back together, but it was close to being an unpleasant experience. In response to that here is our guide to taking a bicycle from boxed to ready to ride.

Review this before you leave for your tour and reference if needed during your tour:

  1. Get your boxed bike and an open area to begin putting it together.
  2. After removing your bicycle assess how dis-assembled it is. If you had a shop pack it up some equipment may still be attached compared to our walk through, or it may be further dis-assembled.
    Bicycle after removal from box, still contains packing material.
  3. Remove any excess packing material
    Hand with scissors cutting zip tie holding packing material on the bicycle.
  4. Attaching the rear derailleur
    1. Shifting to the highest gear on the rear shifter should give you extra slack in the cable.
    2. The chain does not need to be on the f ront cogs, it may be easier with it off allowing free movement of the derailleur.
    3. There will be one large screw on the rear derailleur which screws into the frame. Additionally there will be a smaller screw which is perpendicular to the large screw (A in the picture). Make sure this screw ends up resting on the notch of the derailleur hanger (B in the picture). If you aren’t paying attention you may tighten the big screw and bend the smaller screw, so make sure you keep an eye on this while tightening the rear derailleur!
      Hand holding rear derailleur near bicycle frame before attaching it.
    4. Once the rear derailleur is attached you can position the chain properly on the front and back cogs.
      Rear triangle of the bicycle with rear derailleur attached and chain on.
  5. Positioning the stem
    1. Prior to packing your bike you should use a metallic sharpie to mark the angle / position of your stem/handlebars
    2. Rotate your fork so that it is facing the proper direction.
    3. We find it best to have the fork or front wheel on the ground while working with the stem/fork, if you loosen the wrong part the entire fork may fall out if the bike is on a rack or has the fork unsupported.
    4. If needed loosen the stem and position it so it is pointing in the proper direction, straight away from the bike. Tighten if needed so the stem is firmly attached to fork.
    5. Loosen the handlebar mount portion of the stem.
      Hands unscrewing the front part of the stem prior to attaching the handlebars.
    6. Insert the handlebars and align the marks you made before you left to get the handlebars centered and at the proper angle.
      Rear triangle of the bicycle with rear derailleur attached and chain on.
    7. Tighten all screws firmly.
  6. Attaching the front wheel
    1. If packed with a plastic spacer, simply remove the spacer. This may require applying gentle pressure to pull the fork a little apart.
      Front fork with plastic spacer to prevent bending during transit.
    2. Attach the front wheel as you normally would. You should be familiar with this because you will be needing to change flat tires while on the road.
      Installing the front wheel on to the fork.
  7. Attaching the front caliper brakes
    1. Locate the front brakes and the mounting hole in the front fork.
      Positioning the front brake calipers before attaching to the fork.
    2. Slide the bolt through the mounting hole and thread the tightening piece from the other side. Use an Allen wrench to tighten, snug but not over tight.
      Tightening the front brake calipers to the fork.
  8. Finishing Assembly
    1. Check all cables to ensure they are in the proper mounting holes. As needed re-guide or re-position cables to their appropriate positions.
    2. For the rear derailleur
      1. Ensure the cable routed properly along or through the frame from the handle bars to the derailleur.
      2. Thread the cable through the derailleur, but don’t tighten it just yet.
        Hand threading cable through rear derailleur on a bicycle
    3. Attach your racks to the appropriate mounting points and ensure all screws are tight, including screws that remained installed during transit. You are about to embark on a tour and you don’t want your bike falling apart because you failed to check a screw tight.
      Girl hold bicycle with rear rack attached to back.
    4. Using a pedal wrench attach the pedals. One pedal is threaded “normal” (tighten by turning clockwise) the other pedal is threaded “backwards” (turn counterclockwise to tighten).
      Pedal wrench attaching pedal to crank.


  9. Adjust the rear derailleur
    1. While this is a necessary part of putting your bike together we have included a separate guide. Look for a future post explaining how to do this!
  10.  Stand back and admire your completed bike. Now get out there and ride!
    2014-03-07 2038 PMCT-6

If you have any questions feel free to leave them in the comments, or if you noticed that I missed something tell me. I hope this helps people get a feel for taking a bicycle from boxed to ready to ride.

How to make your Carbon Fiber bicycle ready for touring

Bicycle manufacturers are coming out with “light” touring bicycles. The Jamis Xenith Endura Sport Femme I purchased came with 25mm tires, three chain rings on front, and rack mounts on the rear. It was almost, but not quite, ready to tour right out of the box. Here are a few adjustments that I made to my bike to make it tour worthy. It’s not an all-inclusive list; you may have to do more or less before your carbon fiber is ready to tour.

Gearing. A good touring bike will have 3 chainrings on the front. Especially if you’re planning on hauling gear, you will appreciate the ability to drop down into lower gears as you cross continental divides and summit several thousand foot mountain passes. There are very few places in the world that are perfectly flat; you WILL have to climb hills on your tour. That small chainring on the front will make a huge difference. If the bike you’re considering doesn’t have a triple front chainring, see if you can order it with one from the manufacturer, or if the bike shop can order just the frame and install proper gearing. For my bike I have a 30 tooth ring on the front and a 34 tooth ring on the rear.

Mounts. How are you going to carry your gear? Some carbon fibers are coming with eyelets for mounting racks and fenders. Check to see if yours has them. If there are no mounts, look into attaching clip on racks or pulling a trailer. But, be aware that attaching anything to the carbon fiber posts which involves tightening a clamp could damage the carbon fiber if tightened too hard. The 2012 Jamis Endura Sport Femme came with mounting eyelets on the rear, newer Jamis Endura models now come with a removable rack mounting system. In addition I considered getting a front rack that clipped on (similar to the Thule Tour Rack)  but ultimately decided against it. I wanted to keep my weight as low as possible, and I was able to fit everything I needed into the rear panniers I carried.

Fenders. Most Carbon Fiber road bikes don’t come with fenders, as this adds weight to the bicycle. I decided against fenders on my first tour, and ended up regretting it. While on wet roads the water splashed up on me and the frame, and dirt roads were much the same by splattering mud everywhere including my drivetrain. For my next tour, I plan on installing fenders. This will help keep my gear cleaner, as well as my clothing, when riding on wet, dirty roads.

Tires. Most Carbon Fiber bikes will come with skinny tires, more suited for road cycling. See what the widest tire it is rated for and consider putting it on. Generally 28-35mm tires are used for pavement touring to allow for variable conditions and give a more comfortable ride than narrower higher pressure tires.

Brakes. My Carbon Fiber came with standard rim brakes. Before I left, I upgraded the brakes to a higher quality. This eased my mind about being able to stop with the added weight I was planning to put on the bike. I had no problems throughout my tour however I did miss the disc brakes from my previous touring bike.

I was very satisfied with my Carbon Fiber bike on tour. The decrease in weight from my Raleigh Sojourn steel-framed touring bike meant that I had much more energy at the end of the day. I felt like I could ride many more miles each day, which made the ride more enjoyable. It only took a few minor adjustments to turn it into the ideal cycle for my tour. I look forward to many more carbon fiber bicycle tours!