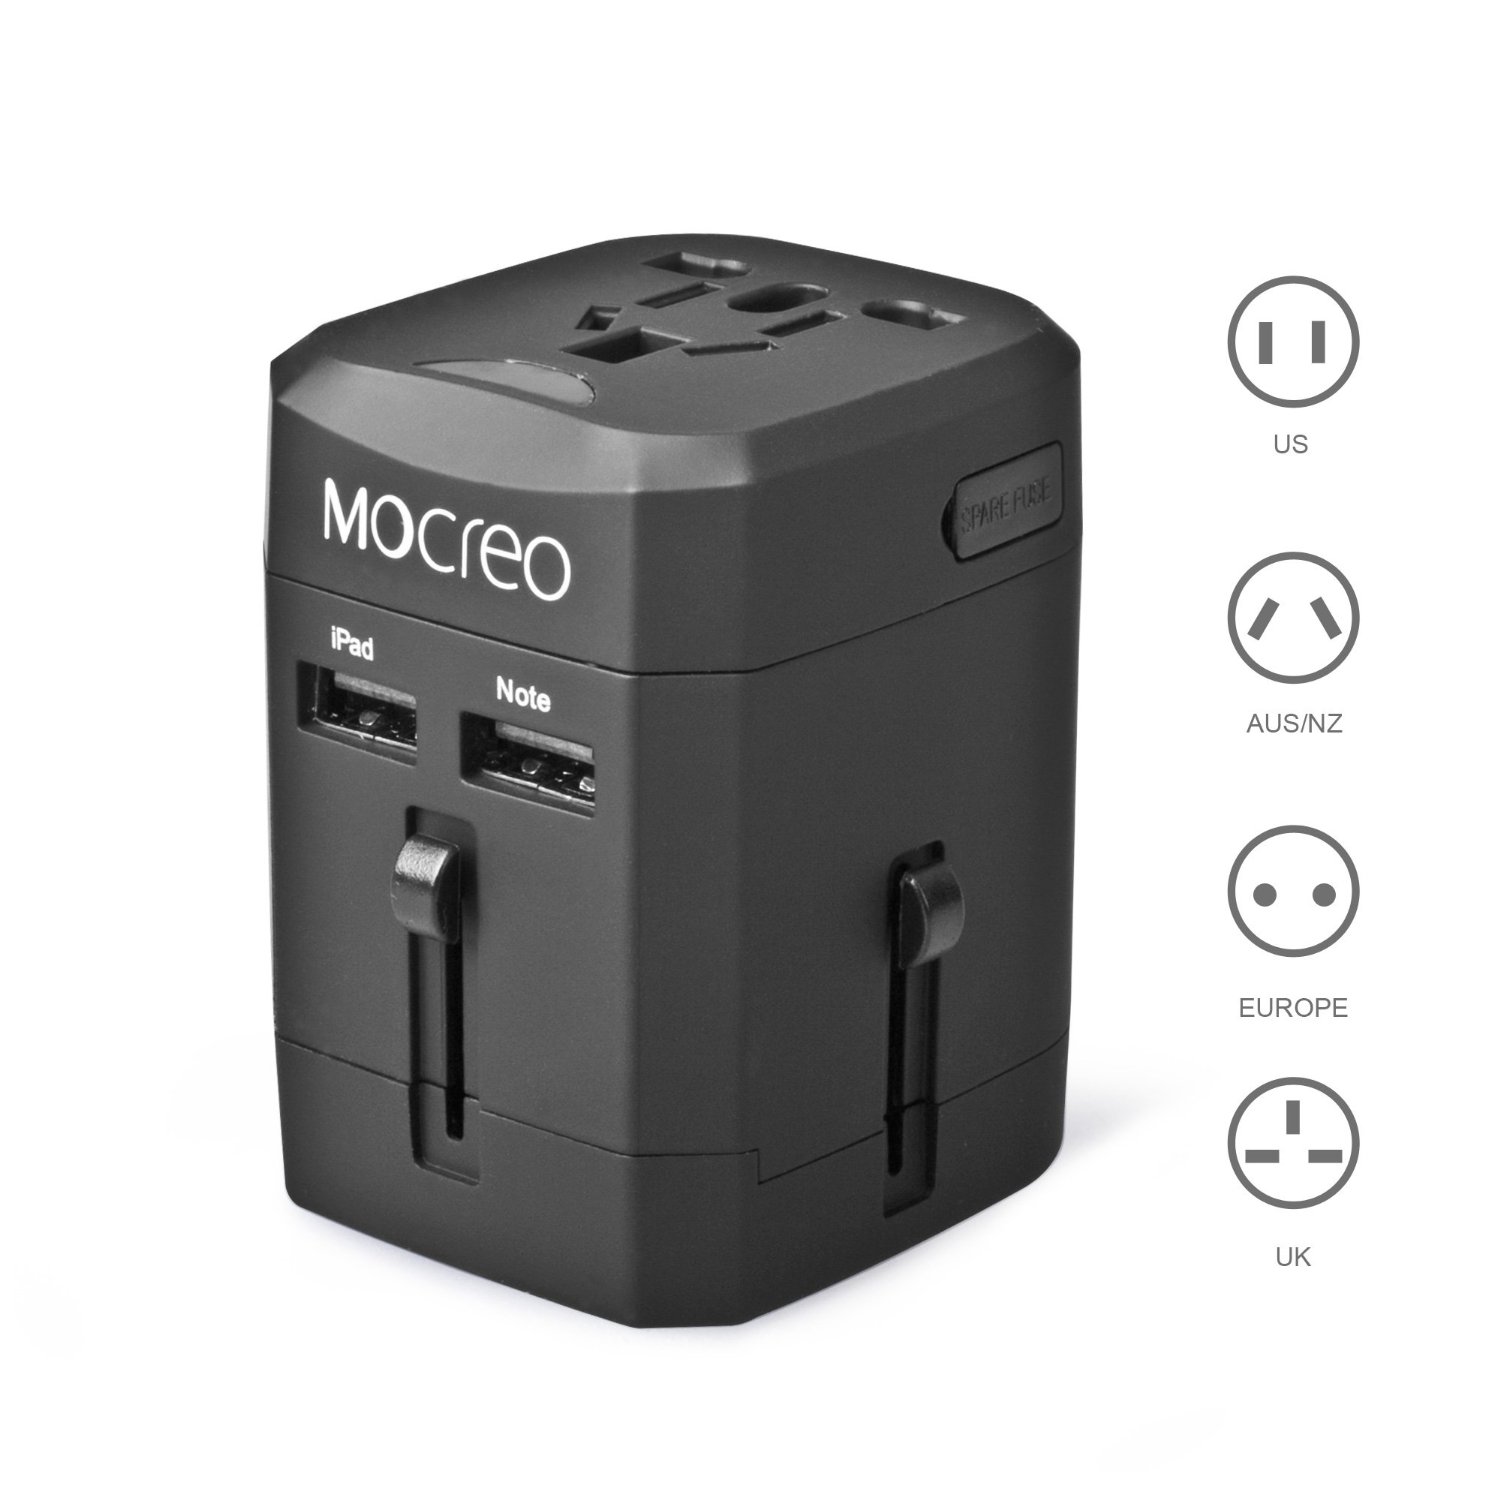
Gear Review: Mocreo Universal Travel Wall Charger Power Adapter Converter

If you’re planning on making a trip overseas, don’t forget that other countries have different power systems. That’s right! Your power plugs won’t fit into the outlets overseas. And don’t try to force the plug in. Not only is the plug shaped differently, the voltage and frequency are probably different. You will risk damage to your electronics, and possibly cause a fire. So, before you go, you’ll need to get a power adapter/converter.

There are many brands of adapter out there. But we found the Mocreo adapter to be a great option.

Black version of Mocreo Universal power adapter

Pros:

  • Covers more than 150 countries. You don’t need a new adapter for each tour.
  • Contains two USB ports, so you don’t waste a plug with a USB adapter when charging your electronics.
  • Easy to operate.
  • Safe to use. It has two fuses, and built in safety precautions so only one plug type can be selected at a time.
  • Folds into a square with no protruding parts.

Cons:

  • It is heavy. Sometimes it would fall out of the wall socket due to weight. It also sticks out far out of the wall. It adds 100 grams of weight to your pack.
  • It is not compact.
  • The white version has a blue glow that may disturb your sleep. I’d recommend the black version.
  • This does not convert the voltage, it just changes the plug. Make sure what you’re plugging in can support the different voltage. Most electronics can, but some can’t. Check before you plug it in.

Specs:
AC: 6A Max. 100-240Vac 50/60 Hz
USB: 2100 mA Max. +5Vdc

Warning: AC-AC. No voltage conversion. USB is for charge only. Indoor use only. No grounding.

If you’re planning on traveling to many different countries, this adapter will definitely meet your needs.

Disclaimer: All opinions about any products mentioned in this article are my own. I have not been compensated in any way by anyone. I will, however, receive a small commission if you choose to purchase the item from Amazon after clicking the link.

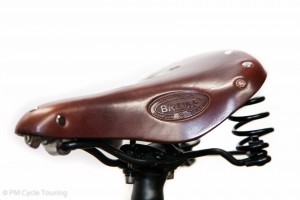
Gear Review: Brooks Flyer S

My first touring bicycle came with a Men’s Aged Brooks B17 saddle. Even though not designed for a woman, I quickly (after about 200 miles) became used to the saddle, and continued to ride it for several thousand miles. I even moved it to my second touring bicycle when the time came, as that bicycle came with a foam padded saddle that hurt my butt after about 5 miles of riding, and I never could get used to it. Now, with my third (and probably final) touring bicycle purchased, I had to make a choice. Do I move my B17 to the new bike? Or do I try out a new saddle? Well, I decided to go with a new saddle, and so far I’m not regretting that decision. I continued with Brooks, opting for the Women’s Flyer S. I’ve ridden a couple hundred miles so far (*update-a couple thousand miles, still no regrets), and plan to use the saddle on all tours in the future.

Women's specific Brooks Saddle Flyer S
Brooks Flyer S

Pros:

  • Shorter front to back (about 5cm less than the Men’s B17), which is a better fit for me.
  • Springs-takes some of the road bumps away
  • Slightly thinner leather top compared to the aged B17 that I’ve come to love.
  • “Special” version has hand hammered copper rivets, which add a nice look.
  • Quality Brooks Saddle, well made, and made to last.

Cons:

  • Leather top needs proper care.
  • As with most Brooks Saddles, takes a certain amount of time to “wear in.”
  • While I have not experienced this, some people complain the springs squeak.

For women the saddle specifically made for you is simply a shorter version than the men’s. Initially I was concerned about this length difference but find that it fits my smaller bicycle well and doesn’t have any negative impact. In all, I’m very pleased with the quality and look of the saddle, as well as the fit and comfort. If you’re in the market for a new saddle, try a Brooks. Take care of it, and it could be the last saddle you ever buy!

Disclaimer: The above contains my opinions only. I have not received any compensation for this review. This review is for informational purposes only. I have not been in contact with the manufacturer.

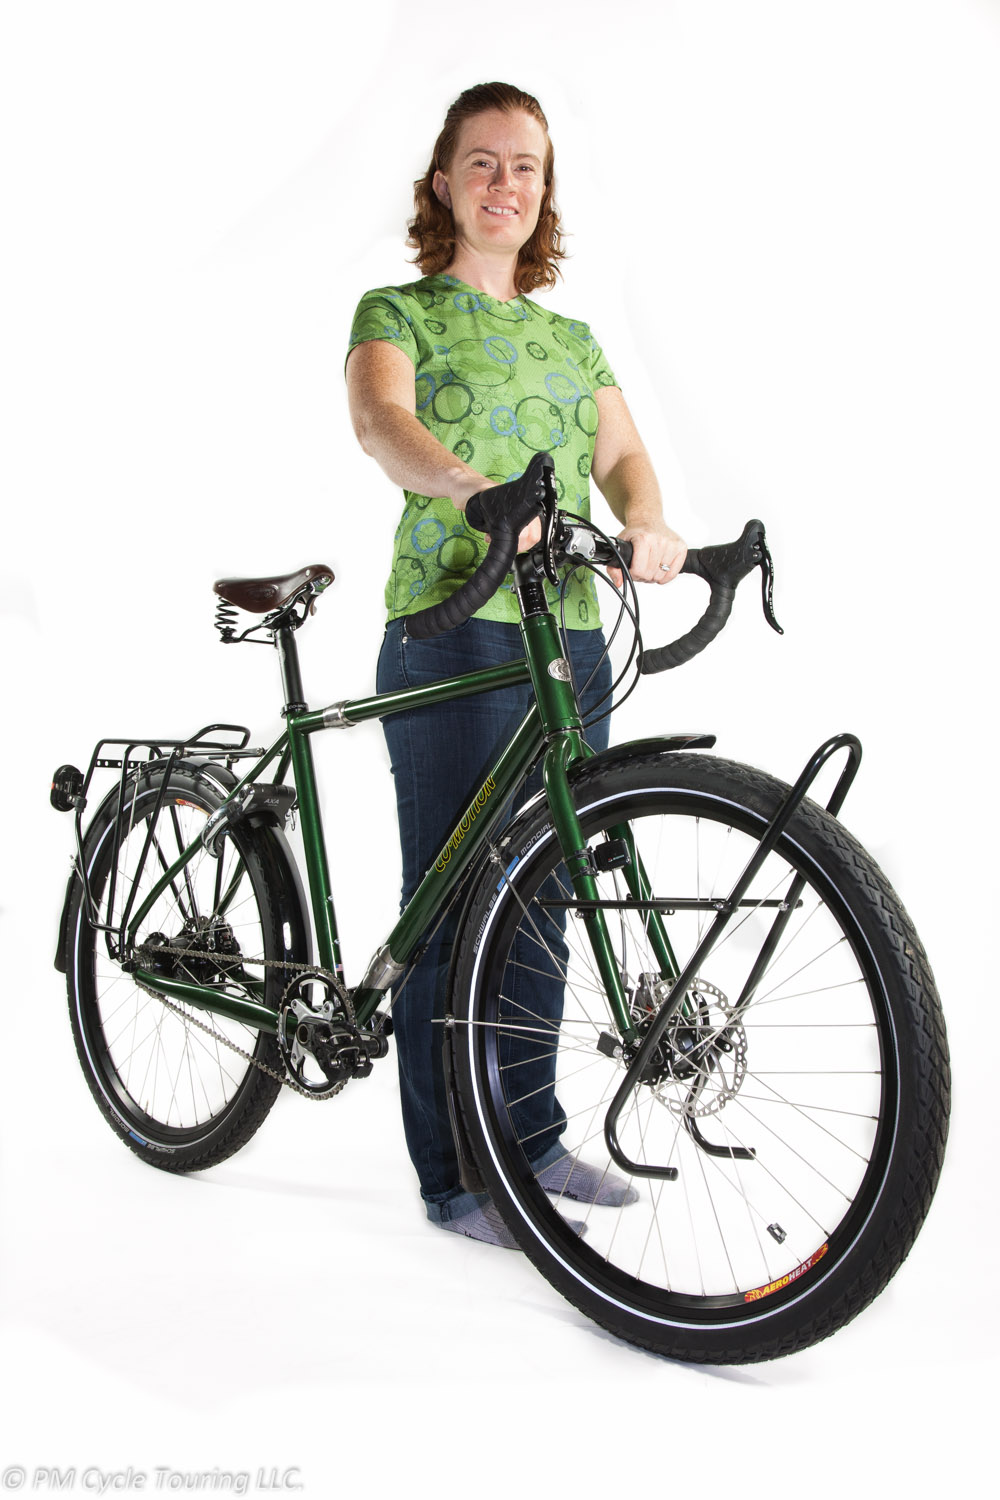
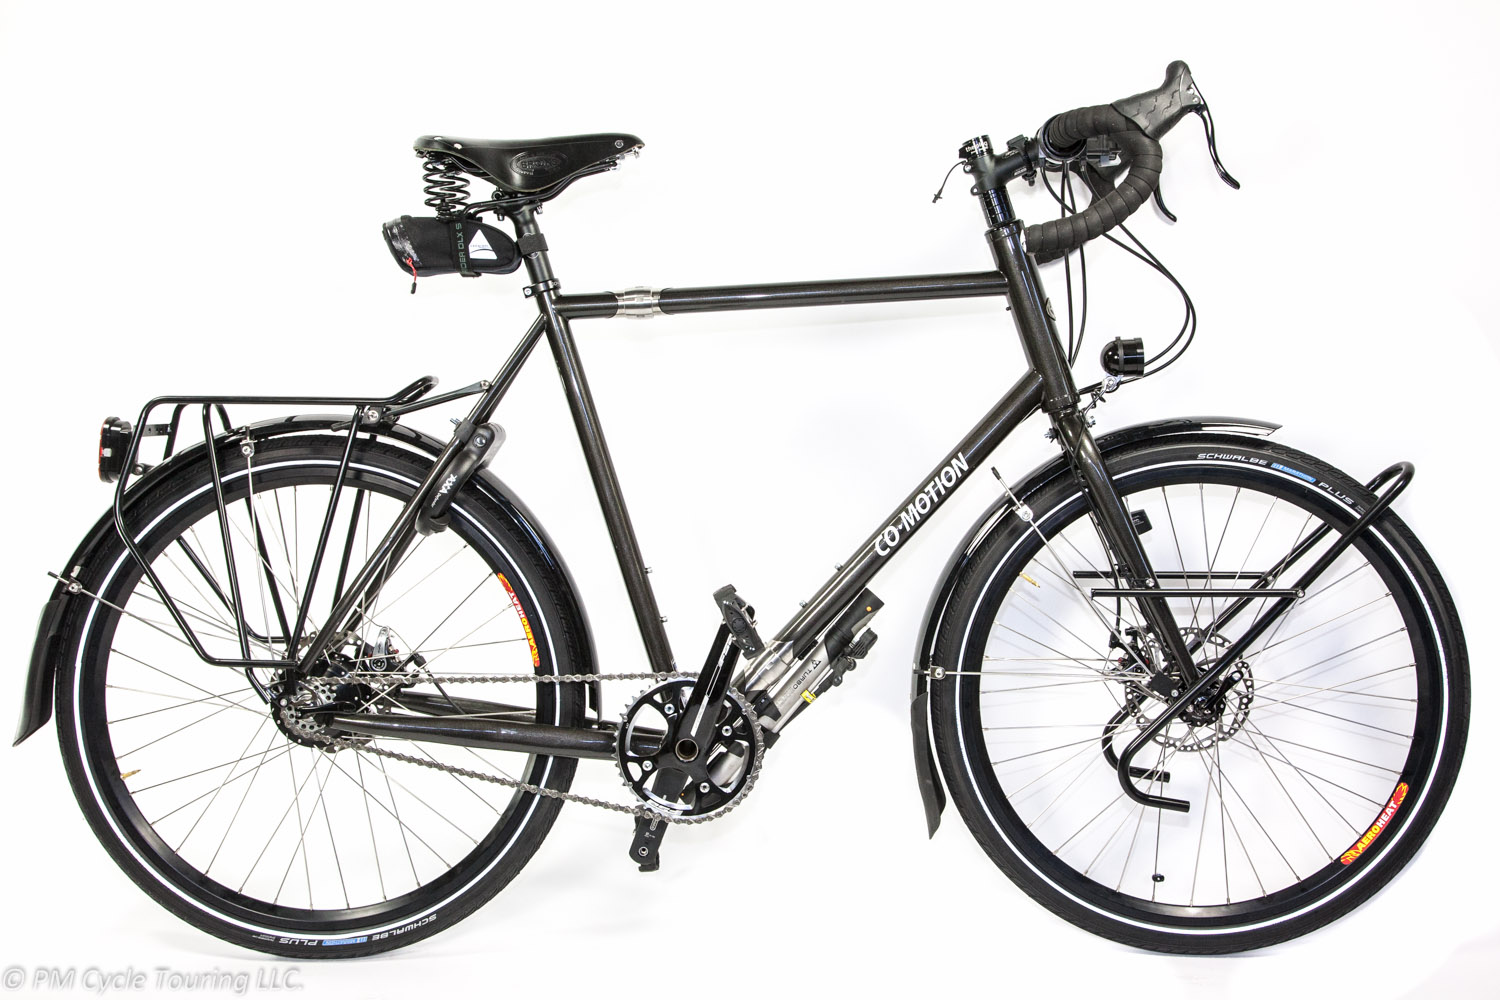
Co-Motion Pangea Post-tour Review

About a year ago I purchased my Co-Motion Pangea after an exhaustive search for the “dream” touring bike. Post-purchase I decided that a break-in tour was needed, to put the bike to the test. We began preparations for a tour of the South Island of New Zealand, which proved to be an amazing test of my Pangea. During our tour we experienced a little bit of everything you can throw at a touring bike: rain, gravel roads, river fording, snow and ice, mud, steep hills, and high winds.

Travel:

To get from sunny Los Angeles to New Zealand involved a 13 hour direct flight. Air New Zealand has a reputation for being very strict on their baggage policy and the Co-Motion suitcases dimensions are pretty much at the limits of allowed baggage sizes.

However the real issue ended up being weight. The suitcases themselves weigh near 14 lbs., and you only get 50 lbs. per bag. We packed the bikes and added the cages, bottles, pedals seats to the suitcase only to find that we were over the limit. After some re-arranging and putting all the extra bits into our other luggage, we managed to get the bikes under the weight limits.

Assembly:

Putting the bikes back together was exactly as we practiced at home; please make sure you practice at home before you tour. No issues to report, everything worked as expected. It was a half-day event getting two of them together and tuned up.

Touring:

So, how is it to tour on a Pangea? I can sum it up in three words: I love it! The ride is very smooth and responsive. We started off on paved roads for the first few days and had no issues with any kind of pavement. The Brook’s saddles with springs, 26×2″ Monodial tires, and thick steel tubes make for a supremely comfortable ride. Even on gravel roads, the Pangea continued to ride very smoothly. My butt has never felt so good and the saddle wasn’t even broken in yet.

Speaking of gravel roads, we found that New Zealand roads aren’t graded like American Roads. It was rather common to find ourselves going up 11-14% grades that are a rarity in the US. We found that the gearing of our Pangea’s may be a little higher than we would like for such steep roads, especially dirt or gravel. However, there may have been another factor. We hardly trained for the tour. So I am uncertain how much of the gearing issues was due to our weak bodies.

As we progressed through New Zealand there were very few bicycle problems. About two weeks in I started noting that my chain was clicking a bit as I pedaled. I found that the tension was very loose and the chain was flopping a bit. I busted out the best multi-tool for a Pangea and adjusted the chain tension using the eccentric bottom bracket. This brought the chain nice and tight eliminating the noise from the drive train. Pam’s right handlebar brake lever started to get loose but that was probably a bike assembly error. Pam was missing one gear of her 14MW on Rohloff, once again likely bike assembly error (seeing a theme here? I am wondering about the shop we used to get the bike). We had to adjust chain tension several times. The Brook’s saddles with springs produce a tiny bit of noise every now and then. The stainless steel drops require a lot of force on the quick removal skewers to keep quiet.

My biggest disappointment was the SON generator and USB outlet. Riding along on flat roads it wouldn’t charge my battery pack or phone reliably. It would turn on, with the green LED lit, then the device would start to charge, then it would shut off, and repeat. If going downhill it would charge for a bit, but as any tourist knows the downhills are always too short. Finally we went through a particularly remote 4×4 track through the mountains that involved fording knee high water 40 times. The SON generator stopped working the next night and never turned on again.

After the generator stopped working I wanted to troubleshoot it, but as a cycle tourist I was carrying nothing I needed. I had no multi-meter or method to test if the hub was producing and the USB outlet failed, or if the hub failed. I unplugged the hub and we made use of our touring techniques for maintaining electric power for devices. New Zealand campsites usually had power available, so we were never more than two days without have an outlet. As any cycle tourist knows, you just make do.

Final Thoughts:

I am very happy with my bicycle, and I was recently asked if it was worth $7,000? For me it is. It feels great to ride, and I spend my time enjoying the ride not worrying about a derailleur tuning, or wondering if my bike could be just a little bit better. If I were to do it again I would skip the generator hub, but I stand by my decision to get a chain instead of the belt drive; the Rohloff itself is amazing.

I know that the Pangea will take me anywhere in the world I want to pedal; it is built like a tank. All that being said, you don’t need a fancy expensive bike to tour, the sites and views look the same, just get out there and ride! If you want the best bike money can buy I would put my money towards a Pangea.

*Note: I was not compensated in anyway for this review, just my two cents on a bicycle I purchased with my own hard earned money.
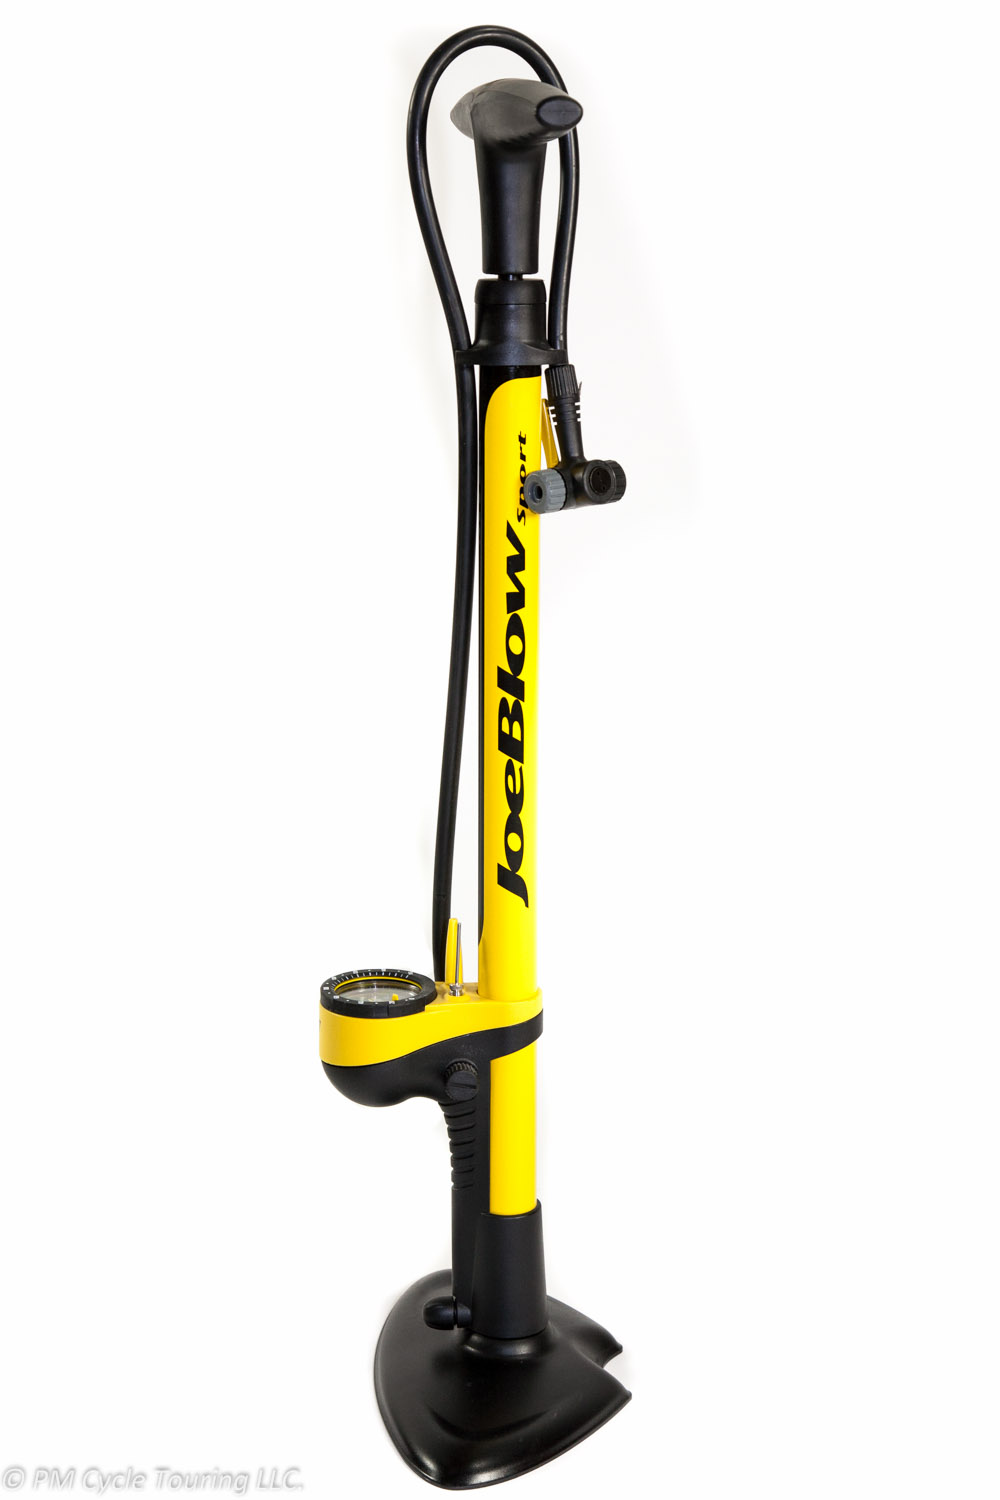
Gear Review-Joe Blow Sport II Floor Pump

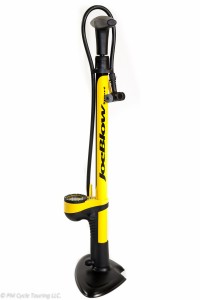
An essential item for any lover of riding bicycles is a tire pump. We’ve already talked about our favorite hand pump. However, it’s a good idea to have a floor pump handy as well. With a floor pump, you can pump your tires more quickly, with less effort. Obviously, you won’t be taking this one with you on your rides (although I once saw a kid with one strapped to his back as he rode along a bike path. I’m sure there was a story to go along with that). We’ve tried a few different floor pumps over the years. Our favorite by far is the Topeak Joe Blow Sport II, which we like so much that we even purchased a second one when we misplaced the first. This pump has it all: it’s easy to use, it’s durable, and its color stands out even in the messiest of garages (I’m speaking from experience, trust me). Here’s what makes this pump special.


Yellow floor tire pump
Topeak Joe Blow Sport II Floor Pump


No need for an adapter. Presta valve and Schrader valve on each side of the pump head, so you don’t need an adapter. It’s right there, on the head.

Pressure gauge. Large analogue pressure gauge, easy to read. This makes getting the right pressure in your tires a breeze.

Hose. 28 inch / 71.5 cm flexible hose, makes reaching tire valves easy, even when on a bike stand.

Color. Yellow color helps it stand out and makes it easy to find in a messy garage.

Handle. Large, padded handles add comfort to your pump.

Base. Large steel base makes for a stable foundation.

Extras. Need to pump up a basketball? A ball needle is included. Also included is a bladder head, which you can use to pump up anything from air mattresses to exercise balls.

Price. You can get this one for a little over $40, which is a great value.

Specs.
Weight: 1.4 kg / 3.09 lbs
Height: 67.5 cm / 26.6 in
Capacity: 160 psi / 11 bar

Bottom line. We love this pump. It does everything we need it to do, and then some. Highly Recommended.

Disclaimer: This review is for informational purposes only. All opinions about any products mentioned in this article are my own.

Gear Review-Big Agnes Copper Spur UL 2 Tent (2013 version)

Restful sleep is essential to putting on the miles day after day. Ever noticed how it takes a while to get used to falling asleep in a new place? That definitely happens to me. But one thing I have observed during my bicycle tours is that even though the tent I’m sleeping in is in a new place each night, the tent itself doesn’t change. Having that consistent environment makes up for new locations each night. So, for me, this makes the tent is one of the most important purchases for a bicycle tour.

I did a lot of research before deciding on the Copper Spur UL 2 tent for our touring tent.

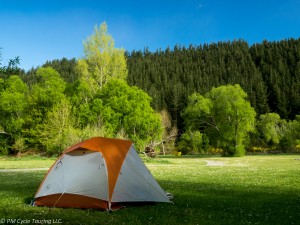
a tent set up in a field with a forest surrounding it
Big Agnes Copper Spur UL 2


First off, the pros:

  • Two “rainbow” doors, one on each side. This means that we each had a side to enter and exit the tent, and weren’t crawling over each other to get in and out. This turned out to be even better than I thought it would.
    • The one person tent only has one door and vestibule.
  • The tent, rainfly, and poles weigh in at 1400 g. and the 2014 version coming in 125 g. lighter. This tent is truly lightweight.
  • Easy to set up and take down (even with just one person). At the end of the day, this tent went up quickly with either one or two of us setting it up.
  • Head space.
    • Matt is 6’2” and I’m 5’6” and there was plenty of headroom for both of us to sit up in the tent. Previous lightweight tents that we’ve had skimped on headspace to save weight, but the Copper Spur left more than enough room for comfort.
  • Adequate ventilation.
    • Nothing is worse than waking up to bedding that is saturated with condensation. We found no problems with this tent throughout our entire tour.
  • Durable.
    • Stood up to 60+mph winds on our most recent tour.

Cons:

  • Footprint
    • Does not provide protection against thorns
    • Not included with the tent/needs to be purchased separately
  • Color
    • The bright orange doesn’t lend very well to stealth camping.


What’s changed on the 2014 model: The 2014 model is very similar to last year’s model, only slightly lighter. We have not had a chance to try the new version out.

We highly recommend this tent for bicycle touring. The Big Agnes Copper Spur comes in a single person as well as three-man and four -man versions. The single might be a bit small for a larger (taller) person, so keep that in mind. What are some things you look for in a tent? Let us know in the comments below!

Disclaimer: This review contains my personal opinions. I have not received any compensation by the manufacturer for this review. This review is for informational purposes only. If you click the Amazon link and make a purchase, we will receive a small commission.

Exped Synmat UL 7 Review

Your sleeping pad can make or break your camping experience. When touring the primary concerns for a sleeping pad are comfort, weight, durability, size, and ease of use. The Exped Synmat UL 7 exceeds expectations in all of those categories.

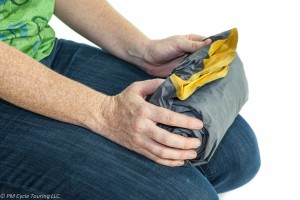
a woman holds a rolled up Exped Synmat UL 7
Pam holds the Exped Synmat UL 7

Comfort is the whole reason for bringing a sleeping pad, and can be difficult to quantify. Pads typically can be broken down in to two categories: Solid foam or Air Inflated. The Exped is air inflated and has a maximum inflated depth of 2.8 inches; the amount of air in the mattress can adjust pad firmness. The Exped also has insulation inside the pad to keep you warm on cool nights. Not much is worse than sleeping on a cold pocket of air. There is some concern that this insulation may work to keep you warmer on hot nights, however neither Pam nor I noticed that the pad was uncomfortable even in the hot humid nights in the South Eastern United States.

Weight is where the Exped shines, at only around 400 grams (depending on the size of pad you choose) it is one of the lightest pads available. Lighter weight pads tend to be made of crinkly plastic; this pad is constructed of a material that feels like very tightly woven nylon. It does not stick to the skin and can be laid on directly with reasonable comfort. Noise-wise this pad does create a bit of sound when laid on and if you toss or turn during the night, however we have yet to find a magical silent pad and you quickly get used to this sound.

Durability of any inflatable pad is directly proportional to how you treat the pad. If you throw it on the ground and aren’t careful about where you put it (like Matt) it will probably get a hole or two (read here about how to patch holes). However if you are careful and make sure you only place the pad on surfaces free of debris (like Pam) then you can go an entire tour with no problems. We did not find any appreciable difference in the durability of these pads compared to other pads we have used.

The size of the pad you choose can be very personal and also depend on weight. If at all possible try out the pad in the store, make sure you can inflate it to a firmness you like, and lay on it to verify comfort. Matt and Pam both prefer pads that go from head to toe. Matt is 6’1” and chose to go with the M size (72 in long) and Pam is 5’6”, so she went with the S size (64 in long). An option for those looking to go ultralight is to get the smallest pad possible, just covering the shoulder, torso, and hip area, letting the legs hang off the edge. This reduces overall pack weight, but might also reduce comfort.

A woman lays on a yellow synmat sleeping pad
Pam lays on the Exped Synmat UL 7 Sleeping Pad

The pad has two valves similar to all other Exped products, one for inflation which has a flap to prevent air leaking out between breaths until you close the cap, and the other to allow for deflation. Both of these have a hole approximately the size of a quarter to allow for rapid inflation and deflation. Compared to twist valves used by other companies these valves operate much easier.

To inflate the pad we use our Schnozzle Bag which takes about 4 full bags to completely fill it. If you elect to fill it manually it takes quite some time. In fact we have never even tried; just get yourself the Schnozzle bag! Inflation pressure can be tweaked by keeping the inflate valve cover open and pressing on the flap to release small amounts of air. Deflation is quick due to the large opening deflation cap, it takes about 30 seconds to deflate to where you are touching the ground and no more air is exiting.

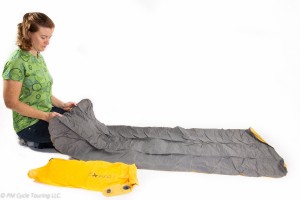
an exped synmat ul 7 laid out in preparation for inflation
Pam prepares to inflate the Exped Synmat UL 7 with a Schnozzle Bag


Overall we have been very pleased with the Exped Synmat UL 7 and highly recommend them. In our opinion these pads are the best all-around pads available. They are a good compromise between weight and comfort. We used them on our Southern Tier Tour and our New Zealand Tour and they continue to be our go to choice. When combined with the Schnozzle Bag we find it difficult to imagine we will be looking for other pads in the future.

Detailed Specs:

Name Exped Synmat UL 7 S / UL 7 M
Weight 399 g / 463 g
Packed Dimensions* L x Diameter (cm) 24 x 9.5 / 24 x 10.5
Inflated Dimensions L x W x Thickness (cm) 162.5 x 53 x 7 / 183 x 53 x 7
Temperature 25 F (-3.8 C)

*Dimensions will vary based on how tightly you roll the pad. This is just an example of what you could expect when you pack the pad.

Disclaimer: All opinions about any products mentioned in this article are my own.  I have not received any compensation for this review. This review is for informational purposes only.

Shoe Fetish

I am not a shoe girl. I don’t like going shoe shopping and I don’t have a closet full of shoes. I’m more into having a few pairs of practical shoes that I wear all the time. But, I recently became the proud owner of a third pair of cycling shoes. When I was a kid, all my shoes were cycling shoes. They were simply the shoes I wore when I rode my bike. Now, it’s more complicated.

I have Time ATAC clipless pedals, which are really the pedals with the clips on them, and my shoes need to be clip compatible. My first pair of cycling shoes were Keen Commuter Sandals. I loved them, and I still do. They’re really versatile, easy to clean, and keep my feet from smelling too funky.

When I got a new, fancy bicycle, I wanted a new pair of shoes, and got a pair of mountain bike cycling shoes, Velcro and all. I choose the Black Shimano SH-WM51 Mountain Cycling Shoes  because they have a recessed cleat to allow walking around and they are fully enclosed shoes for foot climate control. These shoes ended up being super comfortable, and kept my feet warm on the frigid mornings in the mountains of the Southern Tier. I could add an extra layer of socks, and adjust the shoes to fit snugly. My biggest complaint was the lack of breathability. After a good rainstorm, my socks would be as wet on the inside, from sweat, as the shoes were on the outside.

As we made plans for a New Zealand bicycle tour, I decided to purchase a brand new pair (New bike, new shoes? Maybe there’s a theme). This new pair, Shimano SH-WM34, could be easily mistaken for a pair of hiking shoes. Which is perfect, since we plan to spend a lot of time off the bike on this trip. The shoes lace up, and are pretty comfortable to walk around in. The traction is similar to a hiking shoe, and makes hiking up the hills a breeze. The hiking shoe look helps me blend in with all the other outdoor adventurers for those days off the bike.

Update: And now that we’re back from New Zealand, I’m happy to report on how the SH-WM34 performed. On the bike, the shoe performed exactly as needed, providing a solid platform for pedaling. In addition to cycling, we did plenty of “tramping” off the bike, that is, hiking, and the shoe was very comfortable. There was just enough traction to make me feel secure on the moderate hills we hiked. I wouldn’t do very much advanced hiking, however, as this is a cycling shoe, not a hiking shoe. The inflexibility of the sole takes some getting used to, though, as I’m used to a little bit more flex in my hiking shoes. But overall, I was comfortable on our hikes. In the cool weather, I was able to wear thicker socks, which helped keep my feet warm. When it warmed up, I didn’t like how sweaty my feet got, however, so I wouldn’t recommend these shoes on a tour through hot, humid areas.

What kind of shoes do you wear when you ride? Do you go for comfort or style?

Santini Women’s Fiery Short Sleeve Jersey Review

I recently purchased a Santini Fiery cycling jersey (size Small), and wanted to share my experience and thoughts about this jersey. The manufacture Santini designs and produces their clothing in Italy. The description provided for this particular model describes it as a “short sleeve jersey for women in a soft fabric with Resistex Bioceramic thread”. The fancy Resistex Bioceramic thread claims to reflect far infrared rays generated from your body back to your body to aid with micro-circulation. With that in mind here is my take on the jersey.

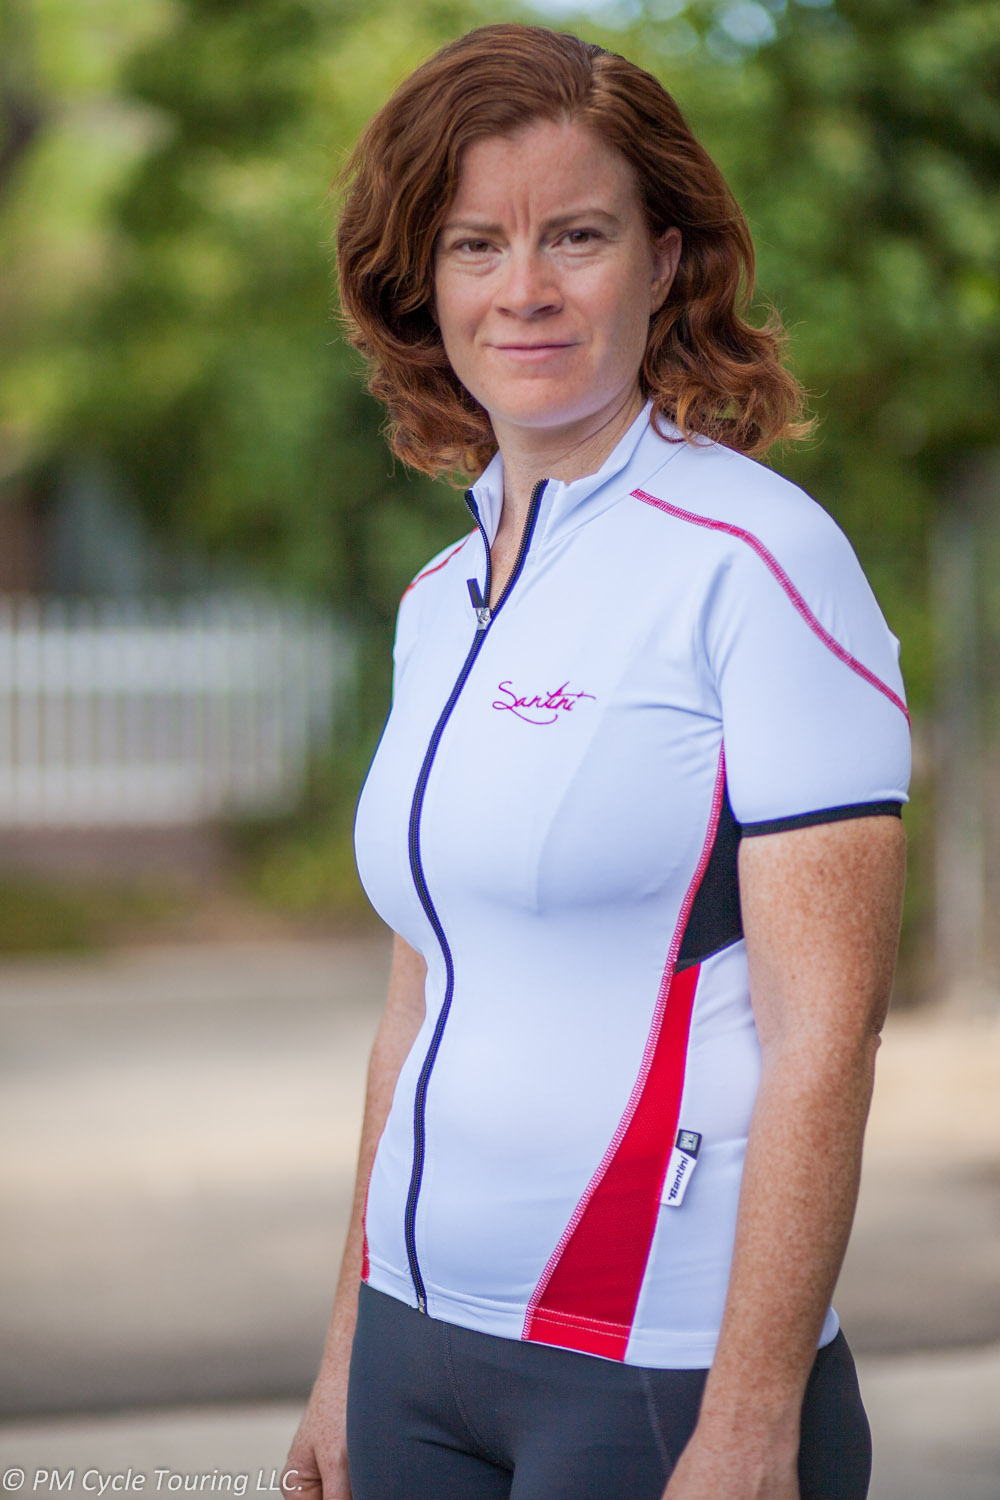
A woman wearing a short sleeve, white, full zippered cycling jersey
Pam wearing a Santini Fiery S/S Jersey

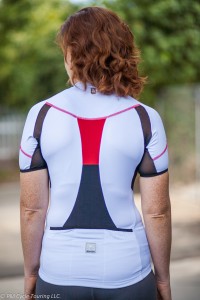
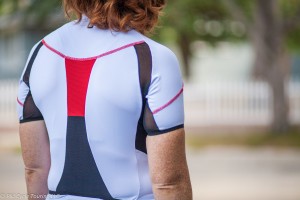
Starting with the positives: the jersey is very well designed with stylish stitching and details. The fabric used over most of jersey feels amazing, it is very smooth and pleasant on the skin. On the back and near the underarms are small sections of micromesh fabric which breathes very well. All seams are smooth, with no stitches rubbing. Overall the jersey looks and feels very high-end. The back pockets are large enough to fit my cell phone and some snacks with no problem.

A woman wearing a short sleeved, white cycling jersey, the back side.
Pam wearing a Santini Fiery S/S Jersey

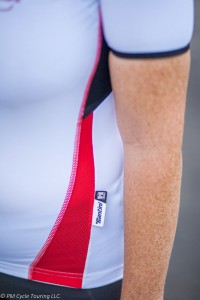
The jersey fit very well in almost every respect. However, the arm holes are too small. I have average-sized biceps, measuring 12 inches. The jersey sleeves are only 9 inches in circumference. The elastic cuts off the circulation in my arms and is uncomfortably tight.

2014-09-07 0811 Santini Fiery Jersey
Santini Fiery S/S cycling jersey
A close-up of the sleeve of a short sleeved Santini cycling jersey
Santini Fiery S/S Jersey

According to the sizing guide on the website, I ordered the appropriate size jersey for the chest measurement (33.5 inches). Unfortunately nowhere does Santini mention that the sleeves are sized so small. I would suggest that you either order another size up (I am unsure of the increase in the sleeve measurement for a medium) or find another jersey.

Recommendation: This jersey is a stylish, high quality garment. Verify that the sleeves will not be too tight before ordering.

Disclaimer: I have not received any compensation for this review. This review is for informational purposes only. I have not been in contact with the manufacturer. However, if they were to send me a size Medium jersey to try, I wouldn’t turn it down!

Hiker/Biker Campsite: Refugio State Beach, California

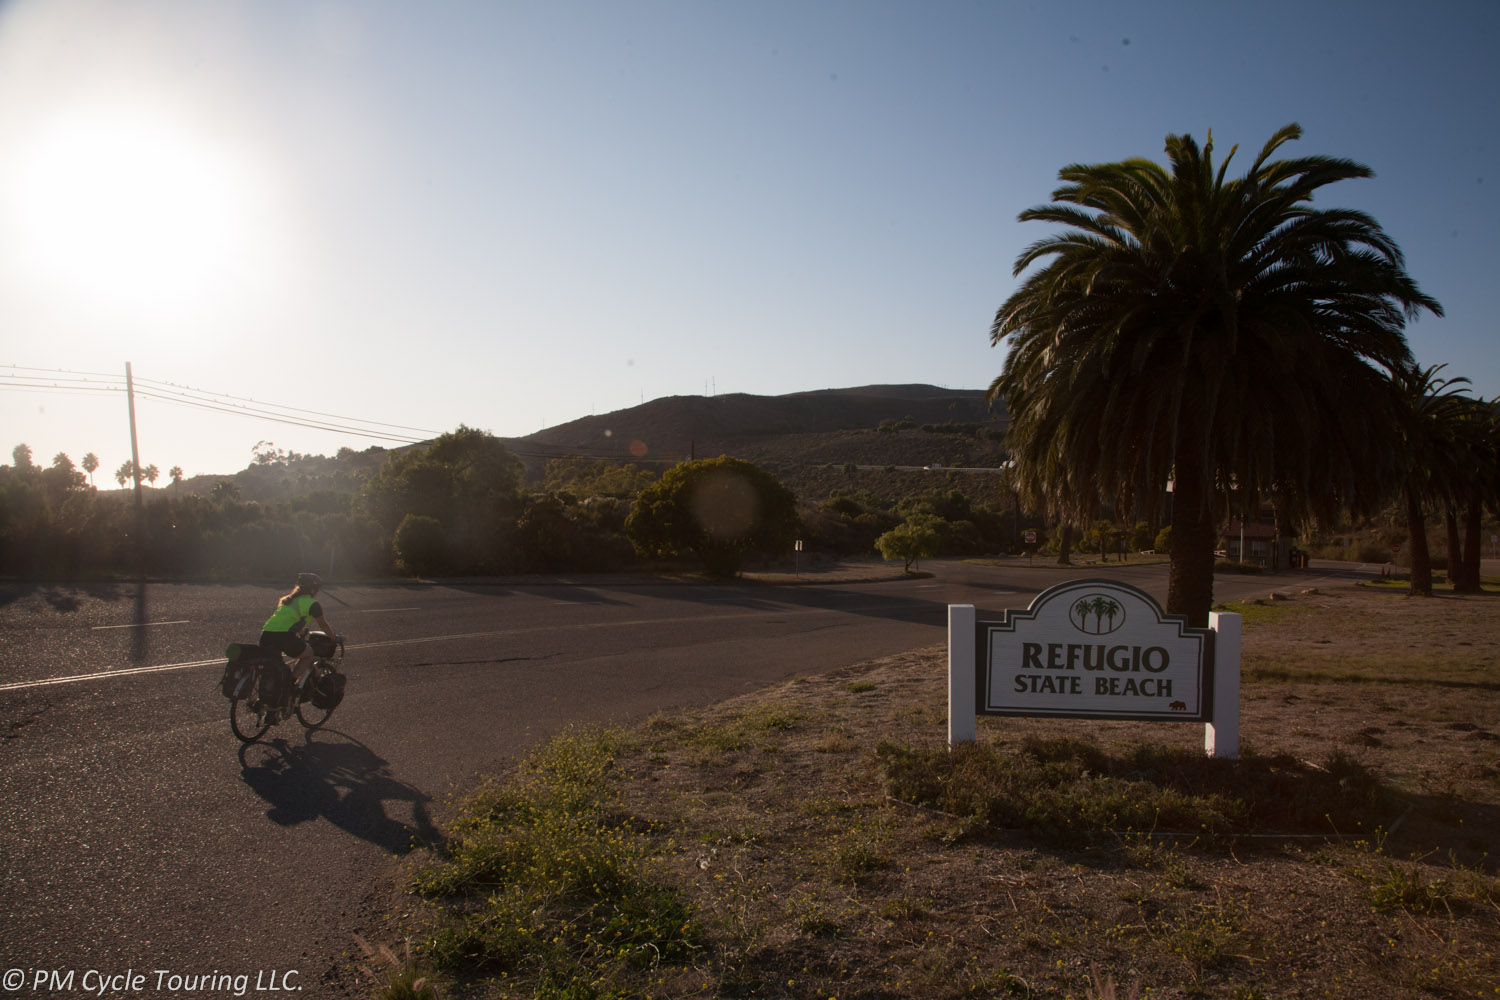
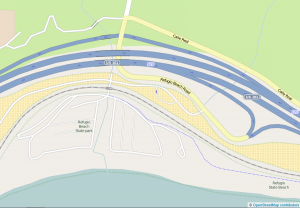
The Hiker/Biker (HB) site in Refugio State Beach is one of our favorite HB sites in the United States and is better than the nearby El Capitan State Beach sites. This site has it all, bathrooms, views, nice camping surfaces, and the sound of the waves crashing. However this campground is rather remote, there are no stores or food once you get out of Lompoc if heading southbound or Goleta if heading northbound. Plan accordingly.

Cost: $10 per person per night.

Getting To Refugio: Coming from the North or South on US101 take exit #120 Refugio Rd. Turn towards the ocean and follow the signs to the entrance to Refugio State Beach. If manned the ranger station will take your payment, otherwise immediately past the ranger station is an automated payment station.

HB Site: After entering the park take the first left and first right. Follow the loop around towards the beach and the HB sites will be on the left side of the road near the playground. The site consists of mostly flat grassy areas with some trees with a standard wooden bench.

Amenities: Bathrooms including warm showers (tokens required) are in sight of the HB sites. The beach is across the road, positon your tent right and you will get to see the sunset over the beach. There is a small camp store open on the weekends with extremely limited supplies; no grocery stores are within a 10 mile radius.

Off Bike Activities: Number one on this list is the beach. Be aware that natural tar deposits are present and walking on the sand will likely result in tar spots on the shoes/feet. However you can walk a reasonable distance enjoying the little caves and coves; the coast here is beautiful and worth exploring. Check the tide tables for high tide, and stay away from the crumbling bluffs.

There is a bike path heading east from Refugio toward El Capitan State Beach. The path used to extend all the way to El Capitan, however sections of it have been closed due to storm damage, so it is no longer possible to travel the entire way. Still, the bluff-top path gives amazing views of the ocean, and is worth a little hike or bike.

RefugioThe bottom line is: you’ll have a great stay at Refugio State Beach.

Exped Air Pillow M Review

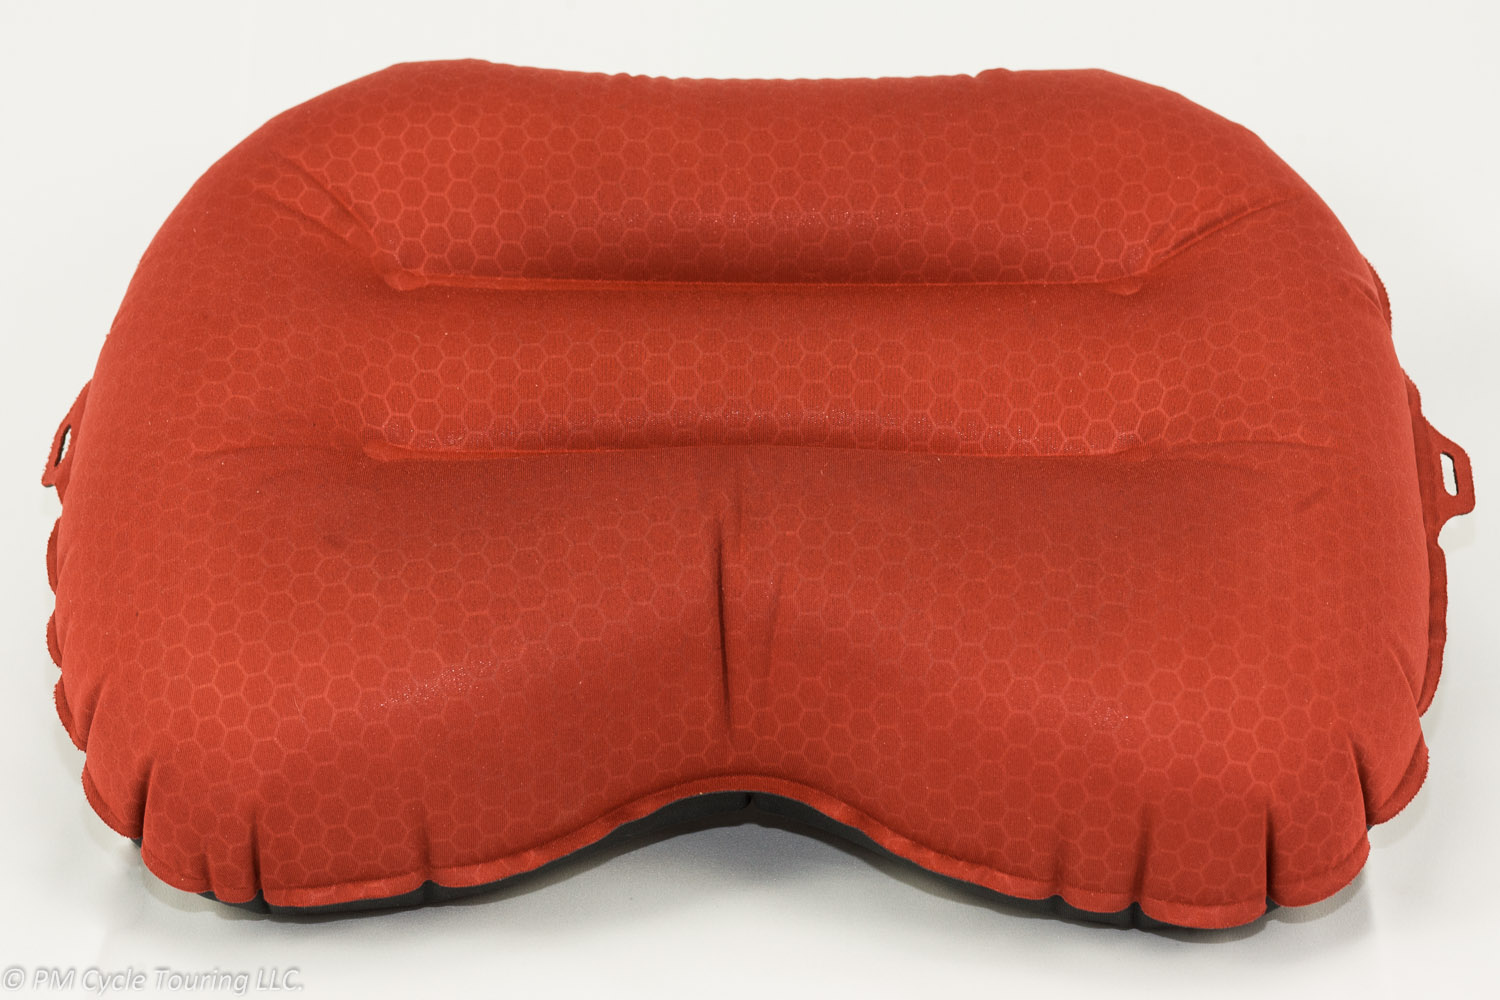
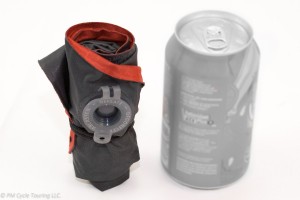
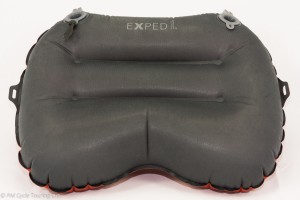
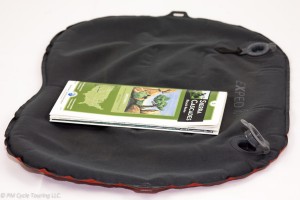
Pillows can be considered a luxury for short tours, but for more than a night or two you probably want something to lay your head on. At 3 ounces the Exped Air Pillow M is lightweight (also available in a 2 ounce Ultralight version). Because it is an inflatable pillow it packs down extremely small, smaller than a can of soda.2014-03-03 1718 ExpedPillow

The pillow has two valves similar to all other Exped products. One for inflation which has a flap to prevent air leaking out between breaths and the other to allow for deflation. Both of these have a hole approximately the size of a quarter to allow for rapid inflation and deflation.2014-03-03 1713 ExpedPillow

To inflate it we use our Schnozzle Bag which takes about 15 seconds to completely fill the pillow. If you elect to fill it manually it takes between 4 and 6 breaths. Inflation pressure can be tweaked by keeping the inflate valve cover open and pressing on the flap to release small amounts of air. Deflation is nearly instant due to the large opening uncovered when you open the deflate cap.

The Pillow is constructed of polyester; this material feels somewhat like a very fine tightly woven nylon material. It doesn’t stick to skin like plastic, but Matt prefers wrapping his down vest around it for increased comfort; Pam prefers to just sleep on it bare. There are two small loops of extra material designed to allow you to use some clips to hold the pillow in place, however we never utilized them.2014-03-03 1715 ExpedPillow

Overall we were very pleased with these pillows and used them for our entire Southern Tier tour. There were no problems on the tour and they continue to work well; we plan to continue to use them for all our future tours. We highly recommend this pillow.

 Name  EXPED Air Pillow M
 Weight  Pillow: 75 grams
Packsack: 5 grams
 Packed Dimensions  5 in x 2 in
 Deflated Dimensions  38 cm x 27 cm
 Inflated Dimensions  38 cm x 27 cm x 11 cm
 Approximate Cost  MSRP: $39.00
 Other Similar Products  EXPED Air Pillow UL

Disclaimer: This review contains my personal opinions. I have not received any compensation for this review. This review is for informational purposes only.