First Look: AXA Defender Frame Lock

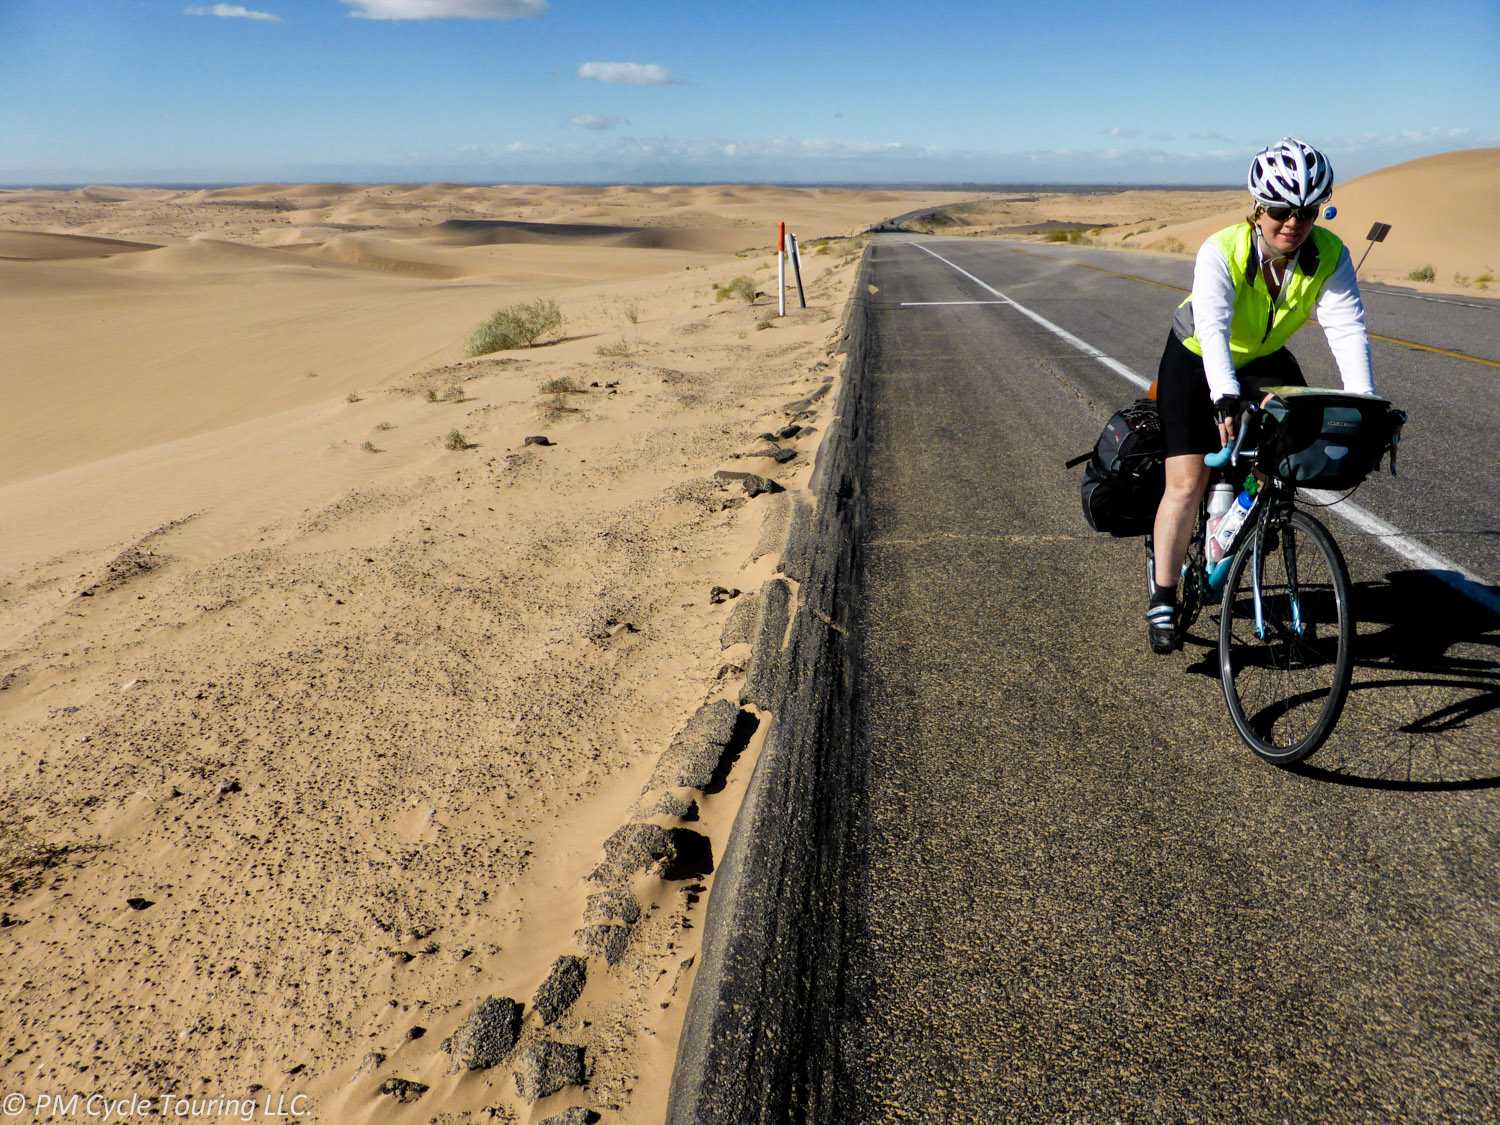
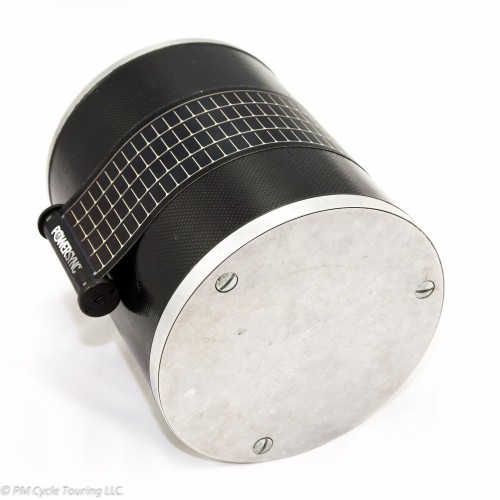
If you are unfamiliar with frame locks you can read my previous post. The AXA Defender weighs in at 670 grams and is available in several colors. Before purchasing an AXA Defender frame lock there are a few things to consider: Understanding the limitations of a frame lock, where the lock will be mounted, how it will be attached, and how the key performs.

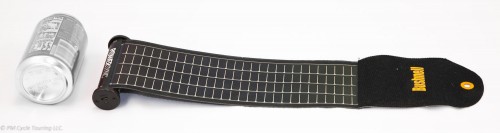
Limitations: A frame lock alone will not prevent someone from picking up and walking away with your bike or throwing it in a pickup truck. However higher end frame locks like the AXA Defender have a special plug-in for a cable or chain when it is desirable to attach the bike to prevent it from being carried away. Lastly it is important to realize that any lock can be defeated by a determine thief, you have to balance security/weight/hassle with any locking mechanism.

Location: The ideal location for the AXA frame lock is inside the rear triangle of the bicycle. In this location even if the lock mounts are cut and the wheel is attempted to be removed the shape of the lock will prevent the rear wheel from being taken. This is a particular benefit if you are using an internal gear hub, like the expensive Rohloff Speedhub, and want some protection to prevent it from being stolen.

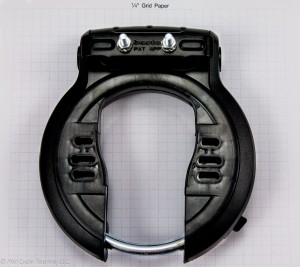
Attachment:Mounting the lock is the trickiest part and should be considered carefully before purchasing. First you should know the size of the AXA Defender and ensure that it will fit including fender and tire clearance. To assist with this I have provided picture of the lock on ¼” graph paper and included measurements as practical.

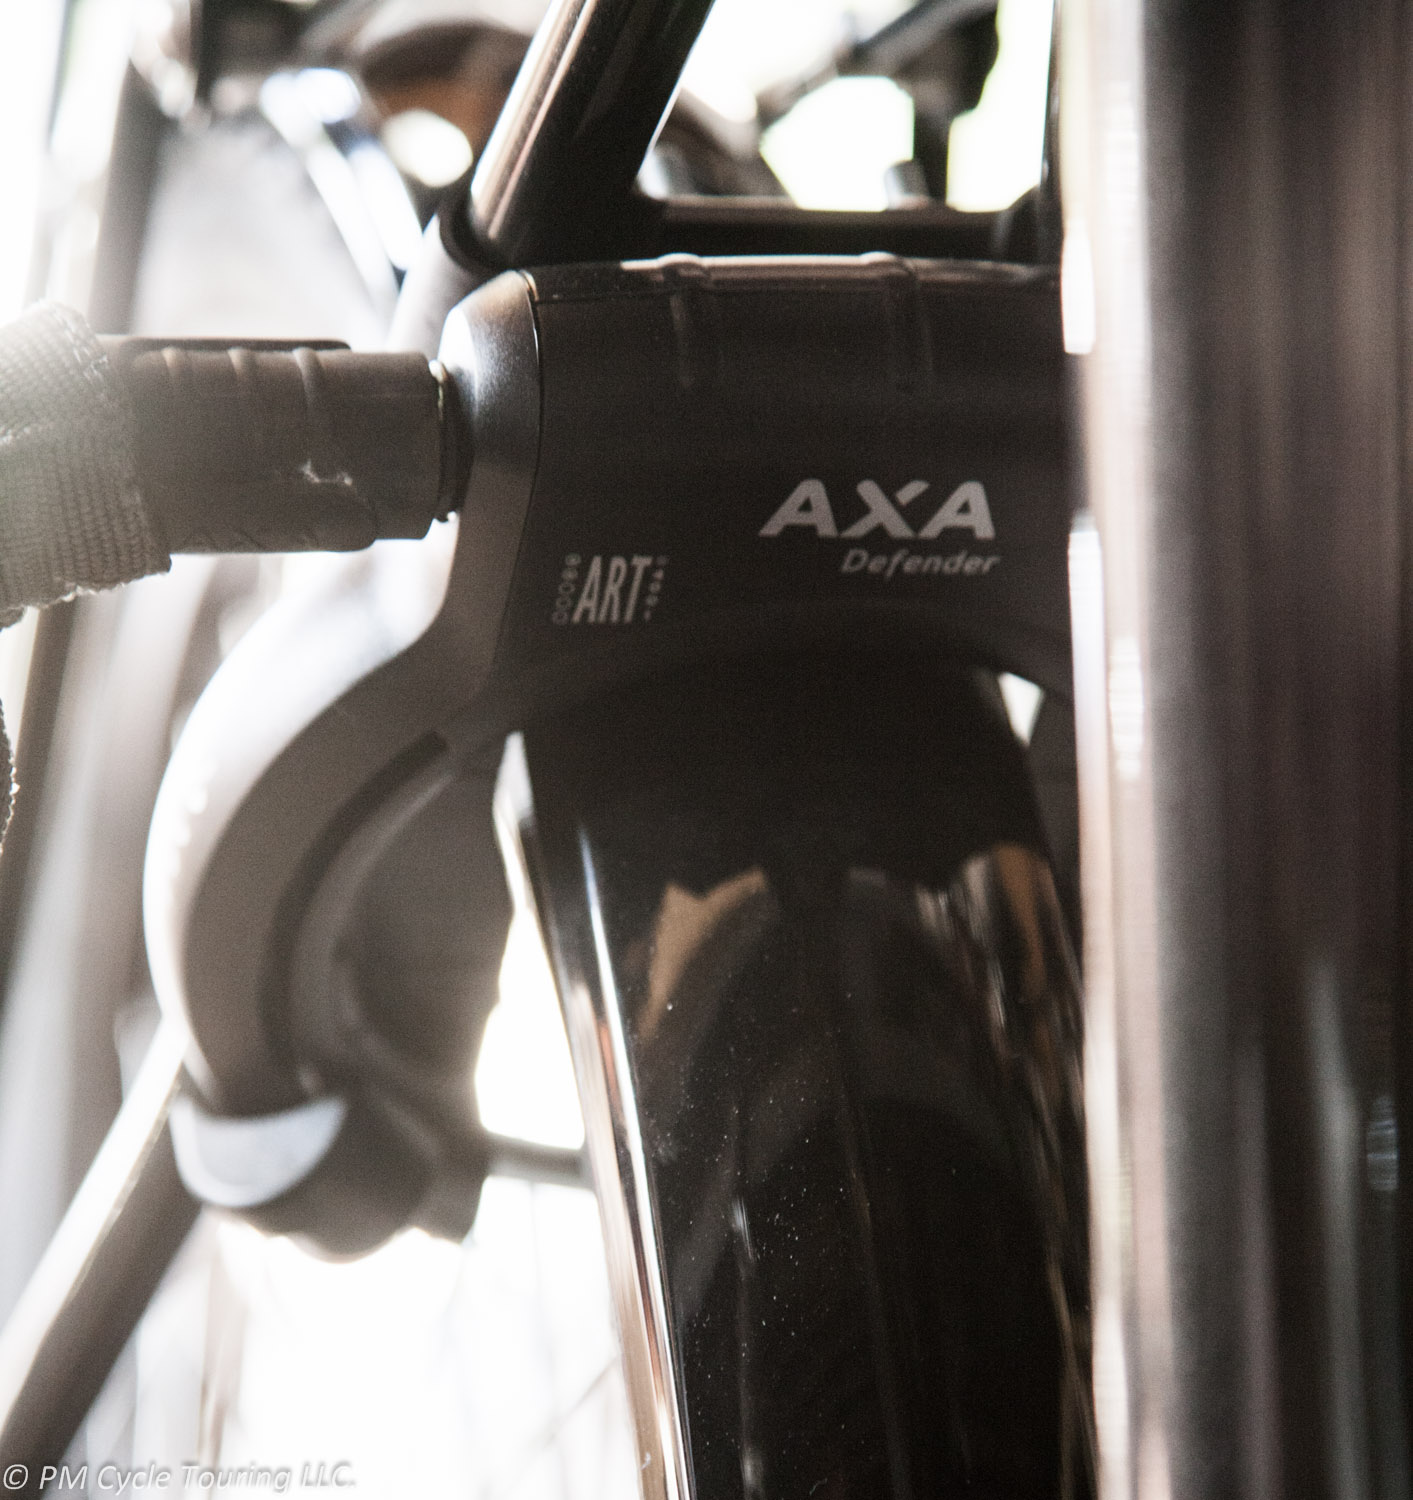
Secondly, you need to determine how to attach the lock; most North American bicycles do not have mounting points for a frame lock. There are two methods that I am aware of for attaching the lock. First is using a set of straps that act like a hose clamp around the seat stays of the rear triangle. The second method is a top bolt option which has two long bolts and a clamp attachment, this is pictured below.

AXA Defender RL top bolt mount on 1/4 inch graph paper

Key: The AXA Defender will retain the key in the lock until the lock is locked. This is a double edged sword. The up side is that you always have the key in the lock ready to go until it is locked, then you can remove the key. The hypothetical down side is that if you leave you bike unlocked, the key will remain in the lock, allowing a cruel individual to lock the lock and take the key. Leaving you with a locked bike and no key. An easy solution to that problem is to always lock you bike, or take a spare key along with you.

Overall I am very excited to use this lock, while there is a weight penalty to carry it around I will always have a lock on my bike ready to be engaged. After some use and actual touring I will come back and provide a follow up review of this lock, but for now the AXA Defender seems to meet all the criteria I could ask for in a frame lock.

I actually had some much trouble finding the AXA Defender for sale in the USA that I bought some extra locks and have them for sale. Please e-mail me at Matt@PMCycleTouring.com if you are interested in buying from us as our online store is a work in progress. If you have any questions leave a comment below!

Learning to Ride a Bicycle (Pam’s bicycle evolution)

I started riding bicycles when I was about 7 years old. My first bike was a fixed gear, with a coaster brake, you know, the one where you just push backwards on the pedals and the bike stops. I got my first bike with multiple gears (10) and rim brakes when I was a teenager, and I loved the speed I could attain on that bike. But then I got my driver’s license, and for some reason I stopped riding. I guess that happens to a lot of us. Driving a car was just more convenient, and gas was cheap.

About 9 years ago, I became interested in bicycling again. I bought a comfort bike, with twist shifters and 21 speeds. Even though I hadn’t been on a bicycle in more than a decade, it’s true what they say: once you learn how to ride a bicycle, you don’t have to relearn. I rode that bicycle everywhere from city streets to dirt trails. Getting used to all the gearing took some time, but I eventually got the hang of it.

Then came my first touring bicycle, a Raleigh Sojourn, with bar end shifters and clipless pedals (the adjective clipless is misleading and confusing. It really means “clip-in,” where the shoe is clipped into the pedal.) The very first time I rode the bicycle I was afraid to clip in completely. I was sure I wouldn’t be able to unclip in time when I stopped. So, I just rested my foot on the pedal while I rode, but when I did come to a stop, my clip was stuck to the pedal anyway, and I fell over. Right in front of the bike shop. I was so embarrassed, but less so when I found out that almost everyone falls at least once. Over time it became natural to clip in and unclip, and now I don’t even really have to think about it.

Bar end shifters were also an adjustment. However, once I figured it out, I liked the dependability of the shifting. My biggest problem at first was remembering which side controlled the front gear, and which the back. Unlike the twist shifters, there were no numbers on the shifters to clue you in. Also, I would sometimes forget which direction I was supposed to shift, and when I really needed an “easier” gear, I would accidently shift to a more difficult one, and lose my momentum. I had to make up a mnemonic to help me remember. To go UP the hill, the chain needs to go UP the cogs on the back. The lever gets pulled UP.

My latest bicycle has Shimano STI shifters, which are combination gear/shifters. This was yet another learning experience for me. It took quite a while, but the quick shifting that you can do with this style of shifter is amazing. The shifter is within easy reach, and if you have to brake quickly, your hand is right there.

After riding for many miles and many hills, I have begun experimenting a bit with different gears. A lot of people will tell you that the most efficient way to ride a bicycle is to keep a high cadence (how fast you pedal) of 80-90 rpms, no matter what gear you are in. I’ve always had a difficult time with this. At first, it was because of my lack of skill at shifting. I wouldn’t shift soon enough before a hill to keep up my cadence. Also, I’ve found that 80-90 rpms is way too high of a cadence for me to be comfortable. I enjoy riding at a much more reasonable 65-70 rpms (This is an estimate since I’ve never had a cadence meter installed on my bicycle).

With practice, I have become a pretty good judge of a hill. Looking at it, I can tell when I need to downshift in order to keep up my speed or cadence to get up the hill. Every once in a while, the steepness takes me by surprise, and I find myself rising out of the saddle to give myself a little more leverage. A skill that I had in my youth that I had to reacquire as an adult. For some reason, it felt unsafe with my shoes clipped into the pedals. Once I got over that feeling, I’ve been able to use the skill to my advantage. But mostly, I am able to choose the right gear to make my way slowly and surely up every hill I encounter.

As with everything in life, it all takes practice. Whether you are new to riding a bicycle, or new again to riding, it’s the same. Don’t be afraid to try new things. Whether it’s clipless pedals, bar end shifters, or brake/shift levers, you may find yourself loving the new technique even more than the old.


Choosing the Right Lock for your Touring Bicycle

Because Pam and I tour as a couple we always have one person to watch the bicycles while the other runs to the store or bathroom. However, if you want to leave your campsite and hike, or take a day trip somewhere else, a lock can do wonders to ease your mind. Last tour we brought a tiny portable lock on tour with us, which a pair of scissors probably could have cut through. We basically would just lock our bikes together to keep honest people honest. However, there were a few times I wished that I had brought a more substantial lock.

After some research I decided that a frame lock (which attaches to the rear triangle of the bike and stops the rear wheel from moving) is the ideal touring lock. While a frame lock alone is not going to prevent someone from picking up your bike, the fact that it is fully loaded and said person would have to carry 50+ pounds where ever they wanted to take the bike might be enough of a deterrent.

Another benefit of a frame lock is how easy it is to engage the lock, you simply partially twist the key while pushing down on the lock lever and the bike will not roll away. If a bit more security is needed a plug in chain or any cable with loops can be attached to a fixed object. But there isn’t any fiddling with getting a lock out of your bags and finding an appropriate place to attached it. The lock is always on your bike ready to go.

Additionally when the lock is engaged your rear wheel won’t turn. Since neither of us have kickstands, engaging the lock means we can lean the bike against anything we want and it will stay upright and not roll away.

If someone really wants to steal my bicycle they will; no lock can stop that. But this will give me peace of mind that someone can’t just ride away with my life, and it is so easy to use that it is unlikely for me to not lock the bike. It may even allow my wife and me to spend more time together (in case being on a tour wasn’t enough time together anyways).

Bicycle Repair Equipment: 5 Must-haves for your next tour

Where you plan to tour and how long you’ll be out there play a big factor in deciding how much repair equipment to bring. If your tour is in the US on highway and state roads, chances are that you can get away with bringing fewer repair items. However, if you are touring in the Siberian Tundra, you might want to bring everything, including a spare bike if you can! Here are 5 things I think every cycle tourist should bring.

  1. Multitool. Do not leave home without it! Instead of having separate tools in varying sizes, the multitool makes it so much more convenient. You will need this at some point on the tour to make adjustments, or to make repairs. A proper bicycle multitool with the appropriate sizes for your bicycle is very, very important. If you are going around the world the Topeak Alien III  has every tool you can cram in. For something simpler try the Avenir Woodsie 10.
  2. Spare tubes. Even with the world’s best, toughest tires, you will have a flat tire at some point on the tour. Road debris or nails or thorns will most likely cause a flat. Make sure you have at least two spares; we have had valves fall off and other oddities that would have left us stranded if we didn’t have more than one spare. Tube manufacturers recommend no more than 2 patches per tube, however we have easily doubled that. Slime tubes can help prevent tiny holes, but are still susceptible to large punctures; we found them less useful than we hoped. Tubeless tire systems are touted as being better, however a common complaint is the difficulty of riding with them. It is easiest to bring along spare tubes and know how to change a flat before you leave.
  3. Tire Levers. It is much easier to change a flat with these. They are usually cheap and you can pick them up at any bike shop or store that sells bicycles. Make sure you get a sturdy pair; the flimsy thin ones will break. They come in packs of three typically however two is all you really need.
  4. Hand Pump with Gauge. Many hand-held pumps are difficult to use and impossible to tell how much air is in the tire. With a gauge, you know you’re putting the right amount of air in. We’ve tried several small pumps and the Topeak Turbo Morph G Mountain Mini Pump  was by far the best. I would recommend it to any tourist.
  5. Duct Tape. When all else fails, duct tape can be the difference between having to walk and being able to hobble to a bike shop for repairs. We like to keep a roll wrapped around parts of our pannier racks for emergencies. You can use duct tape as a tire boot, to patch clothing/tents, an emergency bandage, and much more.

If you are traveling to extremely remote areas, consider bringing along some extra tools. For example, a chain tool, extra spokes, lube, extra tires, cassette removal tool, pedal wrench, and spare derailleur cables might come in handy. These tools all add weight and take up space, but might be necessary if you are hundreds (or thousands) of miles from the nearest bike shop.


Touring Clean vs. Home Clean

As a woman on a bicycle tour, you’re bound to get questioned on many topics. Even if you’re traveling with a companion, male or otherwise, there are questions that invariably get asked. For example: “Do you ever feel unsafe?” “Why would you want to do that?” “How do you stand not being clean?” The first two questions, I can understand. It’s the last one that gets me, and it’s actually the most common question from other women. Why are women so concerned about this?

Well, I’m here to tell you that modern cleanliness has taken the meaning of clean a little too far. The idea that you have to be stripped free of every bit of dirt and sweat immediately is something that you get over really quickly while on a bicycle tour. You get used to your own smell pretty quickly, in a matter of days usually. And don’t get me wrong, a nice shower at the end of the day feels amazing, but it’s easy to ride and sweat through a day (and sometimes two) without thinking too much about it. A clean bathroom on bicycle tour is a luxury. And you learn to never pass up a toilet, no matter how dirty. Just do your business and get on with it. (You also learn how to do your business behind the cover of a tree, or in a culvert, or pretty much any other opportune place. When you gotta go, you just go!)

And speaking of modern hygiene, let’s talk about body hair. On my first bicycle tour, I was very aware of how quickly my leg and underarm hair was growing out. At home, I can get away with a shave once a week or so, but while on tour it began to seem out of control, as I didn’t even bring a razor. I was more than a little embarrassed about it. After talking to other women bicycle tourists, I came to the realization: it doesn’t matter. You’re riding a bicycle all day. You’re using your own powerful muscles to push and pull pounds of gear, plus your own weight, up massive hills. What does a little leg hair matter?

Once I stopped caring so much about it, I felt relief. Like a weight had been lifted from my shoulders. In the present moment, when all that matters is making it to the goal you’ve set for yourself for the day, a little leg hair is irrelevant. Everything gets put into perspective. The simplicity and beauty of the ride should be what you are focused on; this is what your body was built to do. Plus, there’s plenty of time when you get home to lather up or on a rest day (you are scheduling rest days on your tour, right?). Until then, just eat, sleep, and ride!

Paying it Back (and Forward)

Recently we found ourselves with some spare time after a trip to Monterey, California. Instead of taking the most direct route back home Pam and I decided to take the scenic Highway 1 down the coast. This put us on the prime bicycle touring route in the beginning of June. We thought it would be neat if we grabbed some snacks and drinks for any cycle tourists we encountered on our way home to Los Angeles.

We started off from Monterey and saw no one for miles and miles. In fact, we were beginning to believe that there were not going to be any bicycle tourist on our entire route. But finally we happened upon Jean from Quebec, Canada. We offered him water or snacks to which he politely refused (I never thought a bicycle tourist would refuse free food). However he did share some of his story, and as Pam put it: “He was full of happiness.” Jean and a partner have been going for 30 days straight with no rest days, yet Jean still had a smile on his face and was a blast to chat with.

After Jean we ran in to one more tourist who wasn’t interested in talking to us and a few tourists going northbound which we couldn’t stop to say hi to. We kept on driving down the coast and made it to Lompoc. From our own Pacific touring we knew that from Lompoc to the coast is a challenging ride. About ¾ of the way to the coast we saw a lone tourist battling a headwind and an uphill. We stopped to offer him some water and snacks. Dave graciously accepted and chatted with us.

Dave was also from Canada, but more from the Western side, and was 29 days into his tour, also with no rest days. We were certainly impressed; he was flying down the coast, and seemed to be a having a great time of it. We chatted on the side of the road for a bit and shared a little information on what was coming and where to stay.

Then Dave mentioned that we made his day by stopping and offering him some food and water. That in turn made our day. We had set out hoping to give a few people cheer along the way and had succeeded. Being tourists ourselves we know how much these random acts of kindness mean when you’re touring, and now we were able to pass that on to others.

What did it cost us other than a few moments of time, a bottle of Gatorade, and a few granola bars? Almost nothing, and we made a few people have a better day because of it. So as a thanks to everyone who has supported us on a tour, today we tried to pay it back, or pay it forward for the next adventure we embark upon. Either way, it was a terrific experience.

Girl Trouble

When I told my mom about my plan to ride a bicycle across the country, she had a few concerns. Most were not legitimate (isn’t it dangerous for your future reproductive prospects to ride on a bike seat all day? (It’s probably not)) Some were, though. Invariably, when I talk to other women about cycle touring, they bring up a number of issues that concern them. We’re all adults and humans with daily needs to take care of. Let’s talk about some of these.
One of the most common questions I get asked from potential female tourists is: “Where do you go to the bathroom?” If you’ve never spent much time outdoors, you may have never had to do your business in anything other than an indoor toilet. Here is the short answer: anywhere you can. Always take advantage of a toilet if you see one. Supermarkets, gas stations, and restaurants are all great places to use the toilet. Construction sites typically have porta-potties. Sometimes there’s porta-potties in fields for the fieldhands.
However, there will be some times that you’ll have to go when you don’t have a toilet handy. You’re going to have to squat somewhere. Look for a place off the road, behind a tree or bush which hides you a bit. I take off any high-vis I have on just to make myself a little less conspicuous. If I’m cycling through an area with no trees or anything to hide behind, I use culverts-those pipes that run under the road. It puts me down below the surface of the road, making it a little more difficult to be seen. Remember to try to not go within 100 feet of a water source.
What about menstrual cycles? Well, that can be a little more complicated, but while touring in the United States we have not had a day where we didn’t have a place or two I could take care of this in a restroom. In my experience, the fact that I’m cycling for many hours a day lessens my symptoms. I’ve had a lot of success with tampons. If I need to change it out during a daily ride, I have baby wipes to make sure my hands are clean. If there is no place to dispose of it I have a shovel to bury it in a cat hole. I’ve read about women using an internal cup, and I’m intrigued; I think I’ll try this for my next tour.
Other things that I’ve found that really helps include having a sport’s bra that hooks in either the front or the back. At the end of the day, my arms are usually sore enough that pulling a sports bra up and over my head can be difficult. Also, getting dressed in a tent or inside a sleeping bag can be tricky if you have to pull that bra on. On my last tour, the hooks were a welcomed addition.
As for shaving legs, arms, or whatever else you may be used to shaving: I choose not to shave while I’m out there on tour. Carrying a razor and shaving cream just to try and shave in a dingy camp shower is not my idea of fun. No one is looking at your legs while you ride. If you do stay at a hotel every now and then you can always ask the front desk for a razor.
Don’t let your fear of these issues keep you from riding. You just take care of things as they come. In the end, you just do it. It’s really no big deal. What other concerns do you have?

What to Pack: Clothing

As with everything related to cycle touring, careful planning beforehand can payoff big time. This is especially true when it comes to clothing. Weather prediction is a tricky thing, and having the appropriate clothing for any weather situation is difficult. But, with a few guidelines, you can make the right decision and pack your panniers with the right amount of clothing.

The key is to pack only what you need and not a thing more. As I look over my gear list for my last two tours (check them out here and here), I notice a theme. Many items have multiple uses. Versatility is the name of the game.

Tops. Cycling jerseys come in a variety of sleeve lengths. Sleeveless, short-sleeve, long-sleeve, three-quarter sleeve. The most versatile is short sleeves in combination with arm warmers. However, I’m starting to find long-sleeved jerseys to be the best for me, as it cuts down on the amount of sunscreen I have to apply. Plus, if it’s really cold, I put my armwarmers on under my jersey, and then with my rain jacket as an over-layer, I have 3 layers on my arms and I’m very comfortable. I usually bring one short-sleeved jersey along as well. If the jersey is made of a material such as wool, it can go a few days before starting to smell funky. I like to at least air my jersey out from the day, using a clothesline (such as this one) or just draping it over the tent. Unless it rains or is overly humid, it dries overnight. Another great thing about wool is that it lends very well to hand washing, which can be great in areas where you are away from a washing machine.

Bottoms. Cycling shorts also come in a variety of lengths, from super short shorts to long leggings, and everything in between. The most versatile would be shorts, in combination with leg warmers. I’ve found that two pairs of bicycle shorts are all I need on a tour. I wash the pair I wore that day, let it dry overnight, and wear the other pair the next day. I generally wash the shorts in the shower with me at night, making sure to get all the soap out. You can even wear the shorts multiple days in a row if required, just make sure the shorts are dry completely, because wet shorts can rub you the wrong way. I also like to bring a pair of rain pants, which act as a windbreaker layer as well.

Undergarments. The other essentials would be underwear, bras, and socks. I don’t wear underwear while I ride, because of the rubbing and chafing that can happen. I bring 2 pairs of easily washable travel underwear (like these), 2 sports bras, 1 regular bra (which I recommend for every woman. Sports bras can be so restrictive, and having an actual bra can make you feel more human at the end of a long day’s ride.), 3 pairs of riding socks, and one pair of camp socks.

Rain gear. Invest in a good set of waterproof outer layers. For more on what makes raingear great, see this post.

Camp clothes. I recommend bringing a pair of pants and a long-sleeved shirt to wear about camp. I prefer pants that unzip down to shorts, because this adds to the versatility.

Miscellaneous. Other recommendations are a beanie (to keep your head warm in camp), a pair of walking shoes (so you can enjoy exploring camps and towns), and a down vest.

By getting pieces that have multiple uses, you can cut down on the amount of clothing you bring with you on tour, and still be ready for anything Mother Nature can throw at you.


Solar Panels and Bicycle Touring: Bushnell Mini Wrap Review

My husband and I were on a short 4 day training ride last summer. As with most bicycle tours, we found ourselves becoming friends with a fellow tourist and the obligatory checking out the different things he brought with him on his tour. We took particular interest in his solar panel for charging his phone and other electronics. This got me to thinking: maybe we should get a solar panel for our next tour. We checked out the various options and found that portable solar panel technology has come a long way.

We wanted a solar panel that was: lightweight, durable, and had a battery capable of holding a decent amount of charge. We ended up going with the Bushnell Mini Wrap solar charger for our 2,500 mile trek across the Southern Tier. The Mini Wrap met almost all of our needs and we were satisfied with the purchase. Here are our takeaways:

Product: Bushnell Mini Wrap

Weight: At just 96 grams, this solar panel is very lightweight. As a luxury item, I didn’t feel like it was too much extra weight to bring along. It also rolls up and takes up very little space.

Durability: Made of a flexible material, I didn’t feel like we were going to break this solar panel. We used Velcro to attach it to the top of our Bearikade can while riding. It laid around the can perfectly. The Bear Grylls version claims to be waterproof as well. We used it for one tour and haven’t really given it any more use since.The Bushnell Solar Mini Wrap laying over a Bearikade cannister

Functionality: This solar charger has a battery that charges up in about 10 hours of direct sunlight. It charges even on a cloudy day, it just takes longer. The battery also comes with a mini-usb in port so you can charge it using a wall outlet. The USB output means you can charge up your phone, camera, e-reader, or anything else that has a USB cord.Bushnell Solar Mini Wrap unrolled next to a 12 ounce can.

Cost: At around $60, this is a great addition to your cycle touring tool bag.

Recommendation: Highly recommended for sunny tours.


Disclaimer:
All opinions about any products mentioned in this article are my own. I have not been compensated in any way by anyone. I will, however, receive a small commission if you choose to purchase the item from Amazon after clicking the link I provide. Use your own discretion.