Interpreting California Mileposts

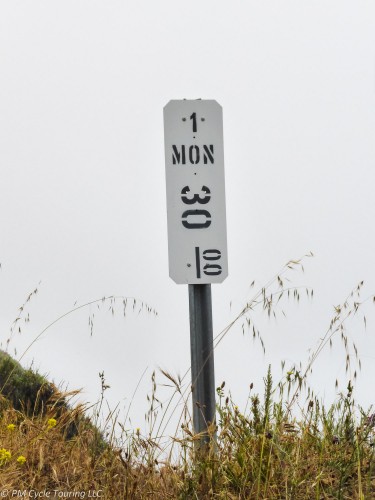
There are many different kinds of road signs in California. There are the big green signs that tell you how many miles you have left to get to your destination. There are the route signs that tell you what road you’re on. And then there are the little white, rectangular signs you’ll find posted at every mile. Knowing what these signs mean can be a big help. The ones that look like this:

Milepost 30, California State Highwy 1, Monterrey County
Milepost 30, California State Highway 1, Monterrey County


Well, here’s a little primer on how to interpret these milepost signs.

First, check out the top. That number? In this case it says “1” but it could also say 001. This is the road you are on. This one in particular means California State Route 1. I’ve also seen an abbreviation of the name of the road, for instance HGR for Harris Grade Road.

Next, there is a two or three letter designation for the county. There are 58 counties in California, therefore, 58 different abbreviations. This is county MON for Monterrey County.

Finally, there’s a number. This is the mileage from the county line. Generally, the mile numbers increase as you go from south to north or from west to east, depending on the general direction of the road. When you get to a new county, the mileage numbers start over.

You can count on these milepost signs to be posted at every mile, but also marking bridges and roadside call boxes. I can honestly say that looking forward to the next milepost has saved me on many a monotonous bike ride; when I think I can go no further, I just say, “at mile 12 you can rest.” And when I get there I say “now mile 13.” It’s also especially handy when traveling from north to south (or east to west) as the numbers count down to the next county. Anything to help keep your motivation to keep pedaling!

ACA Pacific Coast Section 4 Map 48

Bicycling down the Pacific coast is one of the most amazing experiences I’ve had so far. Each section of the coastline is unique, with different geologic features. Sometimes the road is a hundred yards above the ocean. Other times you’re riding with the waves crashing right beside you. The section between Monterey and Moro Bay is particularly scenic as you pass through Big Sur, which is home to the southernmost coastal redwood forest. If the traffic quiets down enough, you’ll hear the cormorants and seagulls, as well as sea lions and elephant seals. You may catch a glimpse of the California condor, soaring on updrafts above you.
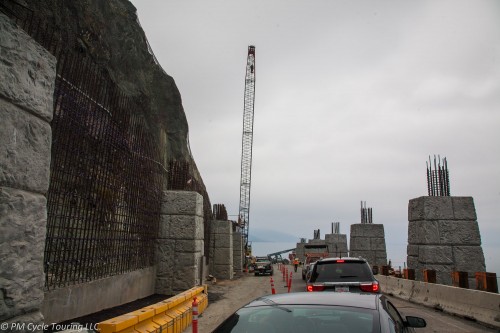
South of Big Sur, just before Limekiln State Park, a new structure will greet you. In 2011, Matt and I were riding through this section and got a particular thrill. There was road construction in progress, which made the traffic very nice on this stretch of road. First we rode through this construction zone trying to imagine what it would look like when it was all said and done. There were giant columns being erected and a ton of heavy machinery.

Pacific Coast Highway 1 near Lime Kiln, California. Major road construction was in progress and we trailed a line of cars through the site.
Pacific Coast Highway 1 near Lime Kiln, California.

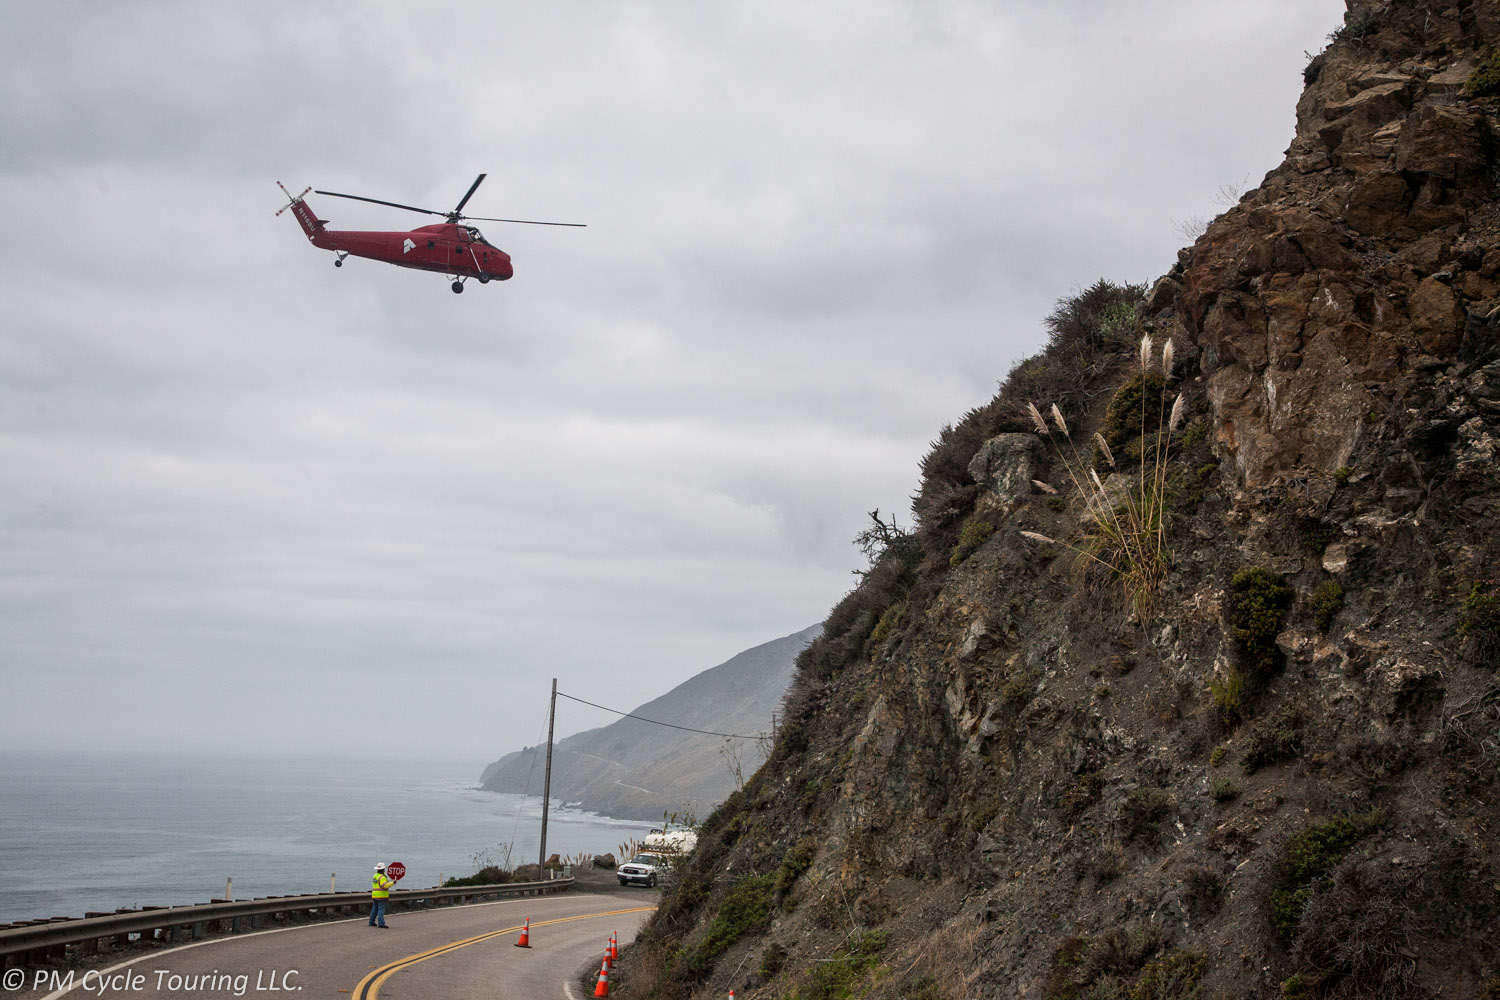
Next we ended up with the road to ourselves for a little while as the cars were held up. Directly overhead, on the side of the mountain, we could see workers. Then, the sound of a helicopter. We stopped and watched, fascinated, as the helicopter landed on the road, picked up some men and supplies, and took off, heading to the top of the mountain. It was a thrill to watch the process. We weren’t sure what the end result was going to be, as they had just started, but we were sure it would be incredible. And we had front row seats and the ability to pause and enjoy the show.

Fast forward to 2014 a few weeks ago, we were driving the same route we had biked before. What had taken us almost a week before now took us only a few hours. As we approached the place (we refer to it as the helicopter spot), I started to get excited. Surely the construction was done. What could it possibly look like?

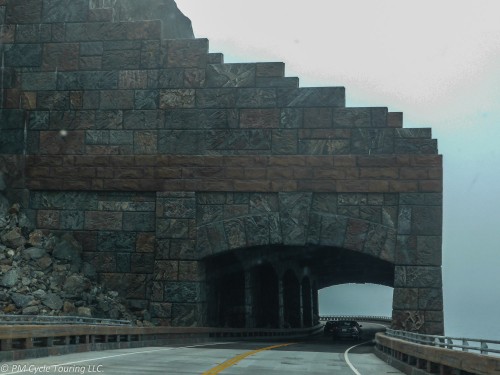
Well, as you can see, it looks amazing. At a point on the highway that was prone to rock slides, now there is a tunnel/castle/feat of engineering.

Pacific Coast Highway 1 near Lime Kiln, California. 3 years ago we rode through this as it was being constructed, not able to visualize how amazing the structure would become.
Pacific Coast Highway 1 near Lime Kiln, California.

As you ride down the coast, take a moment to marvel at what human ingenuity can accomplish. And be sure to snap a picture!

Those Hills Are Intimidating!

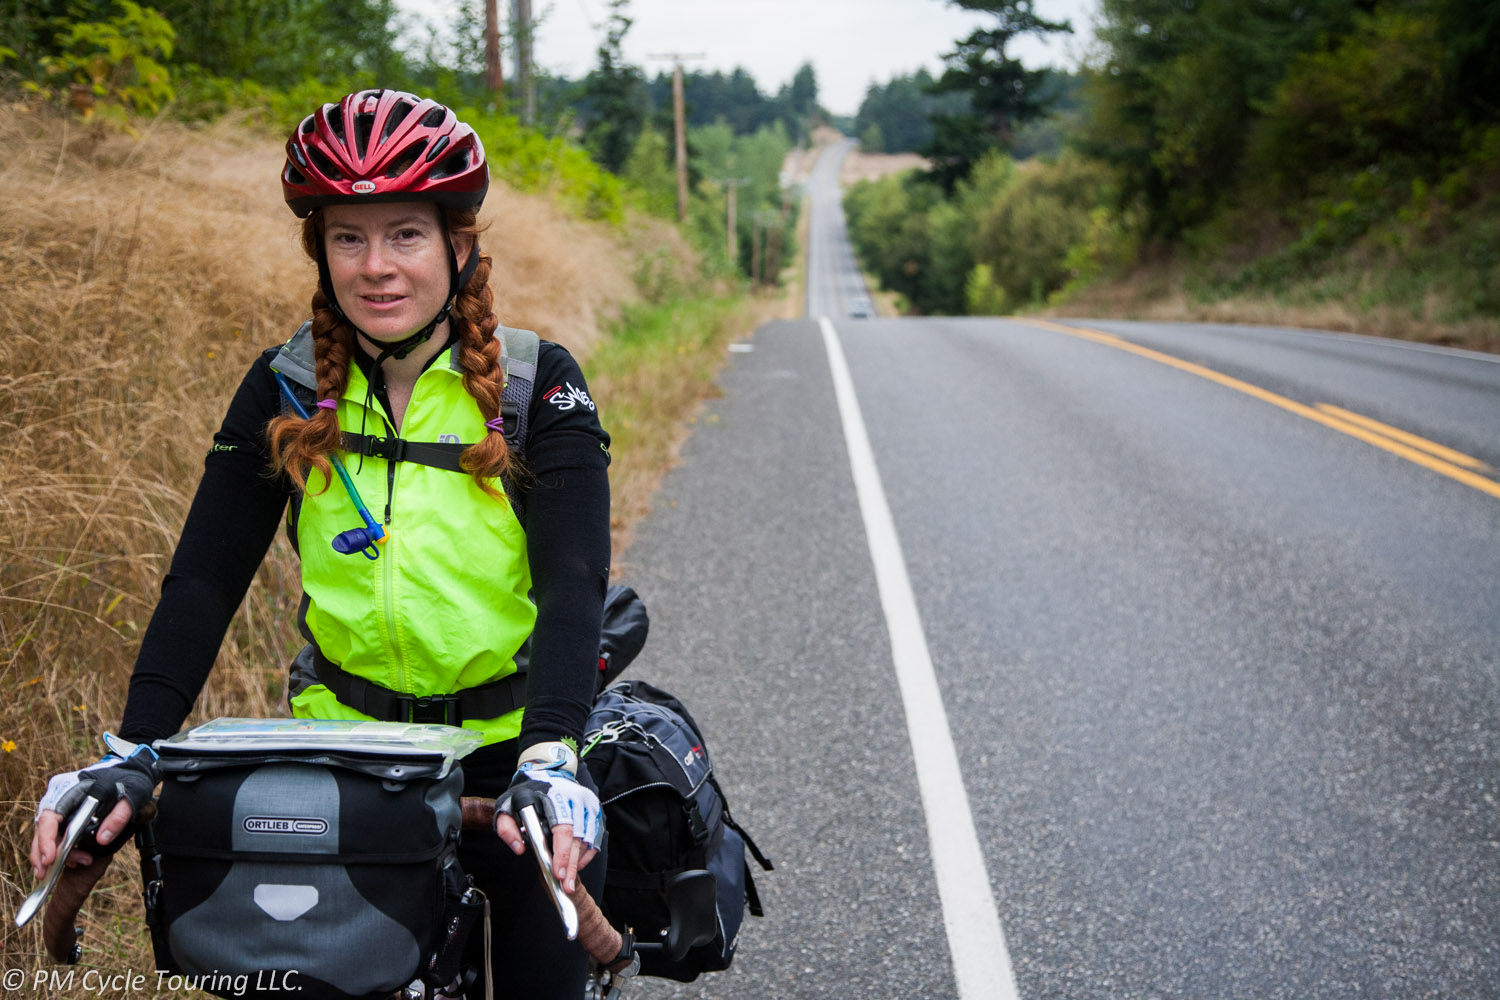
On my first ever bicycle tour, we bicycled down the Pacific Coast. We started in northern Washington, near the Canadian border, and made our way south toward Mexico. After the first few days of climbing up and down steep, small hills, I realized how unprepared I was. The steep hills just about made me throw in the towel. Each night, I would glance at the map for the next day’s ride, and worry if it looked like there was a sizable hill coming up. As we drew south and closer to the biggest climb on the coast, Leggett (1 and 2), my anticipation increased. Would I be able to make it?

But here’s the thing. The big hills always turned out to be much easier to climb than I expected. In general, hills are graded gradually. Even steep ones usually aren’t steep for long. And the best thing about being on a bicycle is you can take a break whenever you need it. There’s no rule that says you have to keep climbing a hill once you’ve started. My husband’s motto is: Slow and steady, and onward and upward. As long as you keep making forward progress, you’re golden! My memories of the Leggett climb are ones of satisfaction and a sense of accomplishment. The climb was gradual, and quite pleasant. The view from the top was amazing, and the downhill ride was exhilarating.

As I have gotten better at bicycling and touring, I have become a better judge of what my body is capable of. I find the least enjoyment with rolling hills, even as a well-seasoned tourist. I much prefer slow, gradual climbs. Additionally, I have learned to take with a grain of salt a car driver’s opinion of upcoming hills. Car drivers don’t even notice the millions of hills they climb with no effort; on a bicycle you have to fight and conquer each one.

On a recent tour, we tried out an Android app simply titled “Elevation Profile” that we used to show the elevation profile for the next day’s route. It was much more accurate than the map profiles we had been using. And since I had more confidence in myself, it felt good to see what I was capable of achieving.

Once again, bicycle touring can be seen as a metaphor for life. How many times do we stand before an obstacle and psyche ourselves out before we even try? Worrying about how big that hill was the night before didn’t change the fact that the hill existed, or that I had to climb it. The best thing to do is take the challenges as they come. And there’s nothing better than reaching the top of a particularly long climb, taking a deep breath, and smiling all the way down the other side.


Touring Clean vs. Home Clean

As a woman on a bicycle tour, you’re bound to get questioned on many topics. Even if you’re traveling with a companion, male or otherwise, there are questions that invariably get asked. For example: “Do you ever feel unsafe?” “Why would you want to do that?” “How do you stand not being clean?” The first two questions, I can understand. It’s the last one that gets me, and it’s actually the most common question from other women. Why are women so concerned about this?

Well, I’m here to tell you that modern cleanliness has taken the meaning of clean a little too far. The idea that you have to be stripped free of every bit of dirt and sweat immediately is something that you get over really quickly while on a bicycle tour. You get used to your own smell pretty quickly, in a matter of days usually. And don’t get me wrong, a nice shower at the end of the day feels amazing, but it’s easy to ride and sweat through a day (and sometimes two) without thinking too much about it. A clean bathroom on bicycle tour is a luxury. And you learn to never pass up a toilet, no matter how dirty. Just do your business and get on with it. (You also learn how to do your business behind the cover of a tree, or in a culvert, or pretty much any other opportune place. When you gotta go, you just go!)

And speaking of modern hygiene, let’s talk about body hair. On my first bicycle tour, I was very aware of how quickly my leg and underarm hair was growing out. At home, I can get away with a shave once a week or so, but while on tour it began to seem out of control, as I didn’t even bring a razor. I was more than a little embarrassed about it. After talking to other women bicycle tourists, I came to the realization: it doesn’t matter. You’re riding a bicycle all day. You’re using your own powerful muscles to push and pull pounds of gear, plus your own weight, up massive hills. What does a little leg hair matter?

Once I stopped caring so much about it, I felt relief. Like a weight had been lifted from my shoulders. In the present moment, when all that matters is making it to the goal you’ve set for yourself for the day, a little leg hair is irrelevant. Everything gets put into perspective. The simplicity and beauty of the ride should be what you are focused on; this is what your body was built to do. Plus, there’s plenty of time when you get home to lather up or on a rest day (you are scheduling rest days on your tour, right?). Until then, just eat, sleep, and ride!

Girl Trouble

When I told my mom about my plan to ride a bicycle across the country, she had a few concerns. Most were not legitimate (isn’t it dangerous for your future reproductive prospects to ride on a bike seat all day? (It’s probably not)) Some were, though. Invariably, when I talk to other women about cycle touring, they bring up a number of issues that concern them. We’re all adults and humans with daily needs to take care of. Let’s talk about some of these.
One of the most common questions I get asked from potential female tourists is: “Where do you go to the bathroom?” If you’ve never spent much time outdoors, you may have never had to do your business in anything other than an indoor toilet. Here is the short answer: anywhere you can. Always take advantage of a toilet if you see one. Supermarkets, gas stations, and restaurants are all great places to use the toilet. Construction sites typically have porta-potties. Sometimes there’s porta-potties in fields for the fieldhands.
However, there will be some times that you’ll have to go when you don’t have a toilet handy. You’re going to have to squat somewhere. Look for a place off the road, behind a tree or bush which hides you a bit. I take off any high-vis I have on just to make myself a little less conspicuous. If I’m cycling through an area with no trees or anything to hide behind, I use culverts-those pipes that run under the road. It puts me down below the surface of the road, making it a little more difficult to be seen. Remember to try to not go within 100 feet of a water source.
What about menstrual cycles? Well, that can be a little more complicated, but while touring in the United States we have not had a day where we didn’t have a place or two I could take care of this in a restroom. In my experience, the fact that I’m cycling for many hours a day lessens my symptoms. I’ve had a lot of success with tampons. If I need to change it out during a daily ride, I have baby wipes to make sure my hands are clean. If there is no place to dispose of it I have a shovel to bury it in a cat hole. I’ve read about women using an internal cup, and I’m intrigued; I think I’ll try this for my next tour.
Other things that I’ve found that really helps include having a sport’s bra that hooks in either the front or the back. At the end of the day, my arms are usually sore enough that pulling a sports bra up and over my head can be difficult. Also, getting dressed in a tent or inside a sleeping bag can be tricky if you have to pull that bra on. On my last tour, the hooks were a welcomed addition.
As for shaving legs, arms, or whatever else you may be used to shaving: I choose not to shave while I’m out there on tour. Carrying a razor and shaving cream just to try and shave in a dingy camp shower is not my idea of fun. No one is looking at your legs while you ride. If you do stay at a hotel every now and then you can always ask the front desk for a razor.
Don’t let your fear of these issues keep you from riding. You just take care of things as they come. In the end, you just do it. It’s really no big deal. What other concerns do you have?

How to Stay Clean (without a proper shower) While on Bicycle Tour

At the end of a long day of hard bicycle touring, you ride into a primitive camp gritty and grimy from the day’s ride. The sunscreen you slathered on in the morning and then reapplied has now mixed with sweat and dirt and chain grease to give you a nice film on your skin. If you’re lucky, you have a shower waiting for you in that camp. Sometimes, though, you have to make do with what is available. Here’s a few things I’ve done when I have to improvise.

1. The towel rinse: If there’s water available at your campsite, just not a shower, you can still freshen up. I’ve been known to strip down to my sport’s bra and shorts, or even put on a bathing suit, to stand under a spigot. I also wouldn’t shy away from wetting down my towel really well and giving myself a “sponge bath”. It does the trick of getting the grime off and making you feel better.

2. Baby wipes: I’ve used baby wipes in the past. However, these are made for wiping, um, babies, and aren’t particularly durable. I find I need to use a LOT of them to get the job done. On the other hand, I love having baby wipes on hand to clean my hands after changing a flat tire or putting a chain back on. (Yeah, you could just wipe them on your shorts, but who wants to do that?)

3. Bathing wipes: These things are awesome. They’re thicker than baby wipes, and more durable. They don’t fall apart on the first go. The ones I’ve been using lately come with directions on the proper way to wipe (hint, you clean your face first, not last!). Some varieties are biodegradable, too, which is a plus. Although, that doesn’t mean you can just throw them on the ground. (Pack it in, Pack it out!) I bring along a special ziplock bag just to store them until I can find a trash can.

I tend to really enjoy a nice shower at the end of the day so it’s not my favorite thing to do when I have to skip one, but once in a while there will be no other option. And hey, it’s not going to kill you to go without a shower every once in a while. Trust me!


Lessons Learned from my First Bicycle Tour

September 20, 2011
Ferndale, WA to Deception Pass State Park, WA
52 Miles

Woke up early this morning to a beautiful sunrise at Aunt Robin’s house. She made us a delicious breakfast (bison with eggs and hashbrown casserole). Finished up the bike prep, and away we left! We departed at 9am or so, and headed to Bellingham. We got to the bike shop in Bellingham around 11, and picked up two wireless bike computers. The guy at the shop was nice enough to help us install them. Then it was back on the road. We should have eaten in Bellingham then, since it was another 3 hours until we made it to a café for lunch. It was a hard fought 3 hours of riding, too. By then, we had gone 17 miles from Bellingham, only 29 miles for the day, and I was already so tired. That ride through the mountains was beautiful, and we even picked some blackberries, but I wasn’t sure I could keep going. But we did keep going. And going. Past Padillo Bay and Anacortes, up over Deception Pass to Deception Pass State Park. We had trouble finding the campsite, and then had to pay $21, but I’m so glad to be done. Tomorrow will be better! It is 730pm, getting dark, and after a baby wipe refresh, I’m ready for bed!

This was my very first journal entry from my very first bicycle tour. I did pretty well conveying the mood of the day. But there were some details I left out. I didn’t really describe how miserable and tired I was. How I almost broke down and cried 5 miles from camp because I didn’t think I could keep going. We took a wrong turn trying to find the campground and ended up climbing up a steep hill, and I was so dejected and disheartened. If this was bicycle touring, I wanted to quit. But here’s the good news. As I said in the journal entry, it WAS better the next day. And the next. It just kept getting better. I got stronger, and it became easier to enjoy the little moments. There are definite moments bicycle touring when you will want to quit. But there are many more when you’ll just be amazed. At the scenery, at your strength, at how far you’ve come. I’d like to share with you a few of the lessons I learned (from that very first day of touring) that can benefit all of us.

  1. If you shipped your bike to your starting location, make sure you know how to put it back together again.
  2. Train (with distance and weight) before you leave.
  3. If you don’t train, plan for shorter distance days in the beginning until you get stronger.
  4. Make sure you know how many miles you are traveling the first day. Nothing is worse than thinking you’ve already finished the ride for the day, only to find out you have to go 12 miles further.
  5. You WILL get stronger and it WILL get easier.
  6. Eat, eat, eat!
  7. Always have an extra meal, just in case you need it. Peanut butter and jelly sandwiches are perfect for this.
  8. Bring fuel for your stove. Sterno cans just don’t cut it!
  9. You don’t need a pasta strainer! And it’s ok to ship back unneeded things you thought you would need on the trip, but really ended up just being extra weight.
  10. It will be harder than you think, but much more rewarding than you can imagine.

I thought I had prepared myself for that first tour. Boy was I in for a surprise. But the thing is, even though I collapsed onto my sleeping pad that first night and passed out from exhaustion, and even though my whole body was sore in the morning from all the hard work I had done the day before, I never gave up. And everything eventually came together. When I think of that first tour, the difficulties of the first day (or week) are a dim memory compared to the rest of the tour. I’m so glad I was able to push past those speedbumps and keep going. And I’m a better person for it.

Gradients and Categories: How Steep is that Hill?

For me, there is nothing better in this world than the accomplishment of reaching the top of a mountain, looking back on the road behind, and eagerly awaiting the descent ahead. I’m fairly new to cycling, and as I’ve learned how to be a better cyclist, I’ve thought of hills in terms of how difficult they were to climb. But I’ve also noticed those signs, you know, the ones with the %. I’ve also heard other cyclists refer to a category system for hills. It was all confusing to me, but now that I’ve been riding for a bit, I figure it’s about time to understand what those signs mean.

The % grade signs that the highway department installs are put in place for vehicles. Some trucks have a hard time with steep hills, going up or coming down. That percent grade is usually accompanied by a distance, as well. For example: 6% downgrade next 4 miles. Percent grade is simply a numerical value given to the average gradient of the hill. The gradient is a fraction, rise divided by run. In simpler terms, it is (the number of feet traveled vertically) divided by (the number of feet traveled horizontally). To turn this into a percent, times the number by 100. For example, if you travel up a hill 9 vertical feet over 100 feet, then the percent grade would be (9/100)x100=9%. Since the road sign gradients are averages, this could mean sections of the hill are steeper or less steep, depending.

You could actually calculate the grade of the road by carrying a level and a ruler (and a calculator). (I don’t know anyone who carries around either on their bicycle, but I suppose if you were curious, you could do it.) Lay the level down on the ground with the ruler at one end. Raise the end of the level by the ruler until it reads level. Your run will be the length of your level (for example 24”) and the rise will be the reading on the ruler. This will tell you the grade at that exact point on the hill, but not the average grade of the hill. (If you want a more high tech way of determining the grade, try a cycling computer with the function built in, such as the one Matt used on our recent tour, the CatEye Adventure cycling computer. This computer uses altitude to calculate the % grade and feet climbed, as well as many other features.)

But what does a percent grade feel like? Well, here’s how I look at them personally:

  • 0%- Flat road. You’re actually not going to find many of these anywhere. Except maybe Holland.
  • 1-3%-This is sometimes known as “false flat”, especially the low grades. You’ll find yourself working to maintain your speed, and might even push it a little too hard. You won’t necessarily feel like you’re traveling uphill, but trust me, you’re working.
  • 4-6%-With good low gears, a strong rider can easily maintain this grade for many miles. It does take work, but you’ll know you’re going uphill. Slow and steady is always my mantra!
  • 7-9%-Most strong riders will do well for short distances, as long as you have low enough gears. In northern Washington I found myself pushing my bike up many 9% hills.
  • 10-15%-Difficult. If it’s for very long, you might have to walk a bit.
  • Above 15%-Extremely difficult. Even experienced riders will find grades this steep to be challenging. Without low enough gears, you’re definitely going to be walking this one!

Another way that cyclists use to categorize hills is the category system. There are 5 categories: Category 1-4 and Above Category (or HC). These categories are based on the difficulty of the climb, with Category 4 being the easiest, Category 1 the most difficult, and HC off the charts. This method originated with the Tour de France(TdF). Maybe that’s why it is counter intuitive that the most difficult is Category 1, but there’s an even more difficult. For the TdF, both steepness and length are considered. Other groups use the category method, but simplify the criteria. For example, the Tour of California only considers the elevation gain of the climb. Category 4 climbs are of 250 to 500 feet in elevation gain. Category 3 are of 500 to 1,000 feet. And so on until HC which are climbs above 5000 feet in elevation gain.

Some riders get hung up on the idea of what hills are coming up. They stress and fret over big Category 2 hills, or steep 7% grades. What I’ve found is that it is irrelevant. If there’s a hill, I have to climb it. While climbing, I try to enjoy it. That slow steady burn, that’s where I get most of my thinking done. And the view from the top, well, that’s the icing on the cake. After an especially tough climb, I like to stop, take in the view, and give myself credit for what I’ve just accomplished. And then I grin all the way down the other side.
Choosing a Bicycle Route

Why can it be so difficult to decide where to ride on a tour? We’ve been on two long bicycle tours (and countless small ones) and we are always pleased with the experience. However, in the early planning stages we tend to waffle on the details. Things like: where are we going? When are we going? How long do we plan to go? Answers to these questions continuously change as the planning continues.

Our latest tour took us across the southern tier of the United States through autumn. However, the trip was originally planned as a northern crossing in the spring. Why the drastic change?

As with many things in life, timing is everything. To complete a successful northern tier tour, without suffering through intense heat or deep snow, the timing needs to be perfect. If you travel west to east, you want to leave late enough to avoid snow in the mountain passes, but early enough to avoid hot, humid weather once you reach the plains. For us, this proved too uncertain. The southern route has similar issues, but we found that it worked for our schedule. We could leave late enough in the season to avoid horrendously high temperatures, but early enough to avoid snow in the mountains.

The main consideration when we plan a tour is flexibility. We give ourselves plenty of time to account for illness and injury, since these are two things generally out of our control. We plan for rest days. We’ve found that a rest day every 5 or 6 days is usually sufficient, and we account for this in our mileage estimates. We also try to plan for several different “early outs”. If something goes wrong on the tour, we think about where we could end it prematurely. Is there an airport along the way we could shoot for? What about the railroad? A large town with a rental car? Several friends and family members have offered to save us if we need it, as well. We’ve never had to call in that favor (yet), but it’s sure nice to know it’s there.

What’s that old saying? “An ounce of prevention is worth a pound of cure.” I think it’s applicable to planning a bicycle tour. You can’t, and shouldn’t try to plan for everything on a bicycle tour. But thinking about the route before you leave can help you have an enjoyable, safe ride. We have found most of our least favorite days touring are when you lock ourselves in to being at a certain place at a certain time and have to push too hard to get there. In the end, it’s about the journey, not the destination. No matter where your tour takes you, you will learn things about yourself that you never knew before. And that’s what really matters!


Adventure Cycling Association has many preplanned routes, and their maps are top notch. Check them out!

You Don’t Need a Hammer on Your Bicycle Tour: Life Lessons

On a recent tour I encountered a particular cyclist who stands out in my memory. Like all tourists, we happily regaled each other with stories and wisdom, swapping tales over a snacks. We talked about gear, and tours, and the weather. And then I noticed something strapped to the back of her pannier: a hammer. I couldn’t believe my eyes. I had to ask. She said that she doesn’t go anywhere without it.
I couldn’t help but think about the wasted energy that this tourist had to expend carrying that hammer thousands of miles. In all of my tours, I’ve never set up my tent in a place that didn’t have some sort of substitute for a hammer. Usually a big rock nearby does the trick. In a pinch I’ve asked fellow campers, and have never been turned down. Even after I told her that, she insisted that the hammer was an essential part of her tool box, and we left it at that.
After we parted ways, I thought about that hammer. Do we all have something like that that we don’t want to let go of? Something we’re hanging onto even though we don’t need to? Is it so obvious to others even though it’s difficult for us to see it ourselves?
I made a resolution that day to let go of some of the stuff I’ve been holding onto. The past is the past, and the only thing that matters is the present. I’ve realized that bicycle touring can be a metaphor for life. Don’t sweat the small stuff. Solve problems as they come. Focus on the road ahead. Don’t worry about that storm that has already passed, enjoy the weather right now.  Keep going. Don’t give up. The climb might be steep, but the ride down the other side makes up for it. Life is like this. It’s full of grit, and pain, and joy, and wonder, and agonizingly beautiful things. It can even be a little scary at times. Live each day proud of yourself for all that you’ve done. But don’t bring a hammer on a bike tour. It’ll only make you tired.