Gradients and Categories: How Steep is that Hill?

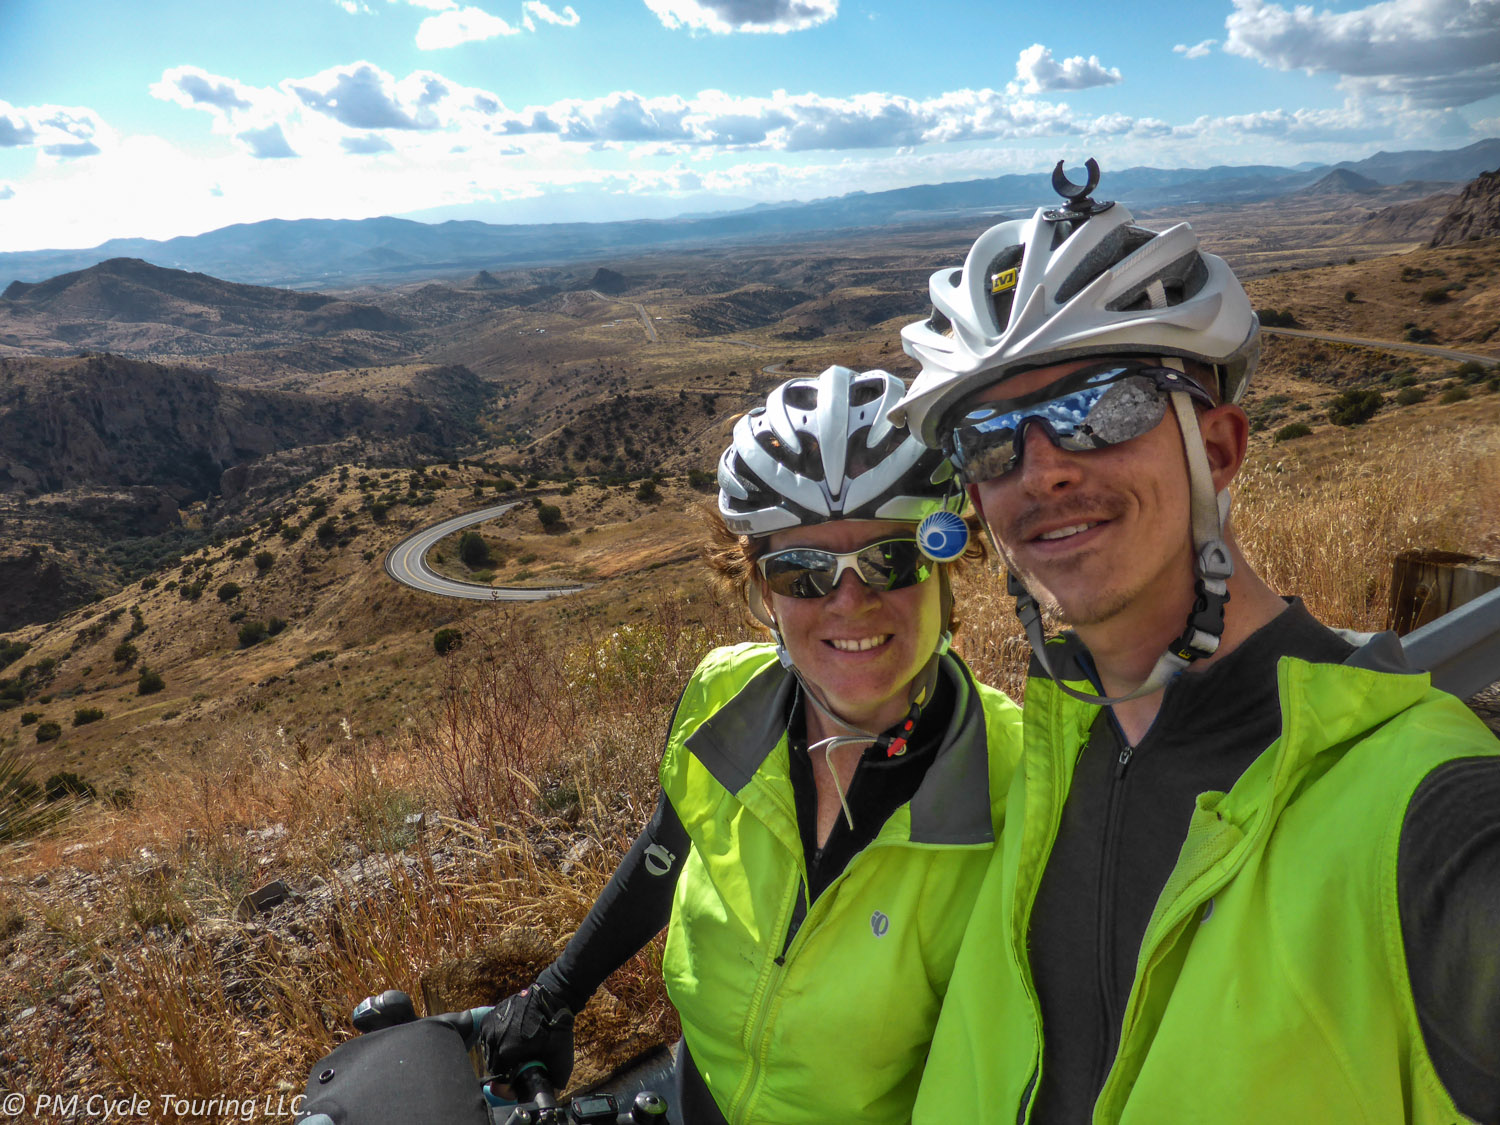
For me, there is nothing better in this world than the accomplishment of reaching the top of a mountain, looking back on the road behind, and eagerly awaiting the descent ahead. I’m fairly new to cycling, and as I’ve learned how to be a better cyclist, I’ve thought of hills in terms of how difficult they were to climb. But I’ve also noticed those signs, you know, the ones with the %. I’ve also heard other cyclists refer to a category system for hills. It was all confusing to me, but now that I’ve been riding for a bit, I figure it’s about time to understand what those signs mean.

The % grade signs that the highway department installs are put in place for vehicles. Some trucks have a hard time with steep hills, going up or coming down. That percent grade is usually accompanied by a distance, as well. For example: 6% downgrade next 4 miles. Percent grade is simply a numerical value given to the average gradient of the hill. The gradient is a fraction, rise divided by run. In simpler terms, it is (the number of feet traveled vertically) divided by (the number of feet traveled horizontally). To turn this into a percent, times the number by 100. For example, if you travel up a hill 9 vertical feet over 100 feet, then the percent grade would be (9/100)x100=9%. Since the road sign gradients are averages, this could mean sections of the hill are steeper or less steep, depending.

You could actually calculate the grade of the road by carrying a level and a ruler (and a calculator). (I don’t know anyone who carries around either on their bicycle, but I suppose if you were curious, you could do it.) Lay the level down on the ground with the ruler at one end. Raise the end of the level by the ruler until it reads level. Your run will be the length of your level (for example 24”) and the rise will be the reading on the ruler. This will tell you the grade at that exact point on the hill, but not the average grade of the hill. (If you want a more high tech way of determining the grade, try a cycling computer with the function built in, such as the one Matt used on our recent tour, the CatEye Adventure cycling computer. This computer uses altitude to calculate the % grade and feet climbed, as well as many other features.)

But what does a percent grade feel like? Well, here’s how I look at them personally:

  • 0%- Flat road. You’re actually not going to find many of these anywhere. Except maybe Holland.
  • 1-3%-This is sometimes known as “false flat”, especially the low grades. You’ll find yourself working to maintain your speed, and might even push it a little too hard. You won’t necessarily feel like you’re traveling uphill, but trust me, you’re working.
  • 4-6%-With good low gears, a strong rider can easily maintain this grade for many miles. It does take work, but you’ll know you’re going uphill. Slow and steady is always my mantra!
  • 7-9%-Most strong riders will do well for short distances, as long as you have low enough gears. In northern Washington I found myself pushing my bike up many 9% hills.
  • 10-15%-Difficult. If it’s for very long, you might have to walk a bit.
  • Above 15%-Extremely difficult. Even experienced riders will find grades this steep to be challenging. Without low enough gears, you’re definitely going to be walking this one!

Another way that cyclists use to categorize hills is the category system. There are 5 categories: Category 1-4 and Above Category (or HC). These categories are based on the difficulty of the climb, with Category 4 being the easiest, Category 1 the most difficult, and HC off the charts. This method originated with the Tour de France(TdF). Maybe that’s why it is counter intuitive that the most difficult is Category 1, but there’s an even more difficult. For the TdF, both steepness and length are considered. Other groups use the category method, but simplify the criteria. For example, the Tour of California only considers the elevation gain of the climb. Category 4 climbs are of 250 to 500 feet in elevation gain. Category 3 are of 500 to 1,000 feet. And so on until HC which are climbs above 5000 feet in elevation gain.

Some riders get hung up on the idea of what hills are coming up. They stress and fret over big Category 2 hills, or steep 7% grades. What I’ve found is that it is irrelevant. If there’s a hill, I have to climb it. While climbing, I try to enjoy it. That slow steady burn, that’s where I get most of my thinking done. And the view from the top, well, that’s the icing on the cake. After an especially tough climb, I like to stop, take in the view, and give myself credit for what I’ve just accomplished. And then I grin all the way down the other side.

Choosing a Bicycle Route

Why can it be so difficult to decide where to ride on a tour? We’ve been on two long bicycle tours (and countless small ones) and we are always pleased with the experience. However, in the early planning stages we tend to waffle on the details. Things like: where are we going? When are we going? How long do we plan to go? Answers to these questions continuously change as the planning continues.

Our latest tour took us across the southern tier of the United States through autumn. However, the trip was originally planned as a northern crossing in the spring. Why the drastic change?

As with many things in life, timing is everything. To complete a successful northern tier tour, without suffering through intense heat or deep snow, the timing needs to be perfect. If you travel west to east, you want to leave late enough to avoid snow in the mountain passes, but early enough to avoid hot, humid weather once you reach the plains. For us, this proved too uncertain. The southern route has similar issues, but we found that it worked for our schedule. We could leave late enough in the season to avoid horrendously high temperatures, but early enough to avoid snow in the mountains.

The main consideration when we plan a tour is flexibility. We give ourselves plenty of time to account for illness and injury, since these are two things generally out of our control. We plan for rest days. We’ve found that a rest day every 5 or 6 days is usually sufficient, and we account for this in our mileage estimates. We also try to plan for several different “early outs”. If something goes wrong on the tour, we think about where we could end it prematurely. Is there an airport along the way we could shoot for? What about the railroad? A large town with a rental car? Several friends and family members have offered to save us if we need it, as well. We’ve never had to call in that favor (yet), but it’s sure nice to know it’s there.

What’s that old saying? “An ounce of prevention is worth a pound of cure.” I think it’s applicable to planning a bicycle tour. You can’t, and shouldn’t try to plan for everything on a bicycle tour. But thinking about the route before you leave can help you have an enjoyable, safe ride. We have found most of our least favorite days touring are when you lock ourselves in to being at a certain place at a certain time and have to push too hard to get there. In the end, it’s about the journey, not the destination. No matter where your tour takes you, you will learn things about yourself that you never knew before. And that’s what really matters!


Adventure Cycling Association has many preplanned routes, and their maps are top notch. Check them out!

You Don’t Need a Hammer on Your Bicycle Tour: Life Lessons

On a recent tour I encountered a particular cyclist who stands out in my memory. Like all tourists, we happily regaled each other with stories and wisdom, swapping tales over a snacks. We talked about gear, and tours, and the weather. And then I noticed something strapped to the back of her pannier: a hammer. I couldn’t believe my eyes. I had to ask. She said that she doesn’t go anywhere without it.
I couldn’t help but think about the wasted energy that this tourist had to expend carrying that hammer thousands of miles. In all of my tours, I’ve never set up my tent in a place that didn’t have some sort of substitute for a hammer. Usually a big rock nearby does the trick. In a pinch I’ve asked fellow campers, and have never been turned down. Even after I told her that, she insisted that the hammer was an essential part of her tool box, and we left it at that.
After we parted ways, I thought about that hammer. Do we all have something like that that we don’t want to let go of? Something we’re hanging onto even though we don’t need to? Is it so obvious to others even though it’s difficult for us to see it ourselves?
I made a resolution that day to let go of some of the stuff I’ve been holding onto. The past is the past, and the only thing that matters is the present. I’ve realized that bicycle touring can be a metaphor for life. Don’t sweat the small stuff. Solve problems as they come. Focus on the road ahead. Don’t worry about that storm that has already passed, enjoy the weather right now.  Keep going. Don’t give up. The climb might be steep, but the ride down the other side makes up for it. Life is like this. It’s full of grit, and pain, and joy, and wonder, and agonizingly beautiful things. It can even be a little scary at times. Live each day proud of yourself for all that you’ve done. But don’t bring a hammer on a bike tour. It’ll only make you tired.

Don’t feed the wildlife

Two weeks into our first bicycle tour, we set up our camp the same way we had the previous 13 nights. We put all of our panniers tied together hanging from a tree limb. Moments after we crawled into our tent for the night, we heard a commotion outside. Matt investigated, only to find raccoons fighting over our panniers and the food inside. They were vicious! He had to fight them off, and with no better option, we brought the panniers into the tent with us for the night, terrified the raccoons would come clawing through our tent. There had to be a better way!

One of the joys of bicycle touring is getting back to nature. Bicycle tours can take you to remote places, where it’s just you and nature in all its glory. Unfortunately, wildlife encounters can turn an enjoyable tour into a nightmare. There’s a few things you can do before you set out that can make all the difference.

Bear can: We found this is the most convenient method of keeping the critters out of your food. Raccoons, rats, skunks, possums, and other nocturnal animals can be very persistent when it comes to going after food, and in some areas bears can be a huge problem. Keep in mind that smells from any food items will linger on your belongings and tempt the animals. Panniers are not animal resistant! A bear canister will prevent any animals from getting your food (and may even be required depending on where you’re going). You should keep everything that smells (toiletries included) in the bear proof container. On our latest tour we used the Bearikade (the Weekender size), and highly recommend it.

At night, place the bear can at least 100 yards from where you’re sleeping (if there’s bears) and make sure it’s in a safe place-that is, it won’t roll off a cliff or into a river or other natural hazard. The bear proof container won’t keep the critters from smelling the food, it will just make it impossible for them to get to it. They will invariably check it out, and maybe even claw at it for a moment; after some time they’ll probably get tired of it, and your breakfast will be safe for the morning.

We found it to be very convenient and easy to use the bear can. It kept our panniers from getting smelly or dirty, and the food was always easy to access. When we came it camp we could just leave our panniers on the bicycles and not have to worry about anything clawing at them. It made camping very simple and less stressful.

Bear box: Some campsites will have bear boxes to put your food in. Again, don’t limit what you put in it to food; put all toiletries into them as well. This means all sunscreen, lip balm, toothpaste, etc. If there is no bear box available, but there have been critter sightings, check to see if it would be ok to leave your panniers in the restroom. A lot of times the door will be enough of a deterrent to the smaller animals. Be careful in some bear areas, though, because they are smart enough to get in. Check with the ranger or camp host to find out the best thing to do with your food.

Smell proof bags: These can be a deterrent, however they should not be your only protection. Smell proof bags are a great place to put your snacks for the day in. This can help you reduce the smell of food in your panniers or handlebar bag. We used these bags on our latest tour and had no issues with animals.

Bring your food in your tent: This is one of the oldest trick in the books and many people swear by this method. Make sure that the food is only in your tent while you are in the tent with it, if you leave food unattended animals may claw through your tent. While we have done this in the past, I hesitate to do this now. It could teach animals that a tent means food and seems risky versus our positive experiences with our Bearikade.

Bottom line: be smart. Think about your food and what you’re going to do with it. Make it as difficult as possible for animals to get it. You’ll be glad you did and sleep better if you aren’t worrying about it.

Breakfast: Starting the day off right

Making good food choices early in the day will help set you up for a successful ride. We often joke when we’re riding about needing not only breakfast, but second-breakfast as well. There’s a reason we eat so much: we’re burning a lot of calories throughout the day, and food gives us the energy we need to help avoid energy crashes.

Here are a few things to keep in mind when planning your meals for the day.

First, try not to eat anything too heavy or rich. If your body has to work too hard to digest it, you’ll be diverting energy away from your ride. As your exert yourself your body diverts blood from your stomach to your muscles slowing digestion.

Look at foods that are both filling and satisfying. You want the meal to give you energy for as long as possible.

Finally, convenience is a factor. A quick, satisfying breakfast can get you going and on your way.

So what do we eat when we are out touring? We prefer hot cereal grains. We usually rotate between oatmeal and other cereal grains, such as Oat Bran or 5 / 7 / 11 grain mixes from Bob’s Red Mill brand. Bob’s cereals come in conveniently sized packages which last about a week between the two of us and are sold in most grocery stores throughout the United States. You can also check the bulk bins for different cereal grains. Cereal grains are not heavy, are very filling, and take just moments to cook (simply add to boiling water and eat when thickened). We would recommend staying away from packaged, instant oatmeal, it is just not as filling as the real stuff.

Pam likes her breakfast sweet, so here are a couple of methods to make your breakfast cereal even tastier. Honey sweetens nicely, and has the added benefit of tasting great added to a peanut butter sandwich for lunch. Additionally, adding peanut butter and jelly to cereal gives it a nutty flavor and adds protein. You can also add dried fruit, or trail mix to your bowl. But our all-time favorite addition to hot cereal is chocolate. Place half (or all) of a chocolate bar into the cereal, which melts, and viola’! Instant chocolate cereal! It is such a treat in the morning to get you going.

A downside of cooking your own breakfast is the cleanup, and washing dishes after breakfast can be a pain. If you’re not into that, there are other options. Scope out restaurants in the area that serve breakfast, or pick up some muffins, fruit, and yogurt the night before. Granola bars can stave off hunger if you need to eat first thing in the morning (like we do) until you can reach a breakfast spot. Just plan ahead. There’s nothing worse than trying to ride hungry.

Calories = energy. You need energy to get you going and to keep you going. Plan ahead, figure out what works best for you. We enjoy a hot, satisfying breakfast to get us started on the right foot. How about you?


Snacking on the Go

The only way to maintain energy levels throughout your bike ride is food. While meals are necessary, probably the most important thing you can do is snack, and snack often. Sometimes while I’m touring with my husband, I find myself getting irritated or overly emotional at small things. The first thing he asks me is, “When is the last time you ate something?” And it’s true! If it’s been a while, I grab something to eat. My handlebar bag is full of goodies to snack on through the day.

I don’t eat while I’m pedaling, so I take a break and snack. Part of touring is enjoying the surroundings, wherever I happen to be. One of the best ways to do this is to pause every 10-15 miles, eat something, and take in your current location.

Additionally I like variety when I eat. I get tired of eating the same thing over and over. Here’s a few types of snacks I’ve tried on my tours:

  • Fruit: Whether dried or fresh, fruit is an awesome snack. When touring in summer, stop into a fresh fruit stand and enjoy peaches or plums. Bananas are also great. Blackberries growing on the side of the road in the Pacific Northwest are also amazing. Can’t get fresher than that!
  • Gels or Gu: I find sport gels to be most useful when I need a punch of energy, like right before a big climb. I like the ones with caffeine. Be careful, though, because sometimes these can make your stomach upset and you may need a bathroom; try them before you go.
  • Granola Bars: In a pinch, we’ll eat those little Quaker granola bars, but these aren’t my favorite. They’re small, and there’s not much to them. I feel like I have to eat 2 or 3 to make a dent in my hunger. An alternative are locally made bars or the Nature’s Own two packs.
  • Energy Bars: For example, Cliff or Power Bar, or other varieties. My favorite are probably Cliff or Luna bars. While some of them taste like cardboard (Power Bars), the Cliff Bars are rather tasty and pack a good amount of calories. I prefer candy bars, but just because I have such a sweet tooth.
  • Sweets: A fellow tourist from the UK called candy in general “sweets” and it stuck with me. On my last tour I kept craving sour gummies. Hard candies work, basically anything with some sugar, too. Just a little bit of sugar, which gets converted straight to energy.
  • Candy Bars: My favorite go-to snack is Snickers. The combination of peanuts and chocolate, along with the sugar of the caramel is pretty much the perfect cycle touring energy bar. I also like to switch it up with other candy bars, but most often return to Snickers. I’ve found Payday bars are also good, with all the peanuts.

Touring is different than everyday living. You have to keep your energy up so you can expend it. This doesn’t mean you can or should just eat anything and everything you want. But it’s important to maintain a certain level so you don’t have an energy crash (or a literal crash, either). So snack, and snack often.

What are your favorite snacks? Share with us in the comments below!

Lightweight Packing List for Bicycle Touring Couples

Before we left on our 2,500 miles ride along the Southern Tier I knew that I wanted to pack as light as possible. Thanks to the recent ultralight craze in backpacking there is a ton of gear available now for the tourist looking to lower the weight on their bicycle. We managed to get to 40lbs total for the two of us.

I consider it a huge victory that for two people going on a self supported tour we were able to get our weight down so far, and the 40lbs includes the weight of the panniers! When divided up my wife carried roughly 17 pounds of gear and I carried the remaining 23 pounds. We also were able to tour with only rear panniers, which allowed for removing my front rack saving another 3 pounds.

If you are looking to see the bare minimum that you need to get you and a partner along the Southern Tier with temperatures ranging from 15-102F in the late fall months this is the list. The only item that I know we could save more weight on is Pam’s sleeping bag, if we trade her bag for a bag similar to mine we will be at about 38 pounds of gear. Not sure how much more ultra-light you can go before losing your self sufficiency.

I hoped this helped you get some ideas for going lightweight on your next tour. Do you see anywhere we can improve, cut a few more grams from? Feel free to comment below!

High Visibility Clothing: To wear or not to wear?

High visibility clothing, commonly referred to as “high-vis,” is a matter of contention among bicyclists worldwide. You can be pretty much be assured that every bicyclist has an opinion about whether or not to wear high-vis. Even government is getting involved. At the beginning of this year, officials in New Zealand considered making it mandatory for all bicyclists to wear high-vis. Take some time to consider your visibility before you embark on that cycle tour.

So what is the big deal? Many bicyclists feel that high visibility clothing is uncomfortable, unfashionable, and doesn’t actually help the bicyclist be seen. There also is the feeling that it is not their responsibility to stand out. Unfortunately none of the above matter when someone does not see you and you are hit/injured.

Modern high-vis comes in many shapes and sizes. Matt and I like to wear high-vis vests over our normal cycling clothing that we are wearing at the time. The vests don’t hinder our movement, have vents & mesh to keep us from overheating, and give us peace of mind that we are going to be seen. We even get compliments from drivers about how visible we are.

As far as fashion goes, we feel that this is a non-issue. We cycle not to look good, but for enjoyment and fitness and the ability to enjoy the outdoors. Most importantly we cycle to enjoy being alive. Wearing high-vis helps keep us visible to drivers, thus letting us live longer. These days there are many more fashionable versions of high-vis clothing and jerseys available to keep you visible while still fitting your fashion sense. However if you are looking for something cheap, not much will beat the construction vest.

Many studies have been done on this subject of visibility, mostly on the related subject of motorcyclists, and they come to varying conclusions. The consensus seems to be that contrast is the major factor in being able to see an object. Most cycle/auto interactions occur during rush hours and dawn/dusk/night, times when the number of cars is high and visibility is low. High-visibility clothing can help with that contrast. Good lights also increase your visibility. We’ve tried many different lights, but the most recent that we love are the Dionette LED taillights. There are many brands and styles on the market. Do your homework before you make a purchase.

Of course, just being visible doesn’t mean you can’t be hyper vigilant and aware of the cars around you. After all, they are protected by a metal box, and you have nothing. Don’t take anything for granted, and pay attention to what’s going on around you at all times.

Think about it. Why not do everything in your power to make sure you are as safe as you can be? If this means wearing a high visibility vest, it is such small thing to do, and it may save your life. We’d rather be out there enjoying our bicycles than be injured or worse.

How to Dress for a Bicycle Tour

What should you wear on your tour? I know that when I started thinking about touring, this was a big concern. I didn’t know how much or what kind of clothing to pack. After experimenting a little bit, here’s what I’ve found that works for me.

Shorts. If you’re new to bicycling, you’ve most likely noticed that cyclists generally wear close-fitting, spandex, padded shorts. Why is this? Well, I’ve got one word for you: chafing. When I started riding, I was too embarrassed to wear cycling shorts, and I wound up with painful, raw patches of skin. It was terrible! So, I bit the bullet and bought a pair of women’s specific bicycling shorts and let me tell you! No more rubbing. And the padded butt, well, let’s just say that it made a huge difference. If you’re planning on riding for many hours a day, many days in a row (aka, a bicycle tour) you’ll need to be comfortable and you need to take care of your skin. Bicycling shorts (and pants) are essential for long distance comfort and after several days on the road you don’t care what anyone thinks about how you look. (Also think about getting a chamois cream or stick to help minimize friction. We recommend Bodyglide Original Anti-Chafe Balm.)

Shirts. If you go into a shop that sells bicycling clothing, you’ll see many different types of jerseys. The two most popular material choices are polyester/lycra blends and wool. In my experience, wool jerseys are the way to go. I’ll tell you why: smell. Polyester (like most man-made fibers) tends absorb and retain your body odor after just a short time. Even after washing it has a funky smell*. On the other hand, you can wear a wool jersey for a few days before it starts to hold onto body odor. It dries quickly, is super durable, and feels great on. I like to take two short-sleeved jerseys and one long-sleeved.

Armwarmers and Legwarmers. One of the amazing things about being on a bicycle all day is the immense range of temperatures you cycle into. It can be literally freezing in the morning when you wake up and sweltering by noon. I prefer shorts to leggings and wear leg warmers in the morning, and remove the leg warmers as it gets warmer. Same with arm warmers. Another advantage of layering up is the fact that your body will warm up as you exert yourself. If you start out with a big climb first thing in the morning, chances are you’ll be wanting to shed a few layers before you reach the top.

Rain gear. Unless you are cycling through Death Valley, you will probably get rained on at some point during your tour. This is a cause of great concern to new cyclists, but very quickly you realize that it is not a big deal. While good waterproof gear will help keep you dry on the outside, even the most expensive gear won’t keep you from sweating on the inside. Realistically the main purpose of rain gear is to keep you from getting too cold and to block the wind. If you are riding through warm rain, it oftentimes is easiest to just ride in it and enjoy it; you will dry off shortly after it passes. Windproof/waterproof gloves are a must if you are riding in cooler temps. Also, a good rain jacket will be one of your most valuable tools. It should have many zippers for venting and if it is truly made for cycling will have a long tail to keep your back dry as you lean over pedaling. Most importantly it will block the wind which does wonders for making cycling more bearable.

Camp” clothes. After a long day on the bike, there’s nothing better than showering and changing into regular clothing. We typically bring one extra set of clothing with us on tour. This includes a pair of long pants and a long sleeve merino wool shirt. I also bring at least 2 pairs (one to wash, one to wear) of travel underwear (like Exofficio), and one normal bra (I bring two sports bras for riding). For cool evenings we like to bring lightweight down vests that double as a pillow cover for Matt, and use our rain jackets as windbreakers around camp. Other must haves include a beanie and a lightweight pair of shoes, in case we want to go for a walk in the evening or explore town on a rest day.

Clothing on a bicycle tour is about balancing comfort and weight. Using clothing that has multiple uses will cut down on the weight of the clothing that you have to carry.  Careful planning will see you out there as comfortable as possible, ready for any weather situation.

One last hint: Got some funky smelling clothing? Try Nathan Penguin Sport wash. A small capful and your clothes come out clean and smelling fresher than other detergents.

Wondering what a packing list for a bicycle tour might look like? Check out this post with a rundown from our latest tour.

Disclaimer:

All opinions about any products mentioned in this article are my own. I have not been compensated in any way by anyone. I will, however, receive a small commission if you choose to purchase the item from Amazon after clicking the link I provide. Use your own discretion.


How to avoid dog bites

You’re out there on the bike, enjoying the freedom of the road, when you see it. The movement catches your eye and you hear the growl, or even a bark.  You know it’s coming.  Like a bullet the dog begins chasing after you and your tires. Gotta get it. Gotta get it! Kill the bike! What do you do?

There are many different strategies to dealing with dog chases. Ask any bicycle tourist and they’ll each give you a different idea for the best way to defend yourself. We’ve tried a few different ways but there may be others, and you have to find the way that’s right for you. I call my strategies the 4 S’s.

Speed.  The simplest way to deal with a chasing dog is to out-ride it if you can. Dogs can be fast, but if you have a head start you may be able to stay ahead of them. Most dogs have a clearly defined territory and they’ll stop chasing once you cross their invisible boundary. Of course, if you’re climbing a steep hill or are already maxed out on speed, this won’t help you. Also, sometimes the dogs can get a head start or will be quite fast, and you can’t outrun them.

Shout. One of my favorite ways to deal with a dog chase is to simply shout “No! Stay! Bad Dog!” I am always surprised at how effective this method is. It works probably 50% of the time. The key is to wait until the dog is close to you before you shout in a clear, loud voice. Keep the words short. The majority of dogs seem to chase bicycles because they have no idea what the bicycle is. They don’t realize that humans are on the bike, but once you shout at them it snaps them out of the chase mentality and they stop, stunned. This could at least slow them down and you can out-ride them.

Stop. If shouting doesn’t work, and you can’t out-ride them, the next thing to try is the stop. That’s right, stop your bike. Put your foot down. Now you look like a human and the dog will probably stop and stare at you. I have found this method to work 100% of the time and I’ve heard the same from many other cyclists. While it can be a scary thought, particularly if you are already afraid of dogs, once the dog sees that you are no longer something to chase they get disinterested quite quickly. Also, if you feel threatened, once you’re stopped, you can place your bicycle between you and the dog, which will probably make you feel safer. The biggest downside to this method is that it slows you down and takes time out of your day. One other problem is that the dog may resume chasing you the second you decide to proceed down the road again.

Spray. Finally if the dog is still threatening you, get your pepper spray ready. Pepper spray should be used as a last resort. The best kind is the stream kind, since the spray variety puts out a fine mist and has a tendency to get blown back to the sprayer if there’s a slight wind, and the only thing worse than getting bitten by an angry dog is to get bitten by an extremely angry dog after you’ve just pepper-sprayed yourself. So, use the pepper spray sparingly, only as a last resort, and while the dog is confused, get back on the bike and get yourself out of there. Also be aware that the dogs owners may be less than thrilled that you just sprayed their pet. If you are looking for a pepper spray recommendation we use Fox Labs because of its high potency and stream spray. Be careful if crossing international borders, pepper sprays may be considered a weapon.

Unfortunately, dog chases are all too common while bicycle touring. Many dog chases are of the “hey, what are you?” variety, and those dogs can be easily outrun or are not a threat. A very small percentage of dog chases are actually angry dogs that want to harm the bicyclist. But, either way, when a dog comes running toward you, it can be scary. Keep your head, stay calm, don’t forget about other road traffic, and you will do fine. Don’t let your fear of dogs keep you from enjoying your ride.