How to Change a Flat Bike Tire in 12 Easy Steps (With Pictures!)

  1. Realize your tire is flat and stop your bicycle. Look for a safe place off the side of the road to change the tire. You don’t want to be doing this on a blind curve.
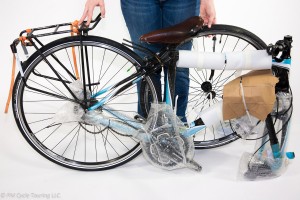
  2. Take off all your panniers and water bottles, otherwise your bicycle will be too heavy to flip and/or you will have things falling off your bicycle.
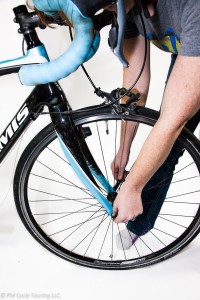
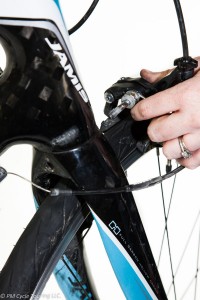
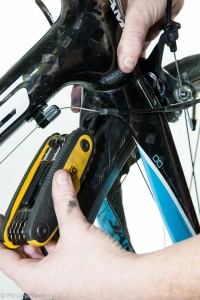
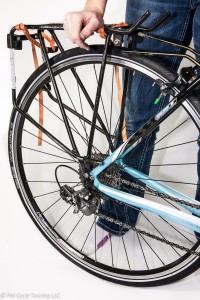
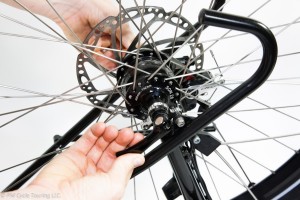
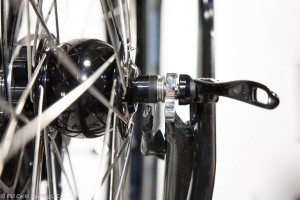
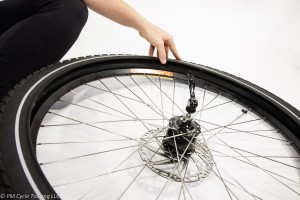
  3. Turn your bicycle upside down, and remove the wheel from the bicycle.Removing the wheel from the bike by unscrewing the quick release skewersClose up of the fork, make sure you unscrew the skewers enough to clear the fork.Removing the wheel from the bicycle.
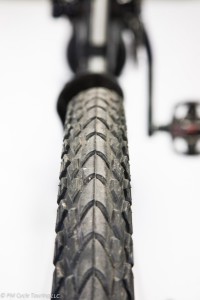
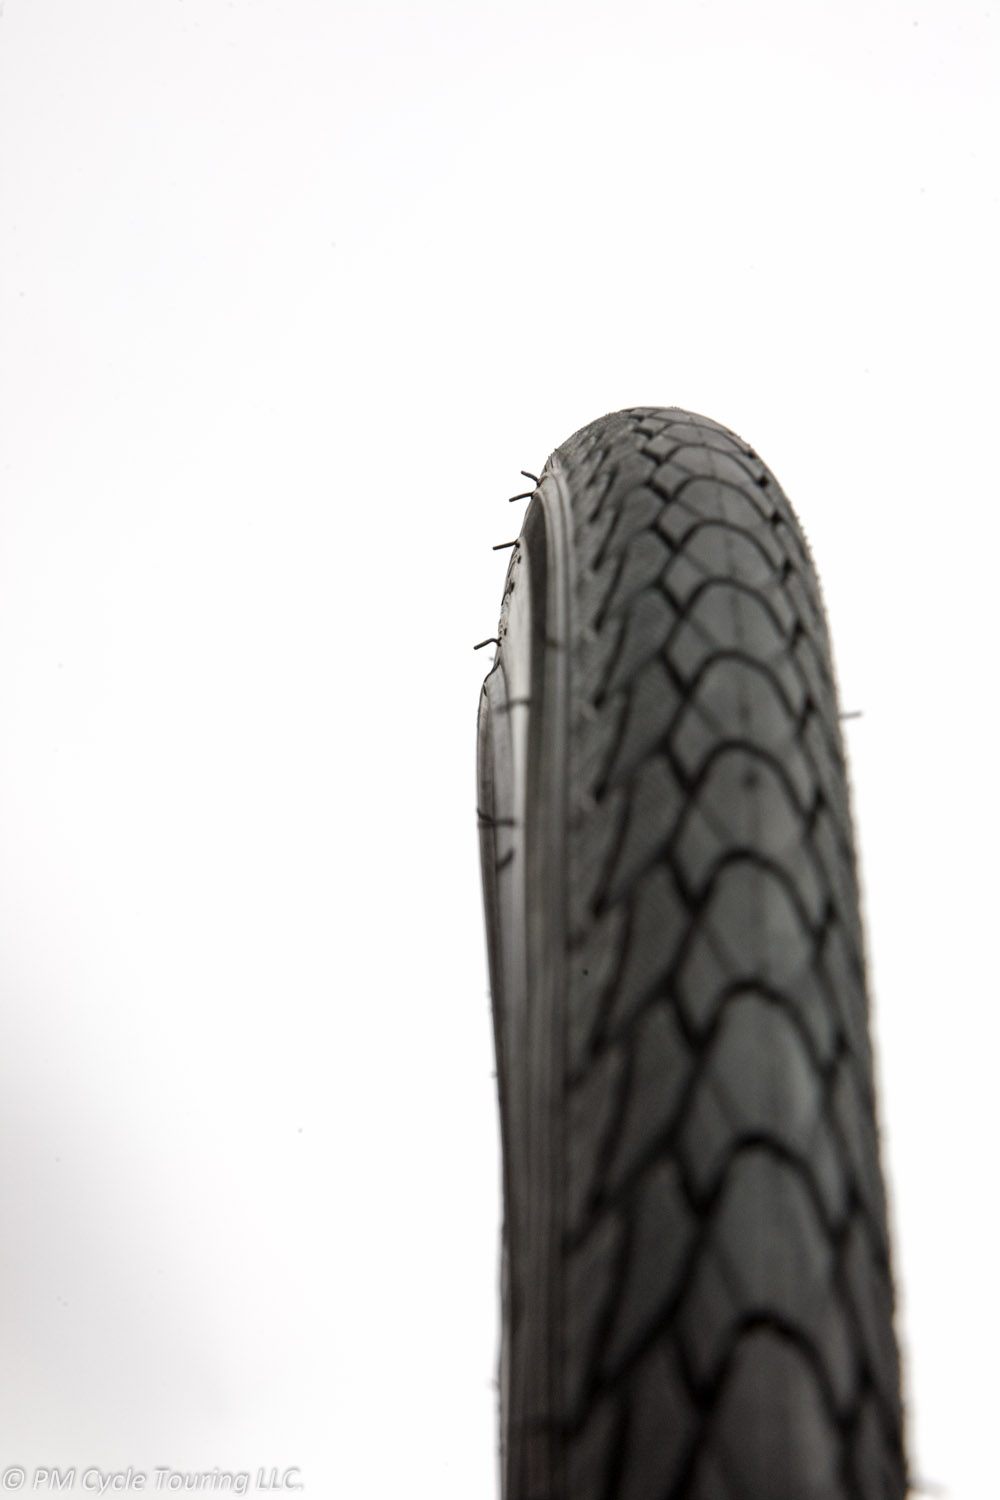
  4. Visually inspect the tire. You may find the culprit. If you do find something, don’t assume that’s the only one. There could be more than one hole in the tube.Close up picture of the tread on a tire
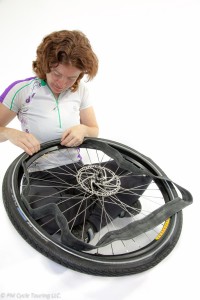
  5. Release any air left in the tube.
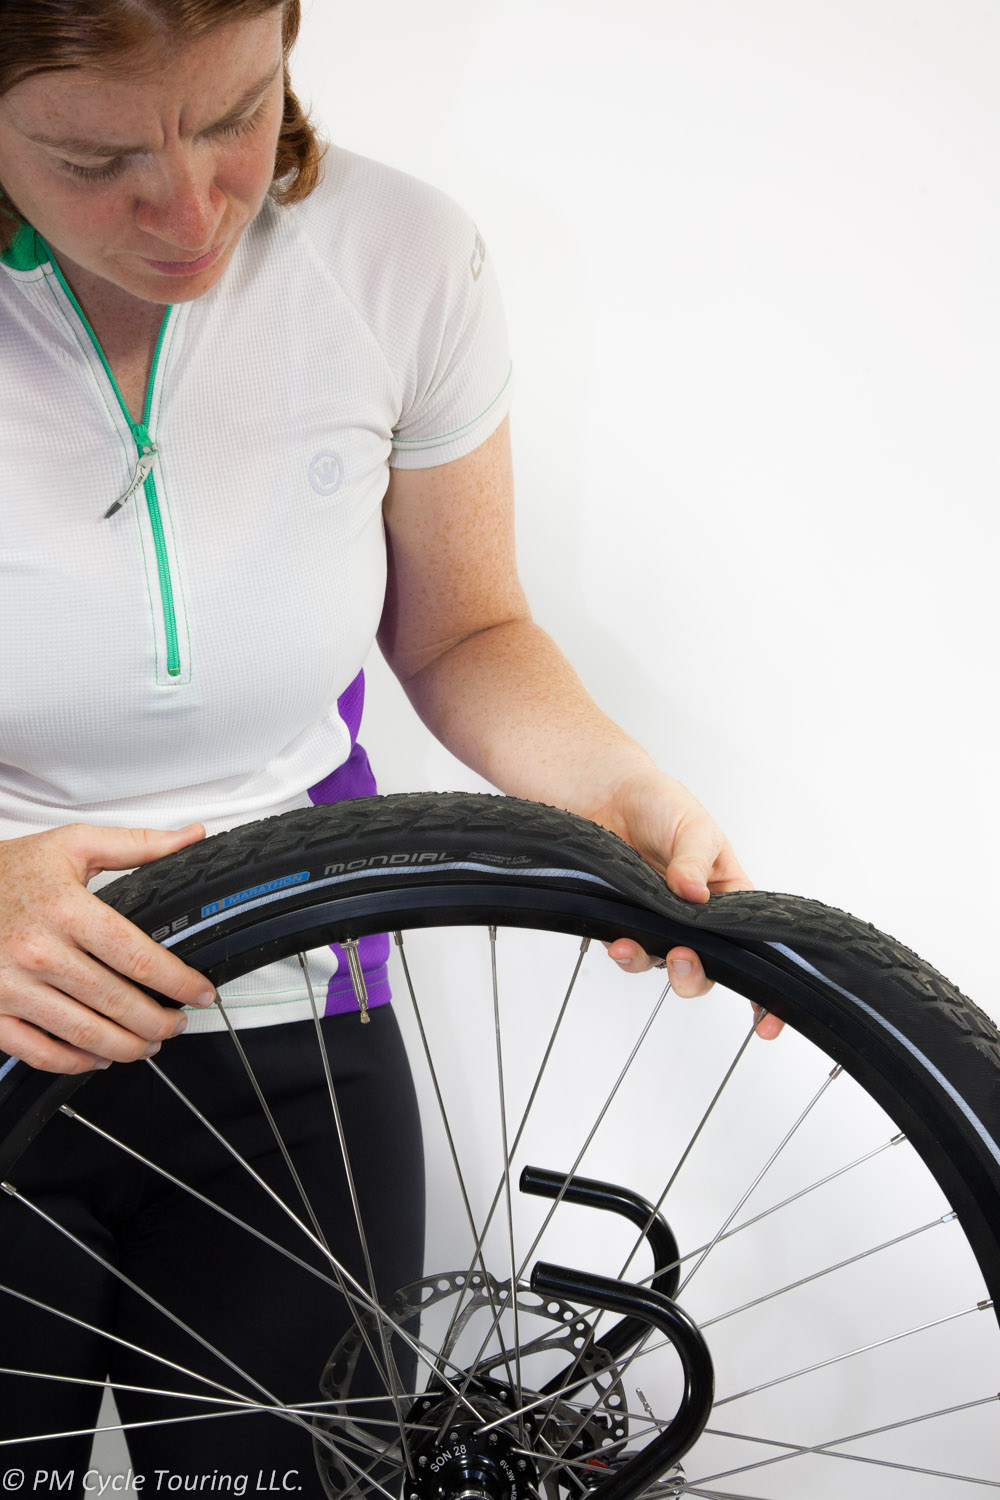
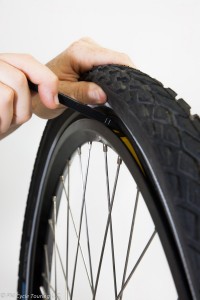
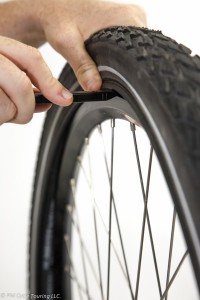
  6. Using tire levers, lift up one side of the tire to remove it from the rim, all the way around.Prying the tire over the rim by inserting a tire lever.Prying the tire over the rim by inserting a tire lever, then use the hook end to attach to spoke, freeing up your hands for a second tire lever.
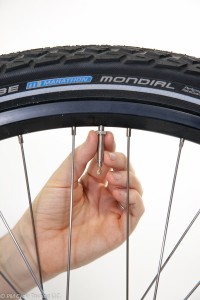
  7. If present, unscrew the nut on the valve so it can be removed from the wheel.Pam unscrewing the lock nut from the presta valve, some valves may not have this.
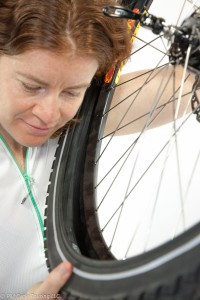
    • If you have not located a leak: Keeping the tube inside the tire, inflate using pump.Bicycle wheel on the ground with one side of the tire reomove from the wheel Holding your ear close to the tube, while still inside the tire, you may be able to locate the leak which may be either heard as a hiss, or felt as the air escapes.Pam listening for a hard to find leak.
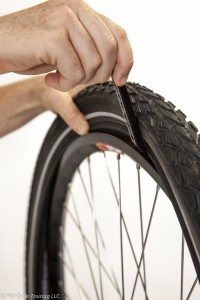
  8. With the leak located, patch the tube. Follow the directions on your patch kit. We prefer the patches that are peel and stick, they work just as well as glue and are easier to apply and get pedaling.
  9. Decide if you are going to replace the tube or reuse the just patched one. Put one side of the tire back onto the wheel, and lay the tube inside. Make sure the tube is not twisted. I like to inflate it just slightly here.Pam replacing the tube with a new tube.
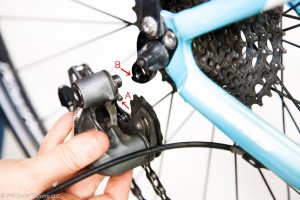
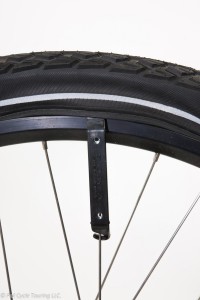
  10. Using tire levers, or your hands, reseat the tire onto the wheel. Using a tire level to seat the tire back on the rim.Using a tire level to seat the tire back on the rim.
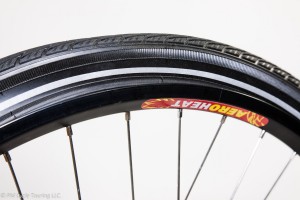
Make sure the tube is not pinched between the tire and the wheel, and that the bead of the tire is seated properly in the hook of the rim.Straight on view of a tire, notice the hook (the bump on the inner edge of the tire which will engage with the rim to keep the tire on the wheel)
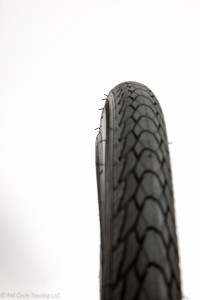
  11. Re-inflate the tube halfway watching for any signs of the wheel slipping off the wheel. While inflating watch carefully for the tire bulging or not seating. In this picture the hook of the tire did not catch the rim and if you keep inflating the tube will like burst.Make sure the tire is seated on the wheel all the way around. Bounce the tire on the ground a few times to settle the tire on the seat and the tube inside the tire.Inflating a tire with a stand up bicycle pump.
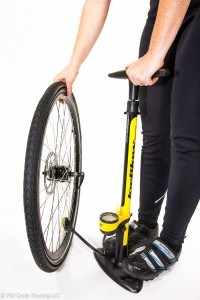
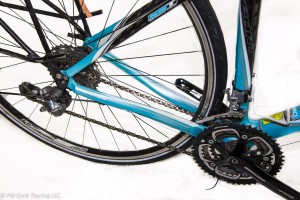
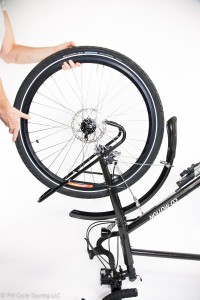
  12. Inflate the rest of the way and replace the wheel on the bike. Turn the bicycle upright, replace all panniers and water bottles, make sure your light is on, and congratulate yourself on a job well done.

On a related note, what if the flat tire is caused by damage to the tire itself? For example, the tire has been damaged and is now rubbing the tube, causing constant flats. One great remedy is using a dollar bill. Place the bill inside the tire, next to the tube. This creates a barrier and protects the tube until a more permanent solution can be found. Another thing that could help is rotating the tires. If the damaged tire is the rear, which is carrying most of the weight, you may want to rotate the tire to the front where it will be subject to less stress than the rear. That might save you from having to change it a few times, at least.

Do you have any tips or tricks you want to share? Feel free to leave a comment below!

How to build (and not destroy) your relationship on tour

Day 36 of our Pacific Coast bicycle tour started off on the wrong foot. The previous day’s mileage had been cut short due to allergies, and we both went to bed cranky. The biting flies didn’t help put us in a better mood, either. While packing up the next morning, I could not for the life of me find my leg warmers. I just knew Matt had put them somewhere, and now they were lost. It was a cool, Pacific coast morning, and I didn’t want to ride with just my shorts. I had had it. This bicycle touring had quite suddenly become not fun. We were getting on each other’s nerves, and it was starting to show.

So, how do you maintain a good relationship while spending every waking minute (and all the sleeping ones) with another person?

It’s not all rainbows and sunshine. First off, you have to realize that it’s bound to be rocky sometimes. Even the best couples go through rough patches sometimes. Everyone only has so many nerves, and it’s easy to let little irritations become big ones.

Cut the other person some slack. Are you tired and sore from the previous day’s ride? Well, he probably is, too. Was your sleep interrupted by some rowdy campers? Guess what. He’s right there with you. Are you cranky because you had trouble breathing through your stuffy nose? News flash. He had to hear you snore all night. A little patience can go a long way.

Give yourselves some space. Sometimes, you just need to be alone. That’s perfectly normal, and will probably save you both some sanity. Just make sure to communicate what your plan is, so he doesn’t think you’re purposefully avoiding him. You’re riding together, eating together, sleeping together. Sometimes, too much together can be too much.

Enjoy the little moments. When it starts to feel like work, slow it down. Find an awesome spot to sit and enjoy the view for a minute. Breathe the fresh air. Give each other a hug. Remember your reason for embarking on this epic journey together.

It’s going to be tough sometimes. But it’s also going to be amazing. You’ll grow closer than you ever thought possible. Besides. Think of the stories you’ll be able to tell your grandkids. Oh, and day 36? It ended on such a high note, at a campsite with a beautiful patch of grass and a view of the Pacific Ocean. I couldn’t wait for the next day’s ride.

First Look: AXA Defender Frame Lock

If you are unfamiliar with frame locks you can read my previous post. The AXA Defender weighs in at 670 grams and is available in several colors. Before purchasing an AXA Defender frame lock there are a few things to consider: Understanding the limitations of a frame lock, where the lock will be mounted, how it will be attached, and how the key performs.

Limitations: A frame lock alone will not prevent someone from picking up and walking away with your bike or throwing it in a pickup truck. However higher end frame locks like the AXA Defender have a special plug-in for a cable or chain when it is desirable to attach the bike to prevent it from being carried away. Lastly it is important to realize that any lock can be defeated by a determine thief, you have to balance security/weight/hassle with any locking mechanism.

Location: The ideal location for the AXA frame lock is inside the rear triangle of the bicycle. In this location even if the lock mounts are cut and the wheel is attempted to be removed the shape of the lock will prevent the rear wheel from being taken. This is a particular benefit if you are using an internal gear hub, like the expensive Rohloff Speedhub, and want some protection to prevent it from being stolen.

Attachment:Mounting the lock is the trickiest part and should be considered carefully before purchasing. First you should know the size of the AXA Defender and ensure that it will fit including fender and tire clearance. To assist with this I have provided picture of the lock on ¼” graph paper and included measurements as practical.

Secondly, you need to determine how to attach the lock; most North American bicycles do not have mounting points for a frame lock. There are two methods that I am aware of for attaching the lock. First is using a set of straps that act like a hose clamp around the seat stays of the rear triangle. The second method is a top bolt option which has two long bolts and a clamp attachment, this is pictured below.

AXA Defender RL top bolt mount on 1/4 inch graph paper

Key: The AXA Defender will retain the key in the lock until the lock is locked. This is a double edged sword. The up side is that you always have the key in the lock ready to go until it is locked, then you can remove the key. The hypothetical down side is that if you leave you bike unlocked, the key will remain in the lock, allowing a cruel individual to lock the lock and take the key. Leaving you with a locked bike and no key. An easy solution to that problem is to always lock you bike, or take a spare key along with you.

Overall I am very excited to use this lock, while there is a weight penalty to carry it around I will always have a lock on my bike ready to be engaged. After some use and actual touring I will come back and provide a follow up review of this lock, but for now the AXA Defender seems to meet all the criteria I could ask for in a frame lock.

I actually had some much trouble finding the AXA Defender for sale in the USA that I bought some extra locks and have them for sale. Please e-mail me at Matt@PMCycleTouring.com if you are interested in buying from us as our online store is a work in progress. If you have any questions leave a comment below!

Choosing the Right Lock for your Touring Bicycle

Because Pam and I tour as a couple we always have one person to watch the bicycles while the other runs to the store or bathroom. However, if you want to leave your campsite and hike, or take a day trip somewhere else, a lock can do wonders to ease your mind. Last tour we brought a tiny portable lock on tour with us, which a pair of scissors probably could have cut through. We basically would just lock our bikes together to keep honest people honest. However, there were a few times I wished that I had brought a more substantial lock.

After some research I decided that a frame lock (which attaches to the rear triangle of the bike and stops the rear wheel from moving) is the ideal touring lock. While a frame lock alone is not going to prevent someone from picking up your bike, the fact that it is fully loaded and said person would have to carry 50+ pounds where ever they wanted to take the bike might be enough of a deterrent.

Another benefit of a frame lock is how easy it is to engage the lock, you simply partially twist the key while pushing down on the lock lever and the bike will not roll away. If a bit more security is needed a plug in chain or any cable with loops can be attached to a fixed object. But there isn’t any fiddling with getting a lock out of your bags and finding an appropriate place to attached it. The lock is always on your bike ready to go.

Additionally when the lock is engaged your rear wheel won’t turn. Since neither of us have kickstands, engaging the lock means we can lean the bike against anything we want and it will stay upright and not roll away.

If someone really wants to steal my bicycle they will; no lock can stop that. But this will give me peace of mind that someone can’t just ride away with my life, and it is so easy to use that it is unlikely for me to not lock the bike. It may even allow my wife and me to spend more time together (in case being on a tour wasn’t enough time together anyways).

Paying it Back (and Forward)

Recently we found ourselves with some spare time after a trip to Monterey, California. Instead of taking the most direct route back home Pam and I decided to take the scenic Highway 1 down the coast. This put us on the prime bicycle touring route in the beginning of June. We thought it would be neat if we grabbed some snacks and drinks for any cycle tourists we encountered on our way home to Los Angeles.

We started off from Monterey and saw no one for miles and miles. In fact, we were beginning to believe that there were not going to be any bicycle tourist on our entire route. But finally we happened upon Jean from Quebec, Canada. We offered him water or snacks to which he politely refused (I never thought a bicycle tourist would refuse free food). However he did share some of his story, and as Pam put it: “He was full of happiness.” Jean and a partner have been going for 30 days straight with no rest days, yet Jean still had a smile on his face and was a blast to chat with.

After Jean we ran in to one more tourist who wasn’t interested in talking to us and a few tourists going northbound which we couldn’t stop to say hi to. We kept on driving down the coast and made it to Lompoc. From our own Pacific touring we knew that from Lompoc to the coast is a challenging ride. About ¾ of the way to the coast we saw a lone tourist battling a headwind and an uphill. We stopped to offer him some water and snacks. Dave graciously accepted and chatted with us.

Dave was also from Canada, but more from the Western side, and was 29 days into his tour, also with no rest days. We were certainly impressed; he was flying down the coast, and seemed to be a having a great time of it. We chatted on the side of the road for a bit and shared a little information on what was coming and where to stay.

Then Dave mentioned that we made his day by stopping and offering him some food and water. That in turn made our day. We had set out hoping to give a few people cheer along the way and had succeeded. Being tourists ourselves we know how much these random acts of kindness mean when you’re touring, and now we were able to pass that on to others.

What did it cost us other than a few moments of time, a bottle of Gatorade, and a few granola bars? Almost nothing, and we made a few people have a better day because of it. So as a thanks to everyone who has supported us on a tour, today we tried to pay it back, or pay it forward for the next adventure we embark upon. Either way, it was a terrific experience.

Powering Your Tour

Now that you’ve decided to go on this crazy thing called a tour and have purchased all the cool gadgets to make your tour awesome, you’re worried that you will be stranded with a low cell phone battery in the middle of nowhere. I’ll admit, I was afraid of this same thing. Ok, maybe not afraid so much as concerned; after all, one of the best things about touring is the ability to unplug and get away from the noise and distraction of the digital world. However there are some amazingly cool apps and doo-dads that require power and can make your tour better and easier. For those of us unable to completely unplug, here are some ideas to help you keep your electronics powered while you’re on tour:

Solar Power.

One thing we found worked for us on the Southern Tier (where it was sunshine and blue skies most of the trip) was a Bushnell Solar Wrap which we kept exposed during our days’ rides, and charged up an internal battery which could then be used to charge any USB device. Additionally the internal battery could be charged from a USB wall charger allowing us to top it off at night or after cloudy days.

The downsides are that it takes ten hours of direct sun to charge fully and doesn’t work in inclement weather. Both of those can be challenges when you are riding a bicycle. The solar charging equipment seems to be a tough product to engineer well, with many solar charging have a large number of negative reviews. This probably shouldn’t be your only method of charging at this time.

Battery backup.

We use a Jackery Bar which is a small battery with a USB port that our devices could be plugged into. Our initial intention was to use this as a backup. We would charge the bar up using any outlet we came across, and use it to give our phones and cameras a boost. This ended up being our favorite option: it charged quickly and lets you use your device where ever you want.

Also in risky situations you can leave the battery bar charging unattended instead of your expensive devices. Our favorite part of this solution is that it freed us from having to sit near an outlet while charging the phone, simply plug the phone into the Jackery Bar and you can now use your phone anywhere. No more hanging out in those lovely state park bathrooms while trying to get a charge.

On the grid.

Any time you’re stopped in a place with a wall outlet, take advantage of it if possible. Plug in your devices when you can. Some common charging spot include hotels, the bathrooms at the campground, or even the local library. Make sure that you ask the owners/operators before charging, however most people are very understanding and willing to help you out.

Conservation.

One of the easiest ways to reduce your charging requirements is to conserve battery power. Turnoff your devices when you don’t need them, put your phone in airplane mode when you’re not using it. I’ve found airplane mode works better than powering it completely down and then back up, which seems to take more juice. Also this allows you to have the phone available and ready to use versus waiting for it to startup. Most smartphones have a widget which can turn airplane mode on and off with one click.

Remember, bicycle touring is all about solving those little problems as they come up. And, don’t forget, it’s not the end of the world if you can’t check your Facebook that night. But with a little pre-planning, you can be as plugged in (or as unplugged) as you want to be on your bicycle tour.


Don’t feed the wildlife

Two weeks into our first bicycle tour, we set up our camp the same way we had the previous 13 nights. We put all of our panniers tied together hanging from a tree limb. Moments after we crawled into our tent for the night, we heard a commotion outside. Matt investigated, only to find raccoons fighting over our panniers and the food inside. They were vicious! He had to fight them off, and with no better option, we brought the panniers into the tent with us for the night, terrified the raccoons would come clawing through our tent. There had to be a better way!

One of the joys of bicycle touring is getting back to nature. Bicycle tours can take you to remote places, where it’s just you and nature in all its glory. Unfortunately, wildlife encounters can turn an enjoyable tour into a nightmare. There’s a few things you can do before you set out that can make all the difference.

Bear can: We found this is the most convenient method of keeping the critters out of your food. Raccoons, rats, skunks, possums, and other nocturnal animals can be very persistent when it comes to going after food, and in some areas bears can be a huge problem. Keep in mind that smells from any food items will linger on your belongings and tempt the animals. Panniers are not animal resistant! A bear canister will prevent any animals from getting your food (and may even be required depending on where you’re going). You should keep everything that smells (toiletries included) in the bear proof container. On our latest tour we used the Bearikade (the Weekender size), and highly recommend it.

At night, place the bear can at least 100 yards from where you’re sleeping (if there’s bears) and make sure it’s in a safe place-that is, it won’t roll off a cliff or into a river or other natural hazard. The bear proof container won’t keep the critters from smelling the food, it will just make it impossible for them to get to it. They will invariably check it out, and maybe even claw at it for a moment; after some time they’ll probably get tired of it, and your breakfast will be safe for the morning.

We found it to be very convenient and easy to use the bear can. It kept our panniers from getting smelly or dirty, and the food was always easy to access. When we came it camp we could just leave our panniers on the bicycles and not have to worry about anything clawing at them. It made camping very simple and less stressful.

Bear box: Some campsites will have bear boxes to put your food in. Again, don’t limit what you put in it to food; put all toiletries into them as well. This means all sunscreen, lip balm, toothpaste, etc. If there is no bear box available, but there have been critter sightings, check to see if it would be ok to leave your panniers in the restroom. A lot of times the door will be enough of a deterrent to the smaller animals. Be careful in some bear areas, though, because they are smart enough to get in. Check with the ranger or camp host to find out the best thing to do with your food.

Smell proof bags: These can be a deterrent, however they should not be your only protection. Smell proof bags are a great place to put your snacks for the day in. This can help you reduce the smell of food in your panniers or handlebar bag. We used these bags on our latest tour and had no issues with animals.

Bring your food in your tent: This is one of the oldest trick in the books and many people swear by this method. Make sure that the food is only in your tent while you are in the tent with it, if you leave food unattended animals may claw through your tent. While we have done this in the past, I hesitate to do this now. It could teach animals that a tent means food and seems risky versus our positive experiences with our Bearikade.

Bottom line: be smart. Think about your food and what you’re going to do with it. Make it as difficult as possible for animals to get it. You’ll be glad you did and sleep better if you aren’t worrying about it.

Lightweight Packing List for Bicycle Touring Couples

Before we left on our 2,500 miles ride along the Southern Tier I knew that I wanted to pack as light as possible. Thanks to the recent ultralight craze in backpacking there is a ton of gear available now for the tourist looking to lower the weight on their bicycle. We managed to get to 40lbs total for the two of us.

I consider it a huge victory that for two people going on a self supported tour we were able to get our weight down so far, and the 40lbs includes the weight of the panniers! When divided up my wife carried roughly 17 pounds of gear and I carried the remaining 23 pounds. We also were able to tour with only rear panniers, which allowed for removing my front rack saving another 3 pounds.

If you are looking to see the bare minimum that you need to get you and a partner along the Southern Tier with temperatures ranging from 15-102F in the late fall months this is the list. The only item that I know we could save more weight on is Pam’s sleeping bag, if we trade her bag for a bag similar to mine we will be at about 38 pounds of gear. Not sure how much more ultra-light you can go before losing your self sufficiency.

I hoped this helped you get some ideas for going lightweight on your next tour. Do you see anywhere we can improve, cut a few more grams from? Feel free to comment below!

Unpacking and putting together a boxed touring bike

For our first tour we flew from Los Angeles to Seattle and had our bicycles boxed up. We had never really thought about how to put the bicycles back together once we got there. I suppose we just assumed it would be super easy. Thankfully our host had a bicycle stand and some tools to help us get them back together, but it was close to being an unpleasant experience. In response to that here is our guide to taking a bicycle from boxed to ready to ride.

Review this before you leave for your tour and reference if needed during your tour:

  1. Get your boxed bike and an open area to begin putting it together.
  2. After removing your bicycle assess how dis-assembled it is. If you had a shop pack it up some equipment may still be attached compared to our walk through, or it may be further dis-assembled.
    Bicycle after removal from box, still contains packing material.
  3. Remove any excess packing material
    Hand with scissors cutting zip tie holding packing material on the bicycle.
  4. Attaching the rear derailleur
    1. Shifting to the highest gear on the rear shifter should give you extra slack in the cable.
    2. The chain does not need to be on the f ront cogs, it may be easier with it off allowing free movement of the derailleur.
    3. There will be one large screw on the rear derailleur which screws into the frame. Additionally there will be a smaller screw which is perpendicular to the large screw (A in the picture). Make sure this screw ends up resting on the notch of the derailleur hanger (B in the picture). If you aren’t paying attention you may tighten the big screw and bend the smaller screw, so make sure you keep an eye on this while tightening the rear derailleur!
      Hand holding rear derailleur near bicycle frame before attaching it.
    4. Once the rear derailleur is attached you can position the chain properly on the front and back cogs.
      Rear triangle of the bicycle with rear derailleur attached and chain on.
  5. Positioning the stem
    1. Prior to packing your bike you should use a metallic sharpie to mark the angle / position of your stem/handlebars
    2. Rotate your fork so that it is facing the proper direction.
    3. We find it best to have the fork or front wheel on the ground while working with the stem/fork, if you loosen the wrong part the entire fork may fall out if the bike is on a rack or has the fork unsupported.
    4. If needed loosen the stem and position it so it is pointing in the proper direction, straight away from the bike. Tighten if needed so the stem is firmly attached to fork.
    5. Loosen the handlebar mount portion of the stem.
      Hands unscrewing the front part of the stem prior to attaching the handlebars.
    6. Insert the handlebars and align the marks you made before you left to get the handlebars centered and at the proper angle.
      Rear triangle of the bicycle with rear derailleur attached and chain on.
    7. Tighten all screws firmly.
  6. Attaching the front wheel
    1. If packed with a plastic spacer, simply remove the spacer. This may require applying gentle pressure to pull the fork a little apart.
      Front fork with plastic spacer to prevent bending during transit.
    2. Attach the front wheel as you normally would. You should be familiar with this because you will be needing to change flat tires while on the road.
      Installing the front wheel on to the fork.
  7. Attaching the front caliper brakes
    1. Locate the front brakes and the mounting hole in the front fork.
      Positioning the front brake calipers before attaching to the fork.
    2. Slide the bolt through the mounting hole and thread the tightening piece from the other side. Use an Allen wrench to tighten, snug but not over tight.
      Tightening the front brake calipers to the fork.
  8. Finishing Assembly
    1. Check all cables to ensure they are in the proper mounting holes. As needed re-guide or re-position cables to their appropriate positions.
    2. For the rear derailleur
      1. Ensure the cable routed properly along or through the frame from the handle bars to the derailleur.
      2. Thread the cable through the derailleur, but don’t tighten it just yet.
        Hand threading cable through rear derailleur on a bicycle
    3. Attach your racks to the appropriate mounting points and ensure all screws are tight, including screws that remained installed during transit. You are about to embark on a tour and you don’t want your bike falling apart because you failed to check a screw tight.
      Girl hold bicycle with rear rack attached to back.
    4. Using a pedal wrench attach the pedals. One pedal is threaded “normal” (tighten by turning clockwise) the other pedal is threaded “backwards” (turn counterclockwise to tighten).
      Pedal wrench attaching pedal to crank.


  9. Adjust the rear derailleur
    1. While this is a necessary part of putting your bike together we have included a separate guide. Look for a future post explaining how to do this!
  10.  Stand back and admire your completed bike. Now get out there and ride!
    2014-03-07 2038 PMCT-6

If you have any questions feel free to leave them in the comments, or if you noticed that I missed something tell me. I hope this helps people get a feel for taking a bicycle from boxed to ready to ride.

The Nature of Bicycle Touring

Bicycle touring can be many things. It can be a cross-country ride, or a cross-county ride.  It can involve packed-to-the-brim panniers stuffed with every possible convenience, or a support vehicle carrying your gear. It can be a slow easy ride, or a fast-paced adventure with long mileage days.

Distance. When you think of a bicycle tour, you may be picturing that one guy you heard about that has bicycled 45,000 miles around the world and you think “I could never do that!” Bicycle tours don’t have to cover such a great distance. A bicycle tour could be as straightforward as riding from your house to the next town, or as involved as riding from one side of the country to the other. The sky is literally the limit when it comes to distance covered on a tour.

Lodging. Many people camp while on tour. They carry a tent and all the necessary gear on their bike or in a trailer. Some people skip the gear and ride from hotel to hotel. This type of tour is nicknamed “credit-card touring” and typically costs a bit more than camping. Most tours end up being a hybrid of the two, with some nights camping, and others spent in hotels. Even some nights spent in a welcoming stranger’s house or yard.

Time. Bicycle tours last one day or many. Tours can be a sort of race, with the rider trying to see how far they can go in as little time as possible. Or you can leisurely enjoy the ride with no time constraints and stopping to explore everything along the way. I prefer the latter.

It doesn’t matter if you decide on a quick, long distance tour, or a slow, easy ride to the next town. What is important is to get out there. Decide where you want to go make it happen. You won’t be sorry!